|
Какой рейтинг вас больше интересует?
|
Каскадные Таблицы Стилей / CSS Shaders: 3D-эффекты для веба2011-10-14 02:38:22Компании Adobe, Apple и Opera совместно разработали спецификации CSS Shaders для генерации ... + развернуть текст сохранённая копия Тэги: css, effect, filter, html5, openlg, shaders, svg, webgl, шейдер Анимация и 3D графика / [Из песочницы] Проблема 3D частиц в After Effects2011-09-19 18:41:18При работе с моушен-дизайном нередко приходится сталкиваться с тем, что нужно создать большое ... + развернуть текст сохранённая копия Тэги: adobe, after, effect, дизайн, моушен, моушен-дизайн, частица Как сделать Flash Видео Презентацию2011-09-14 04:40:21Видеокурс ‘FLASH VIDEO ANIMATOR AFTER EFFECTS’, авторами которого являются Тим Ворон и ... + развернуть текст сохранённая копия Тэги: after, effect, flash, видео, графика, монтаж, монтаж, Create “Cool” Typography Using Paths in Photoshop2011-09-12 17:00:15In this tutorial we will demonstrate how to create some "cool" custom typography. Let’s get started!
Tutorial AssetsThe following images were used during the production of this tutorial.
Working with PathsWe will use the circle path and parts of it and stroke them with brush. Pick Ellipse Tool (U) and choose Path option on the properties panel. This way you will create circle path and not the shape. Hold Shift and create a perfect circle. 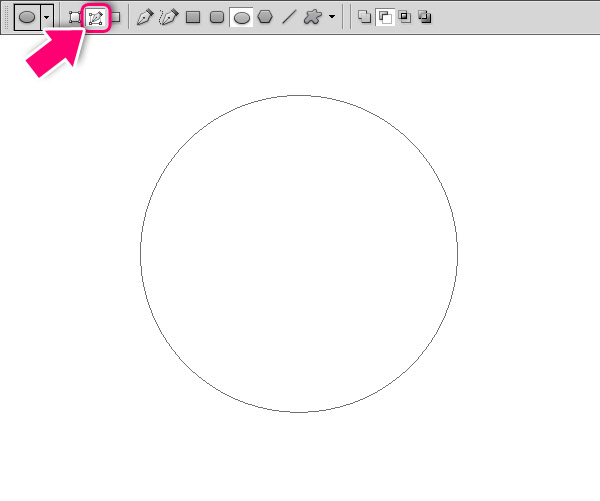 Pick the Brush tool (B). Use big, hard edges brush. Press F5 to get brush properties panel. Set Spacing to 10% and uncheck Shape Dynamics. 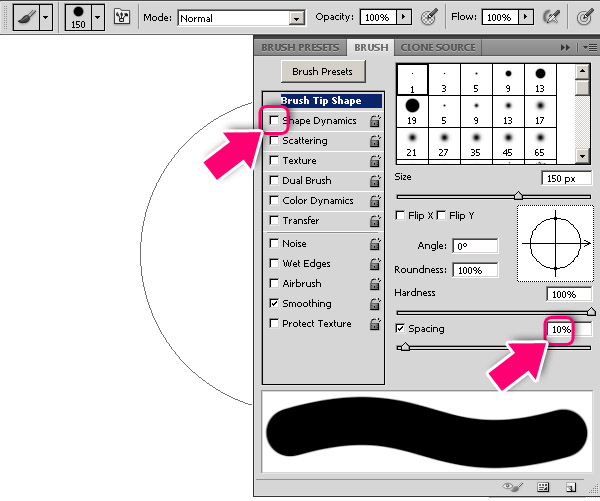 Create a new layer, and with Brush tool choosing press Alt + Enter. That will stroke the path with your brush properties. 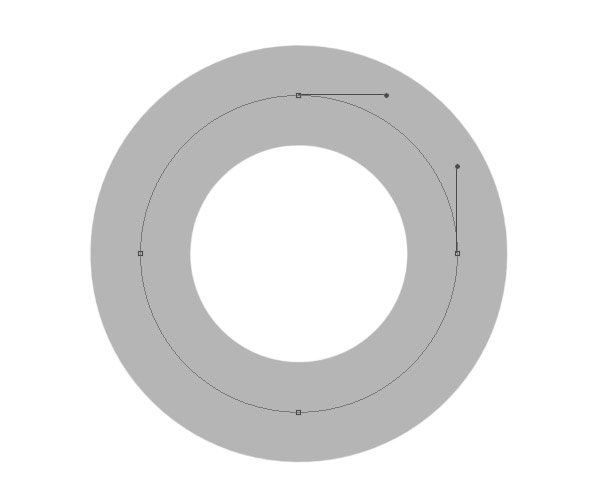 Pick the Direct Selection Tool (A). Note that no one of the anchor points are selected, click on the path between the two anchor points and click delete. Create a new layer, pick the Brush Tool (B), pick darker color and press Alt + Enter to stroke the path you just created. 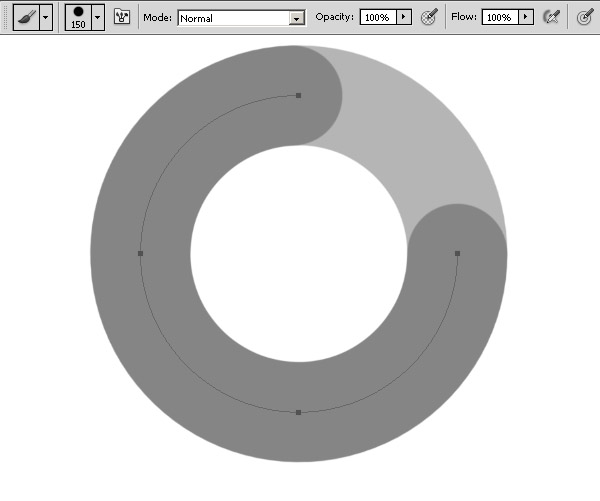 Pick the Pen Tool (P) and add anchor points on the path as shown below. 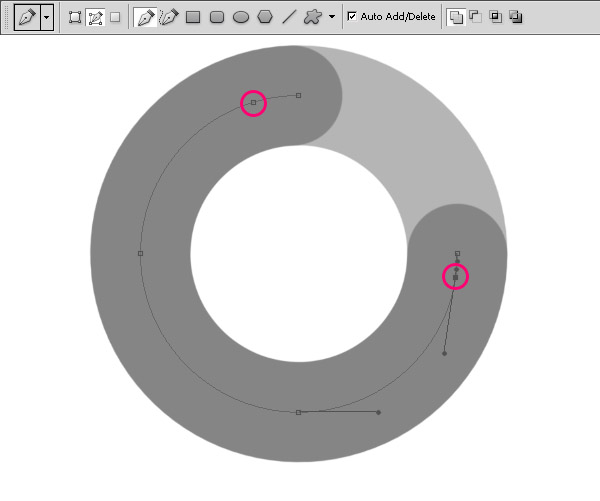 With Direct Selection Tool (A) select and delete the extreme anchor points of the path. 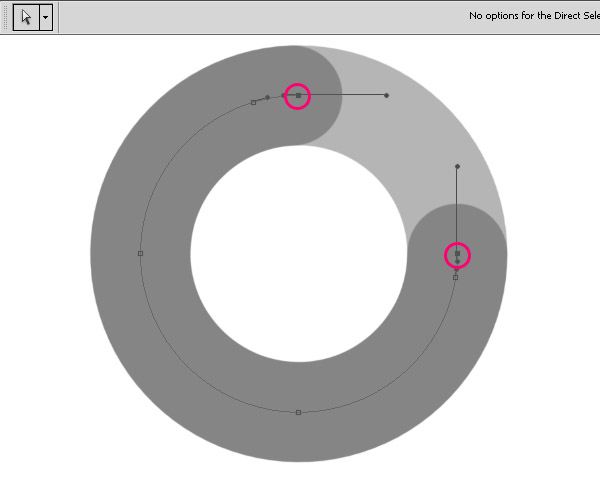 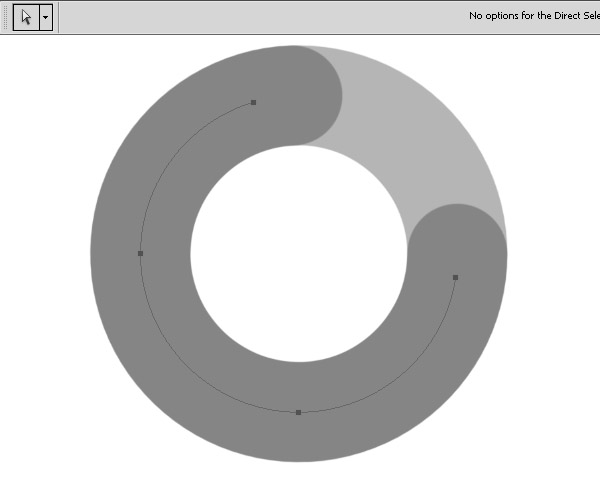 Pick the Brush Tool (B), pick darker color, create new layer and press Alt + Enter to stroke the path. 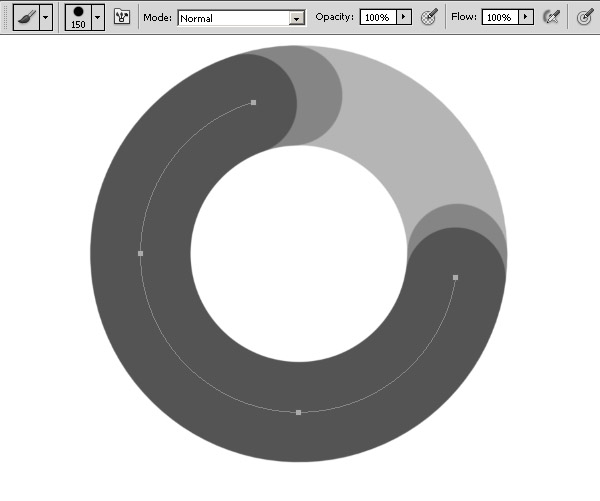 As you see we just cut parts of the original circle path by deleting anchor points. That lets us to make nice clean shapes and create interesting effect. This is the base technique of the tutorial. Make sure to always create a new shape on new layer. Another note: after you delete one anchor point, all other points will be automatically selected, so for choose another single anchor point you should click ones outside of path to unselect all points, and when select one point with Direct Selection Tool (A). 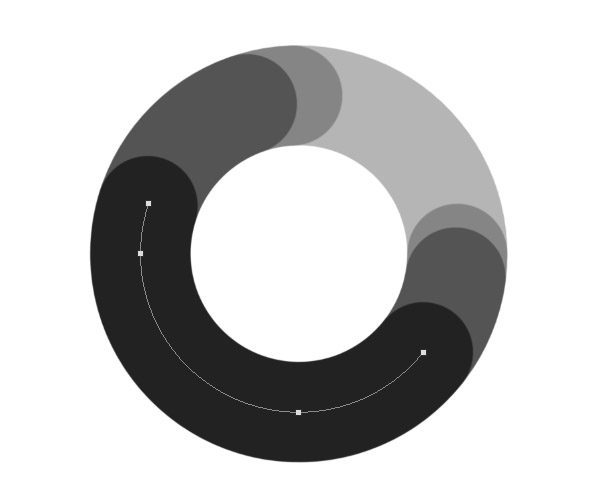 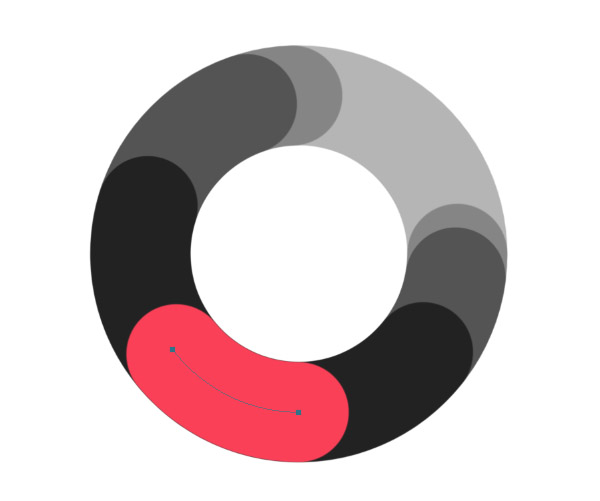 Step 1Create a new document 1600 pixels wide and 1200 pixels high at a resolution of 72 dpi. Fill the “Background” layer with black with dark violet gradient #392354 – #593b70. 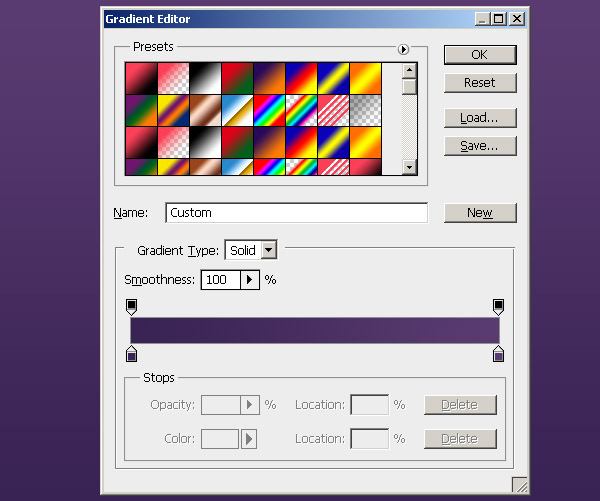 Pick the Ellipse Tool (U) and choose Path option on the properties panel. Hold Shift and create a circle. Go to the Paths panel, duplicate the Work Path, name it "Base" and then duplicate it again. Keep the "Base" shape and work with copy. 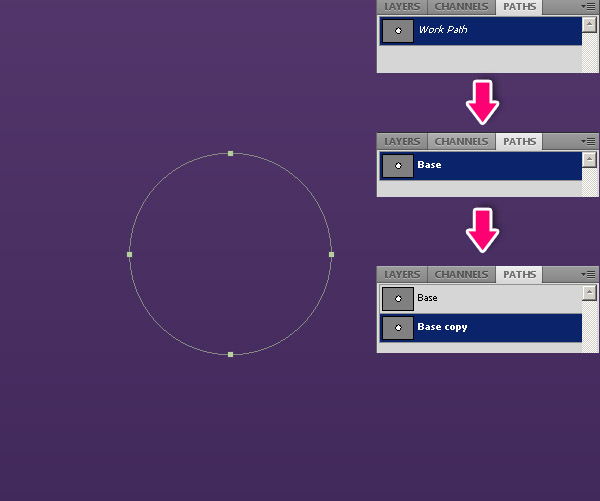 Now we will create letter “C”, using Pen Tool (P) add two anchor points, and then delete the anchor point between them. 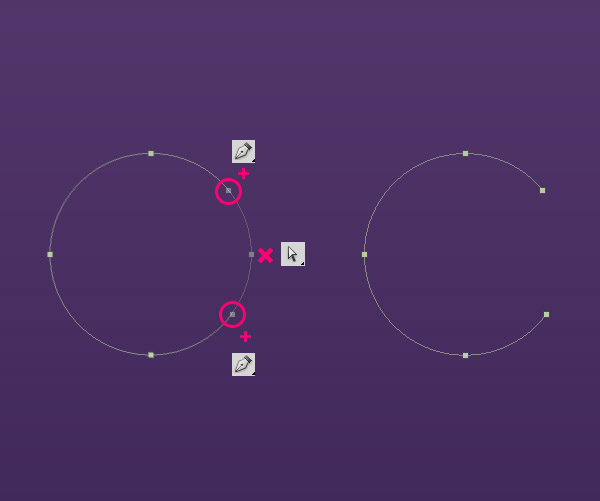 Pick the Brush Tool (B) size 80 px. Create new layer and press Alt + Enter to stroke the path. Make sure not to delete this path, we will need it later. 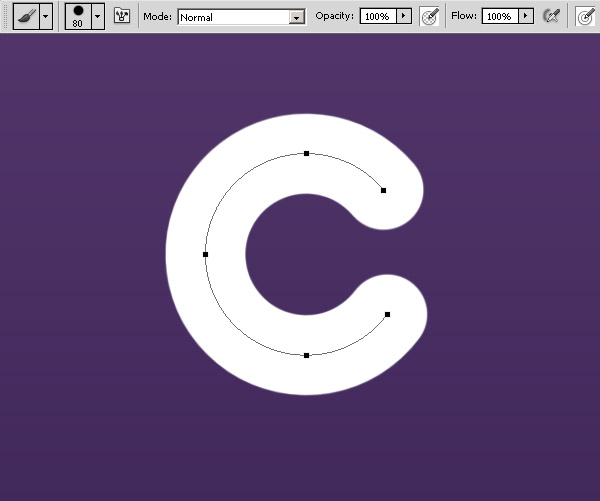 Go to Paths panel, select the “Base” path, duplicate it and move the copy path to the right, it will be letter “O”. To move path use Path Selection Tool (A). 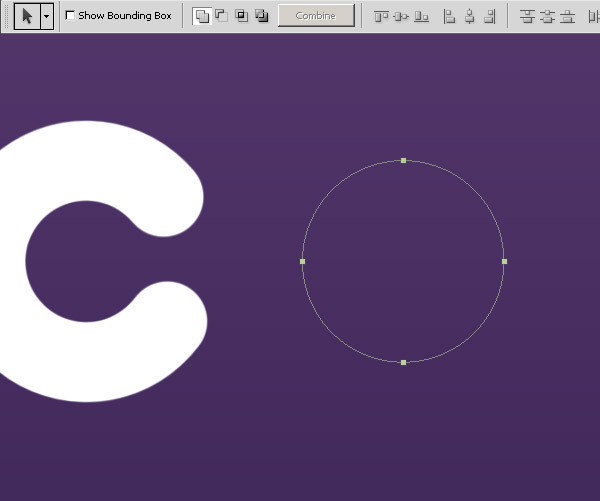 Brush (B) > New Layer > Alt + Enter. 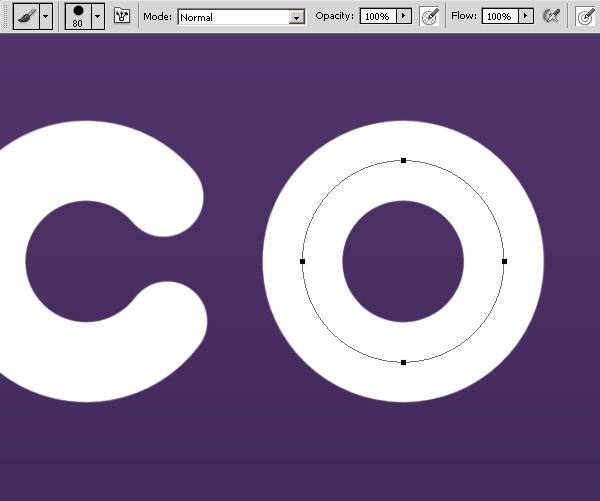 Duplicate the “O”.  Now create the "L". Place rulers to mark the "Base" path height. Pick Pen Tool (P), holding Shift create a path. 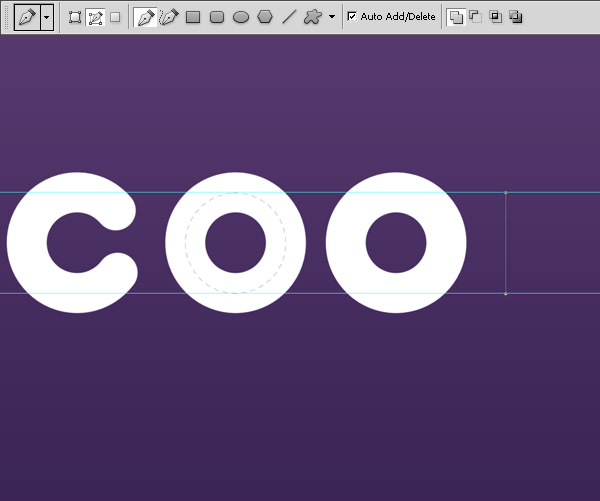 Brush (B) > new layer > Alt + Enter. 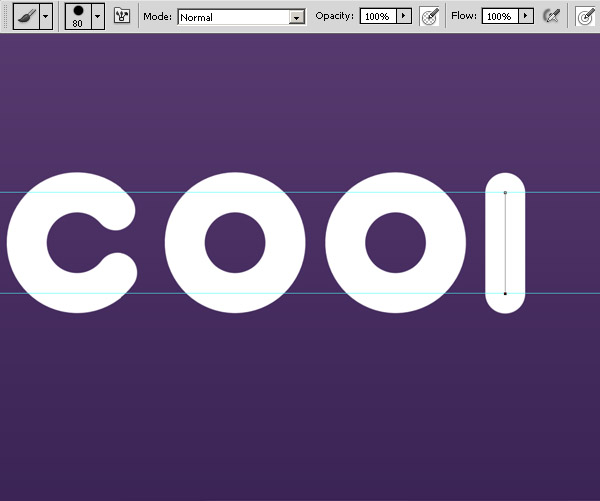 Do the same to create the second part of “L”. 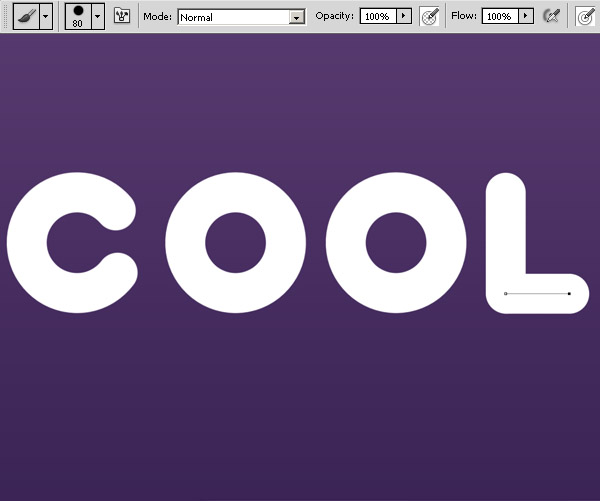 Now arrange the layers as shown below, each letter in separate folder. 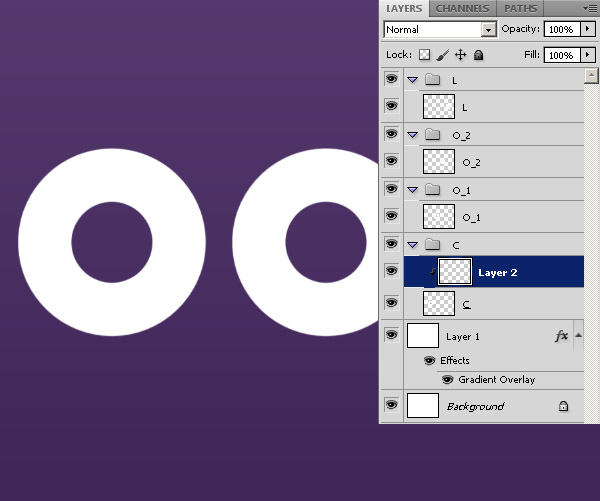 Step 2Now we have all the letters, we start to make layered shapes inside each letter. Use clipping mask for each new layer. Choose "C" path from Paths panel, duplicate it, and start cut and stroke it. Use shades of gray for now, we will add colors after. 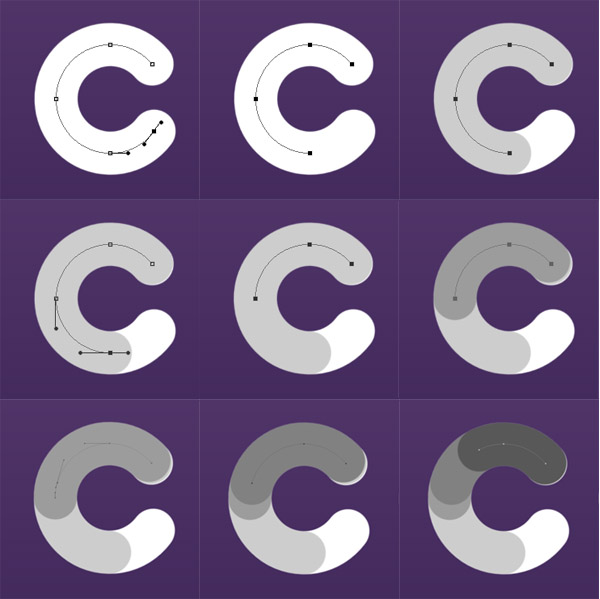 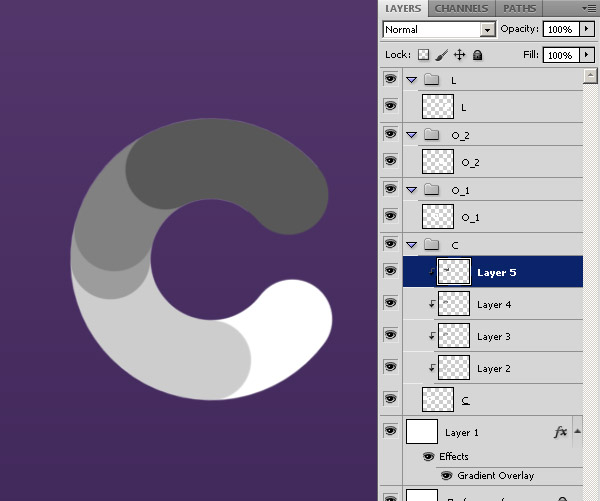 Let’s splash some colors! Choose the “C” layer and add Gradient Overlay Layer Style. In the blending options uncheck Blend Clipped Layers as Group and check Blend Interior Effects as Group. Gradient #ff0096 – #c20049. 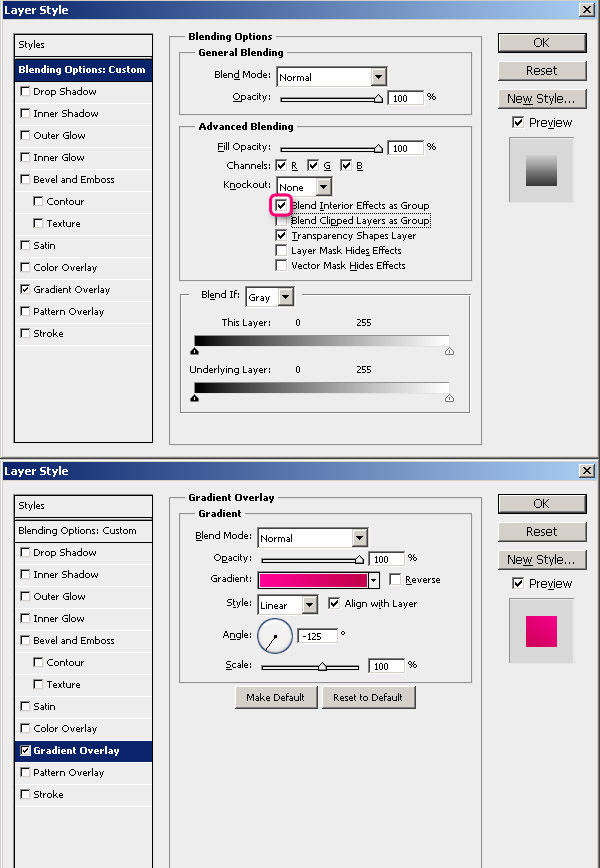  Apply Gradient Overlay for each shape as shown below. Pay attention for angles of the gradients. 1. #ffd200 – #e900ba 2. #4a6d00 – #b1d603 3. #4a6d00 – #eaf900 4. #00dbef – #c8db00 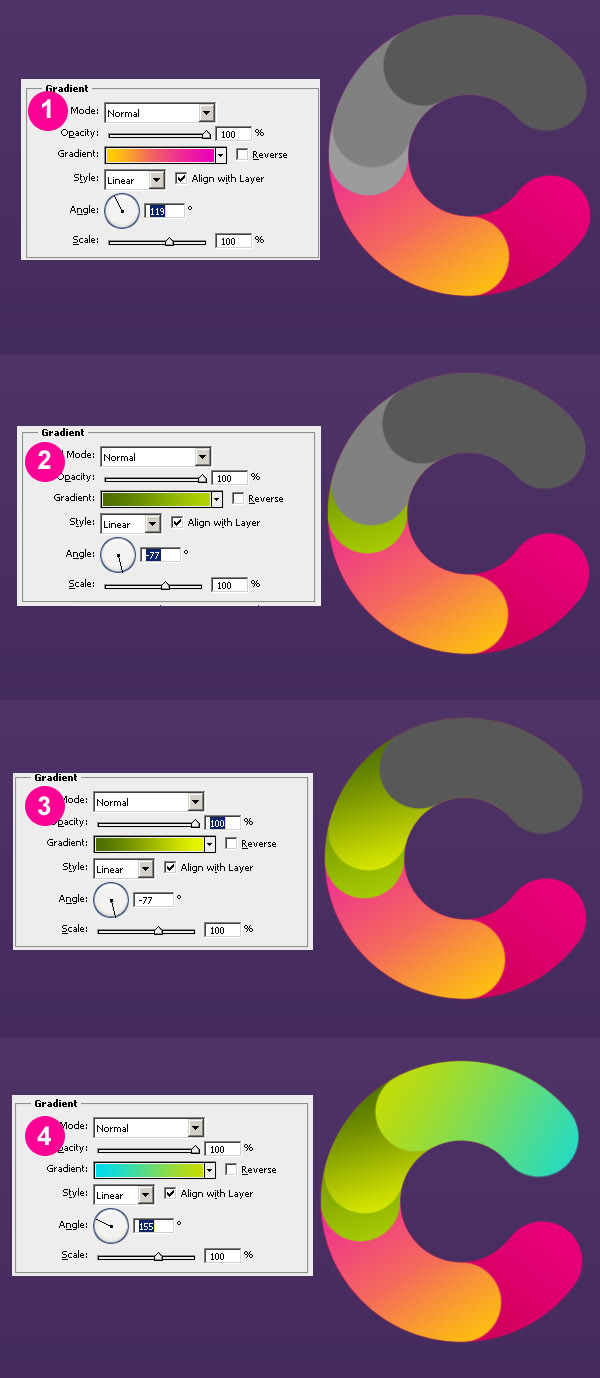 Grab a large soft-edge brush, set opacity to 50%. Create new layer under each shape and draw shadows with black color. 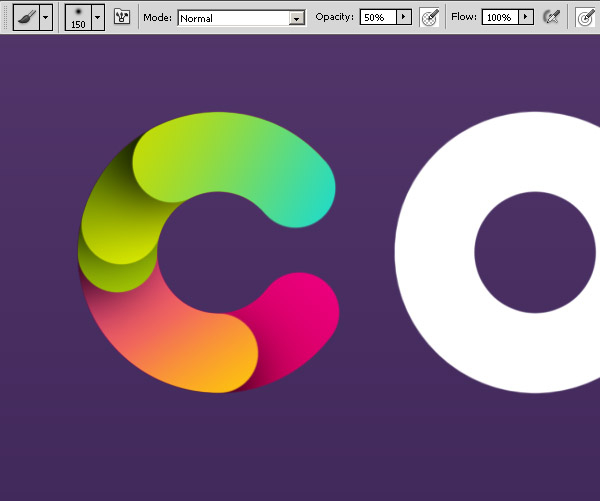 Select the "C" path again, and make it smaller (Path Selection tool (A) and then Command/Ctrl +T to transform). Use size 40 brush to stroke it on new layer. Add gradient (#fb3a7e – #442b5d) and place it under upper shape. 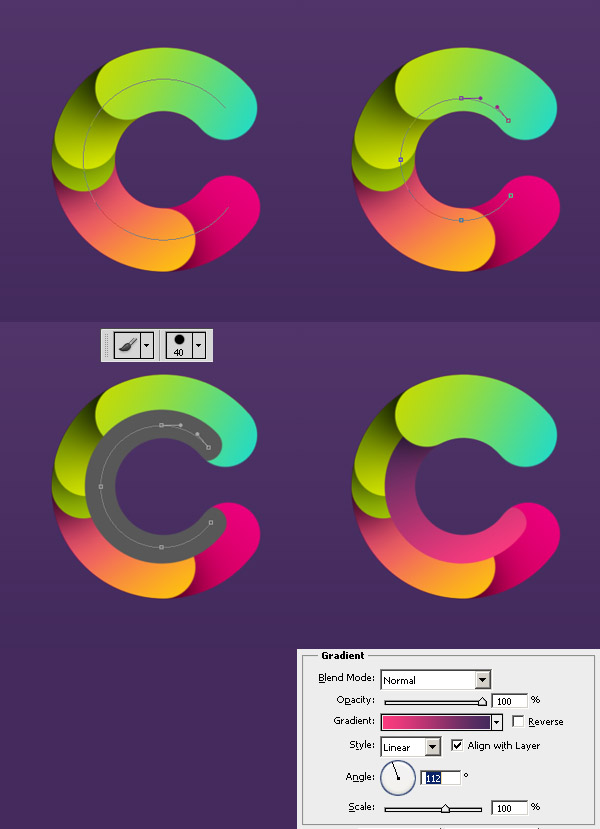 Do it again to create another small shape. Gradient #e80079 – #ff6481. 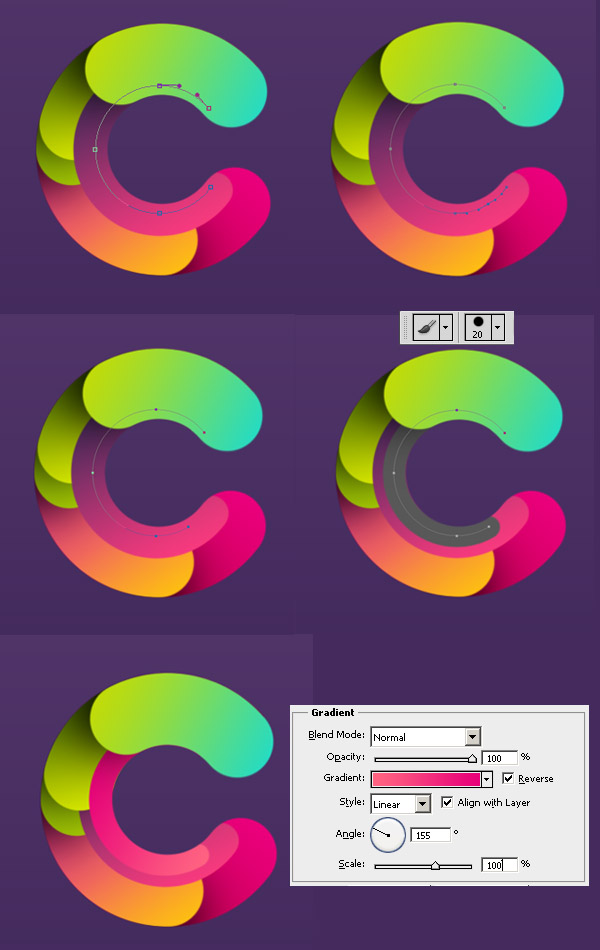 Also move the first small shape under second big shape, and add Drop Shadow layer style for both small shapes we just created. We are done with "C" for now, just 3 more letters to go! 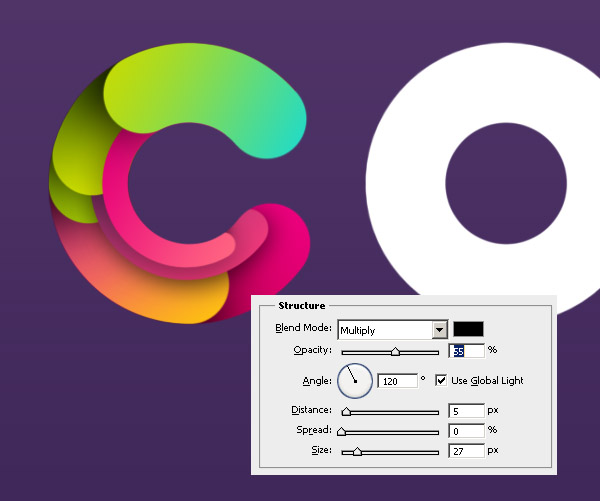 Step 3Now repeat similar steps for all other letters, you can experiment with paths and create different shapes. Use same gradients we apply to "C" shapes to keep uniform colors composition. You also can follow my steps of course.  After I finished the "O" shapes, I realized I didn’t like the dark shape at the bottom and I deleted it.  Second "O." Repeat Process 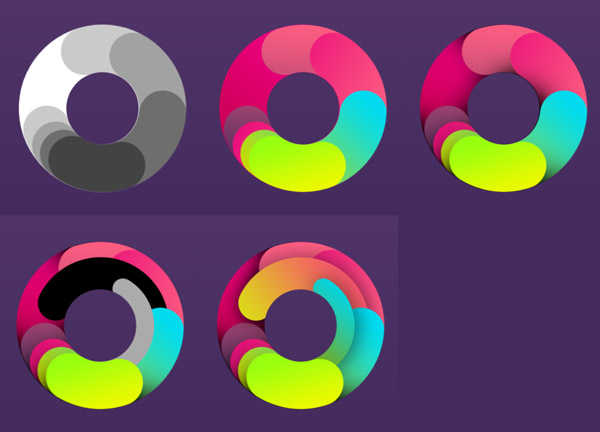 The “L”. Now it’s really easy. 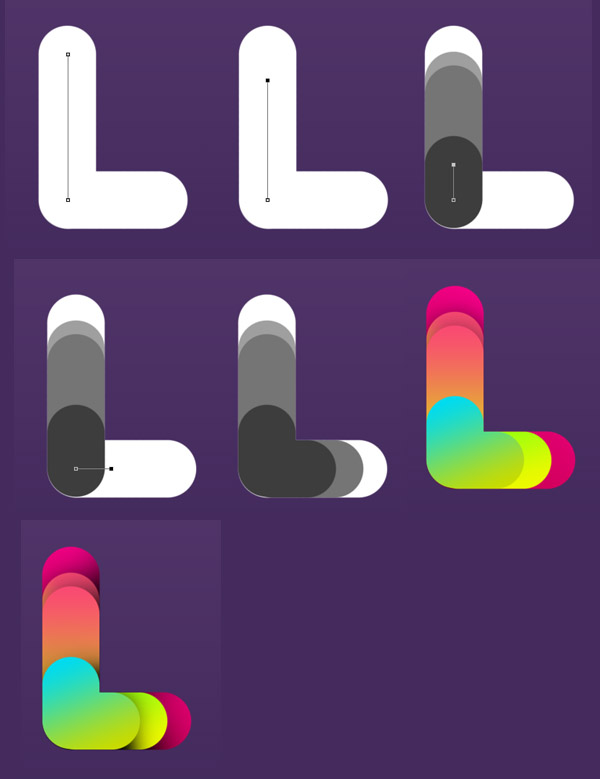 Step 4Now we have all 4 letters, lets place them in nice round composition. Use Free Transform Tool (Command/Ctrl + T) to rotate and place each letter. 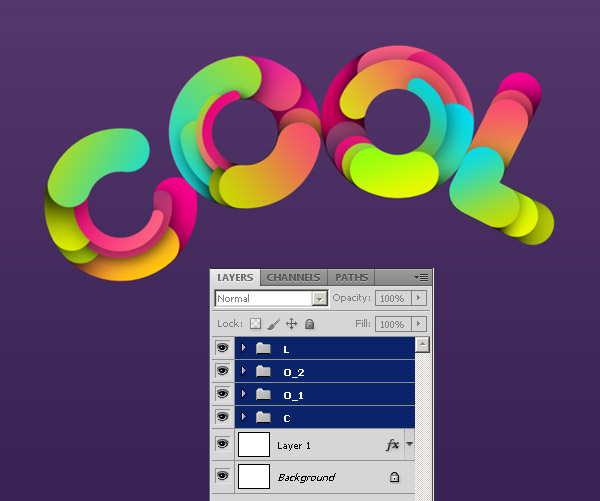 Let’s add some shine to the letters. Create small path, stroke it with size 15 px hard brush, and paint a white dot by single clicking of brush. 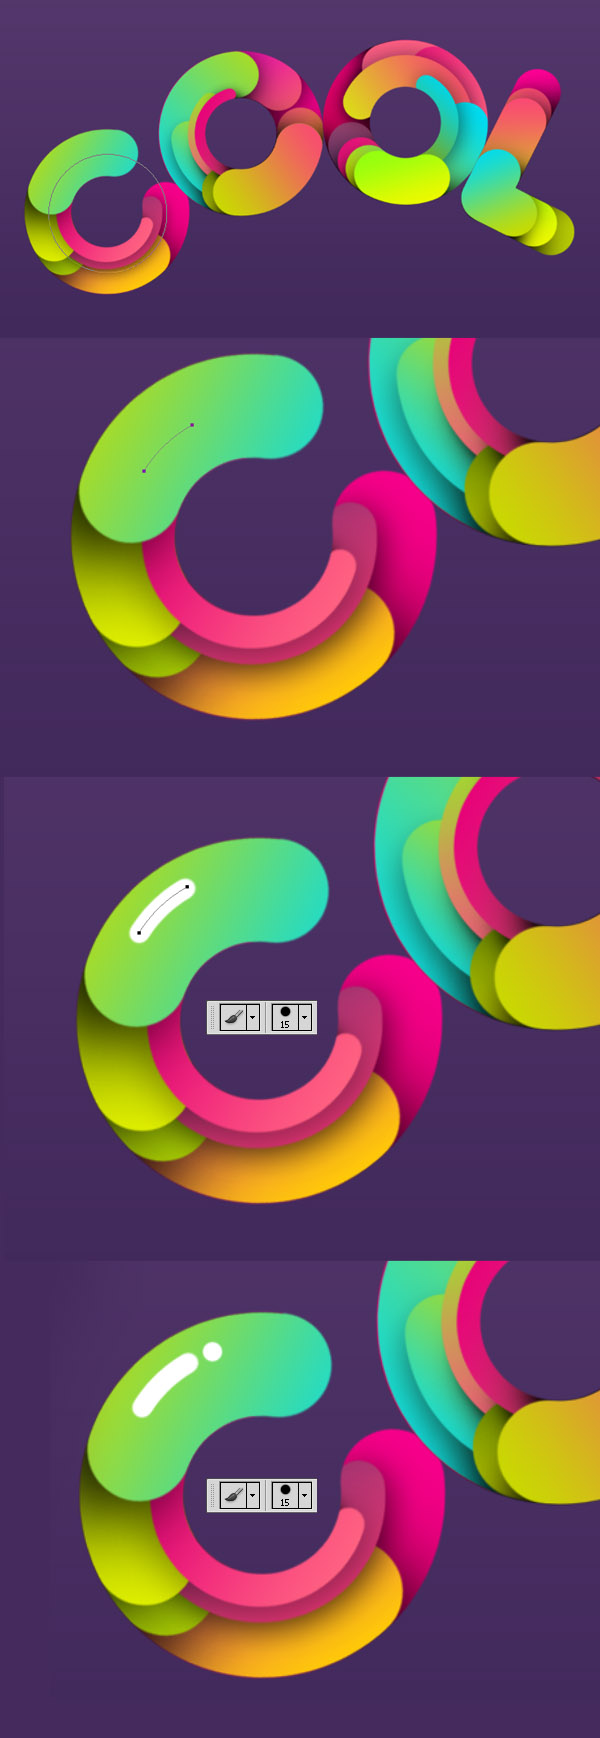 Add white shine for all letters as shown below, set some of the shapes layer style to Overlay and different opacity. 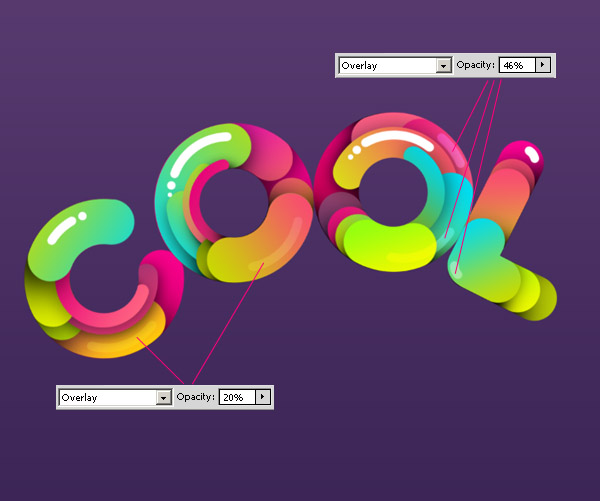 Step 5Create some pieces around the letters. Color them with various gradients we used for the letters. Easy way to do this: Right click on layer > Copy Layer Style, then select the new shape layer, right click > Paste Layer Style. 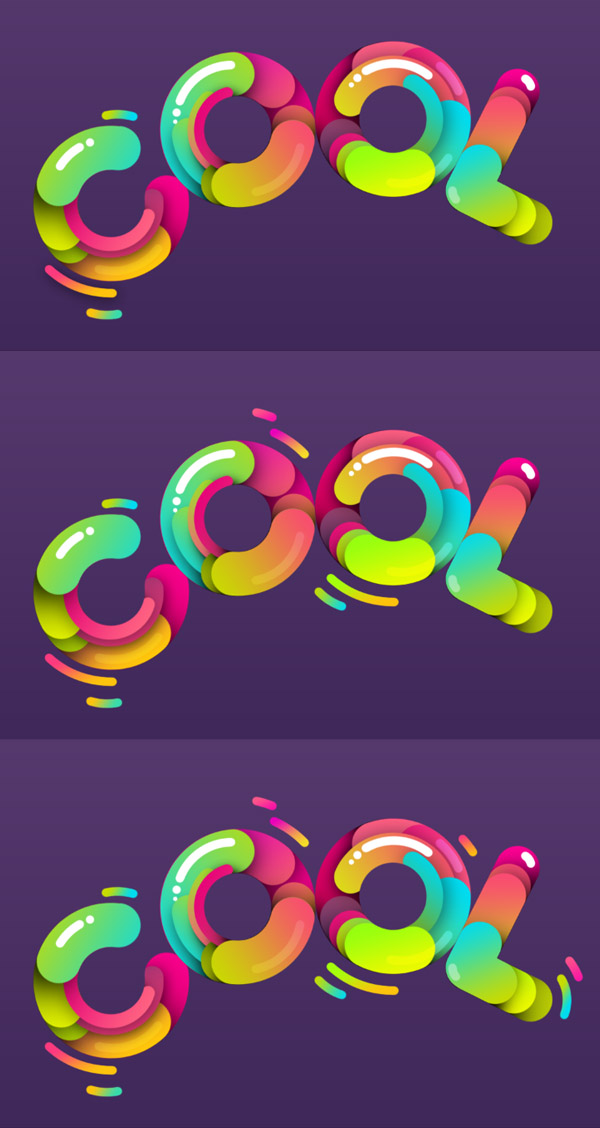 Step 6Pick Polygon Tool (U), make sure it’s a shape, and not a path. Set Sides to 3, and in Polygon Options check Smooth Corners. 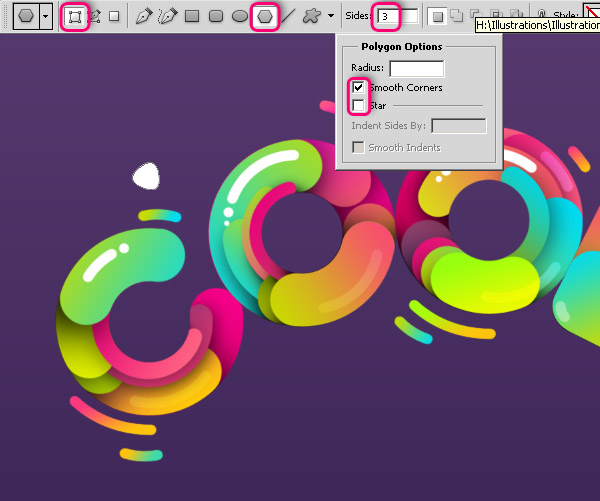 Set Foreground color to #754a9a, and create few triangles with different sizes around the letters. 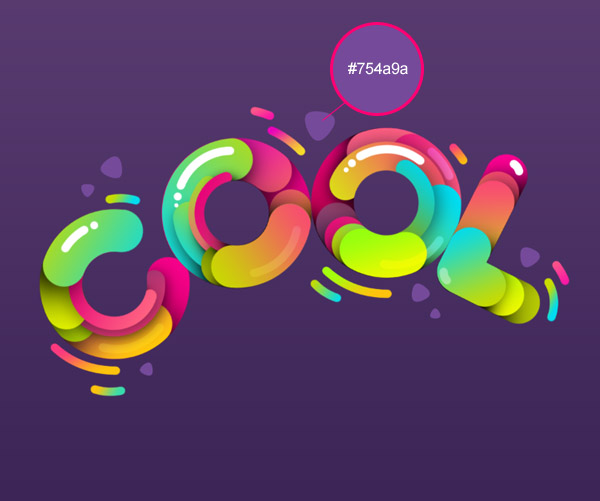 Pick Ellipse Tool (U), set foreground color to white, and create various circles around the letters. 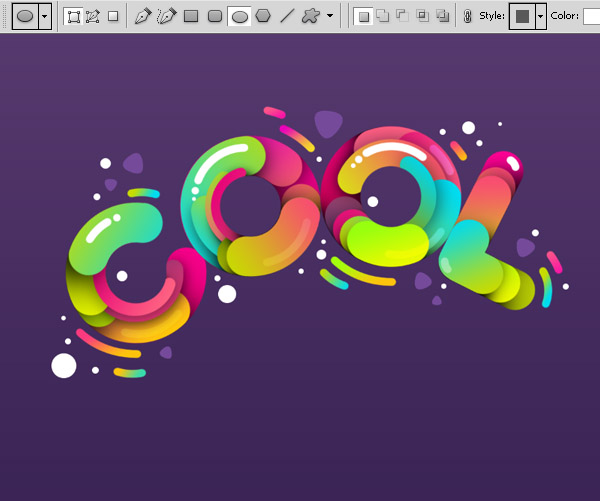 Color them with various gradients we used for the letters. Set some of the circles layer style as shown below: Gradient stroke and set layer fill to 0%, to see only the stroke of the circle. Select another few circles, go to Filter > Blur > Gaussian Blur, and set radius about 2.6 pixels.  Step 7Let’s take care about background. Using a large soft brush draw on the new layer above background layer with color # ff02ea. 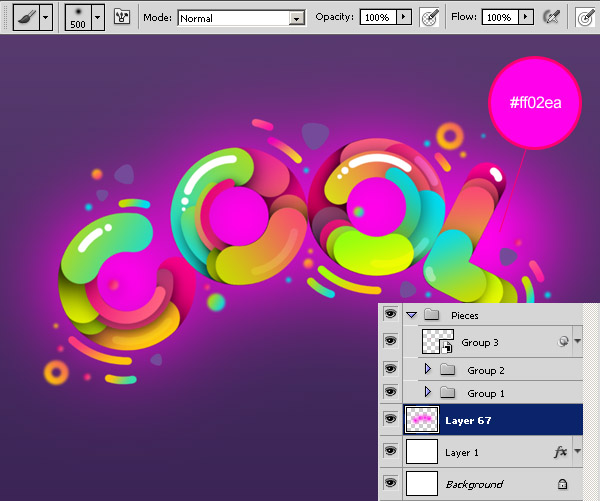 Set layer style to Soft Light. 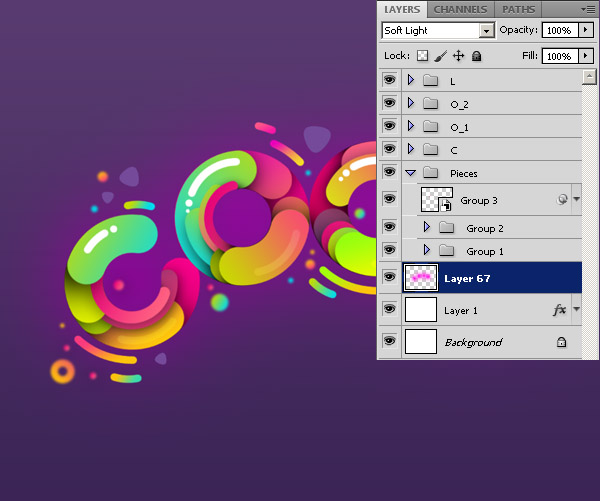 With smaller soft brush draw some shadows with black. 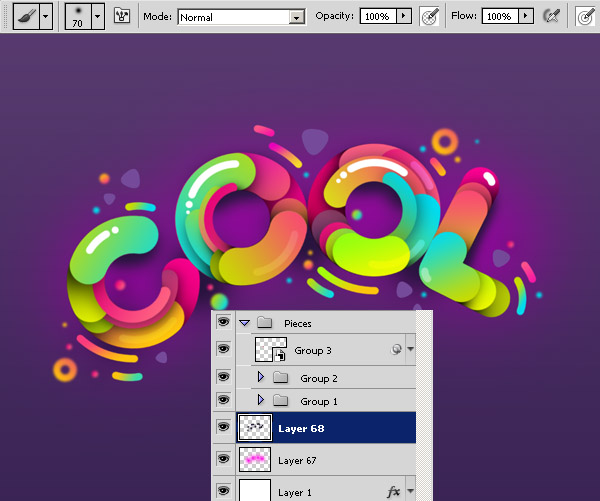 Set layer style to Soft Light. 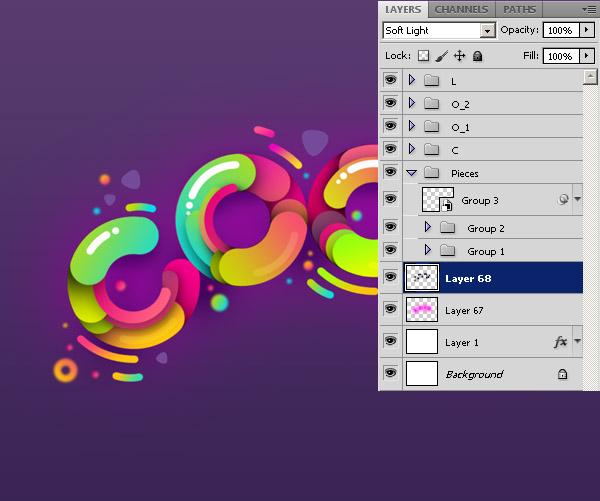 Step 8Create new layer above all other layers, press D to set foreground and background color to black and white. Go to Filter > Render > Clouds. 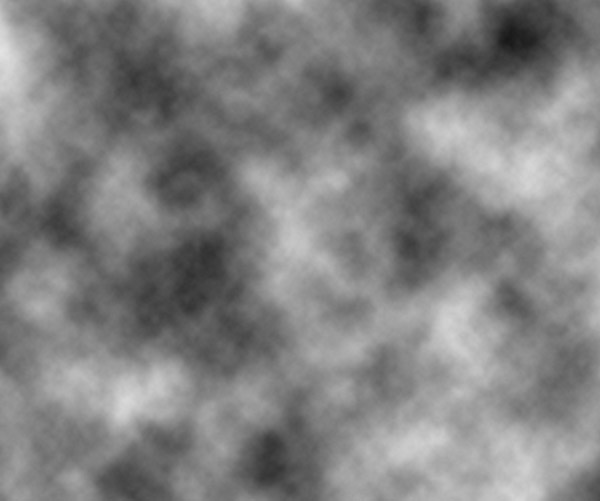 Go to Filter > Noise > Add Noise. Check Uniform and Monochromatic, and set Amount about 26%. 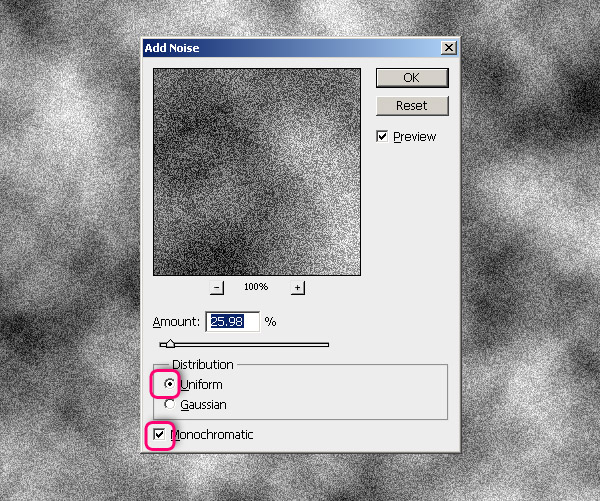 Go to Filter > Blur > Gaussian Blur. Set Radius to 0.5 pixels. 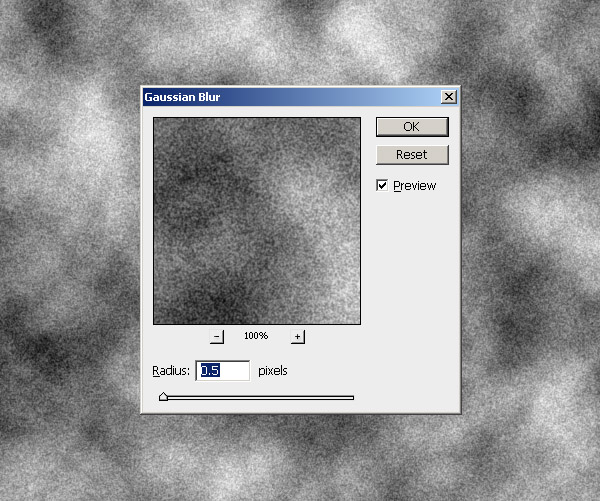 Set layer style to Color Burn and opacity to 20%. 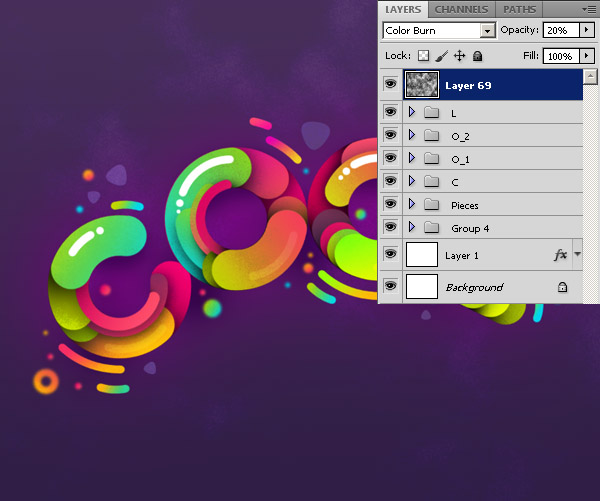 Step 9Pick Rectangle Tool (U) and holding Shift create a black square. Rotate it 45 degrees. Pick Path Selection Tool (A), hold Alt + Shift and move the square, you will create the copy of the shape. Duplicate the shape like this few more times, until you getting the pattern all over the canvas. 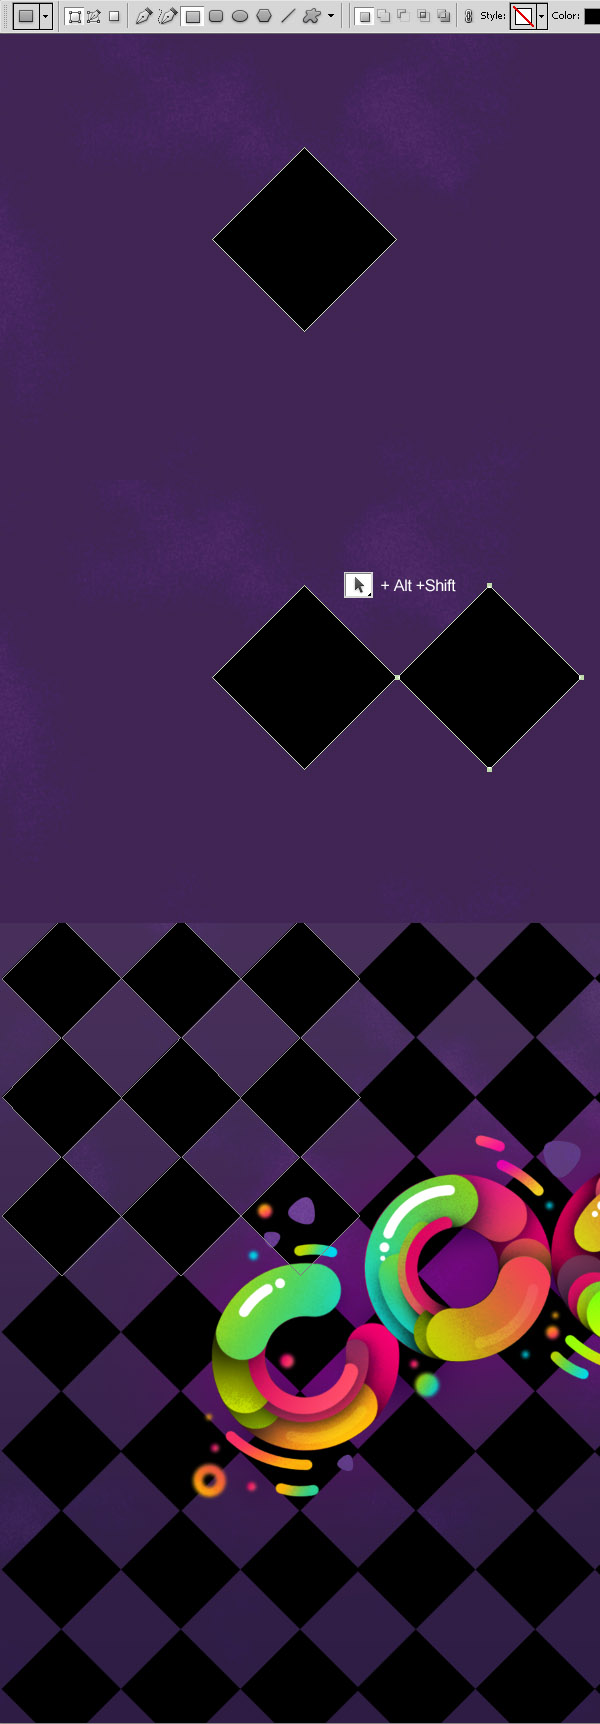 Step 10Now add some flowers. I found these on Deviantart, they are transparent pngs, so all you need to do, just drag and place them on the canvas. Add to each flower Drop Shadow layer style. I also blurred one of the flowers. 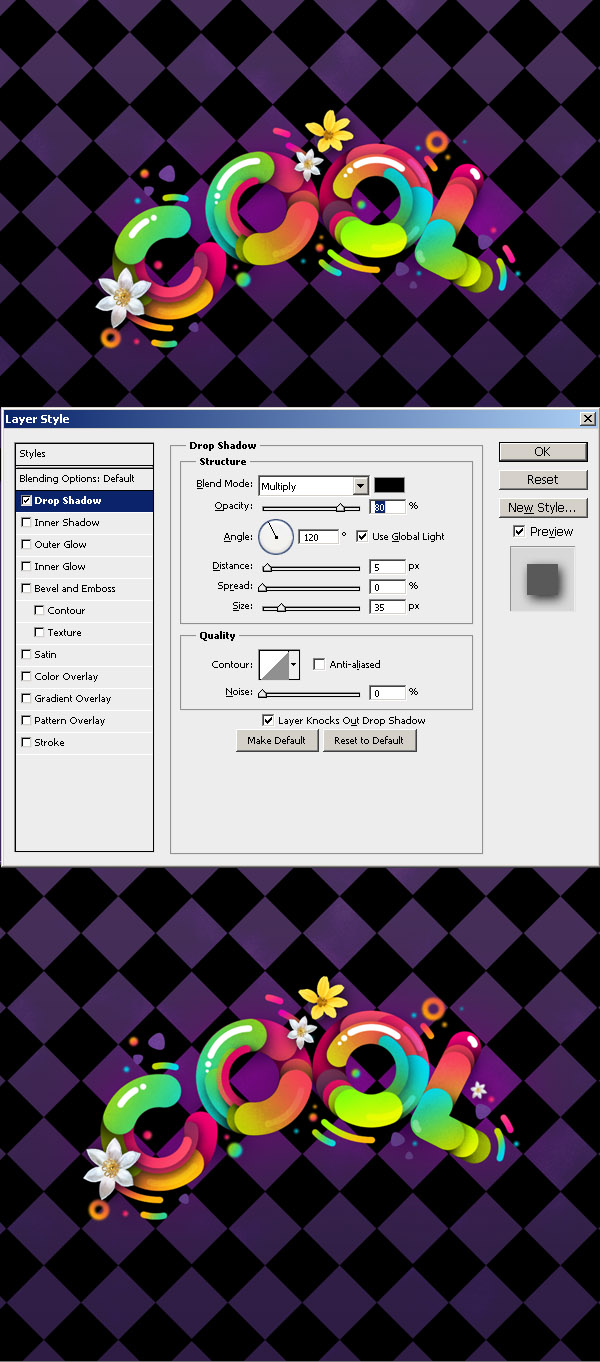 Step 11The final touch. Create new layer above all the layers. Set foreground color to black. Pick Gradient Tool (G). Select the Foreground to Transparent gradient. On the gradient properties panel select Radial gradient and check Reverse. Draw the gradient from the middle of the canvas to the edge. Set layer style to Soft Light. 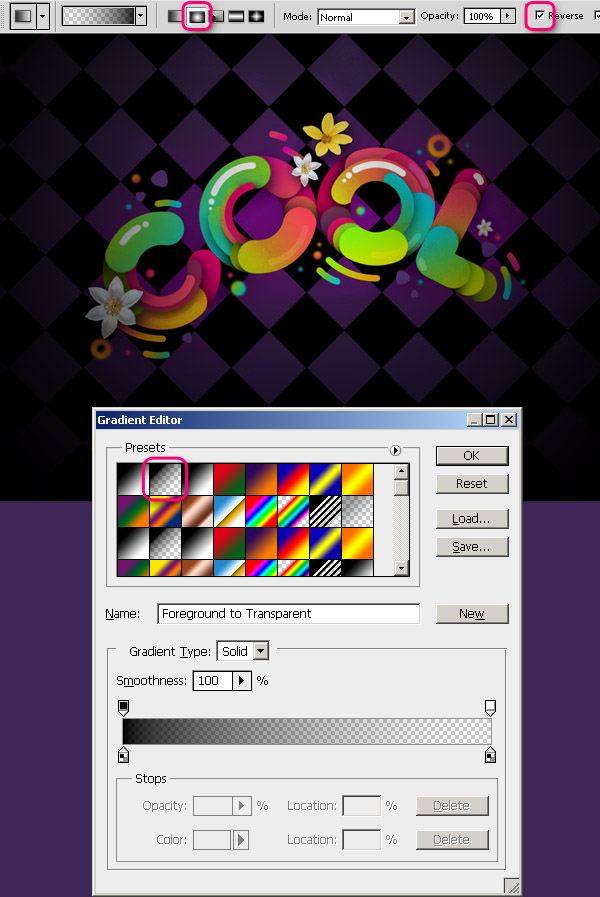 Set layer style to Soft Light. 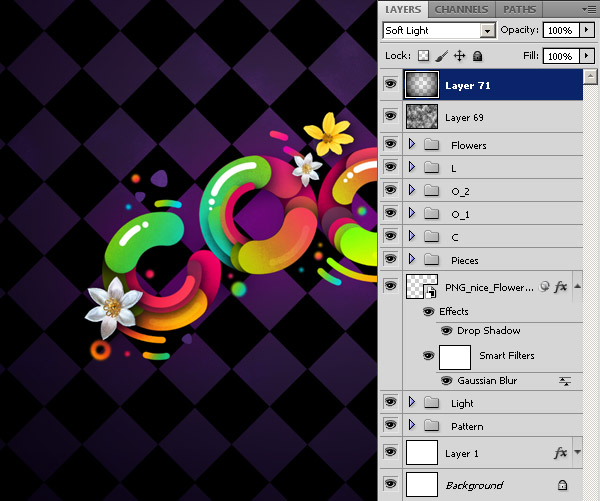 Final Image
Тэги: effect, text Create Earthy 3D Typography in Photoshop – Psd Premium Tutorial2011-09-01 17:00:22In this Psd Premium tutorial, author Ed Lopez will demonstrate how to create an earthy 3D typographic piece using Photoshop’s 3D tools. This tutorial is available exclusively to Premium Members. If you are looking to take your typography skills to the next level then Log in or Join Now to get started!
Detailed Video InstructionThis tutorial includes 10 videos that demonstrate the process of creating this project in detail so that you can better understand the techniques that were used in each step. Below is a clip from one of those videos. To view more clips you can Log in or Join Now! Professional and Detailed Instructions InsideThis tutorial also includes full text and screenshots of each step. Premium members can Log in and Download! Otherwise, Join Now! Below are some sample images from this tutorial.     Final Image Psd Premium MembershipYou can join Psd Premium for as little as $9/month. Premium membership gives you access to the source files for all our tutorials as well as access to premium tutorials like this one. This also includes the rest of the sites in our network including Vectortuts+, Webdesigntuts+, Phototuts+, Nettuts, and more! Premium Members can Log In and download this tutorial. Otherwise you can Join Today!
Тэги: effect, premium, text
Главная / Главные темы / Тэг «efect»
|
Категория «Живопись»
Взлеты Топ 5
Падения Топ 5
Популярные за сутки
|
Загрузка...

