|
Какой рейтинг вас больше интересует?
|
How to Create a Photo Manipulation of a Flooded City Scene2011-05-20 17:00:23Advertise here In this tutorial, we will learn how to manipulate a simple photo into a flooding torrent of a scene. We’ll use some relatively simple techniques to give this image a semi-realistic, stylized feel. Let’s get started!
Video TutorialOur video editor Gavin Steele has created this video tutorial to compliment this text + image tutorial. Step 1With the main image opened, use the Clone Stamp tool to remove any unwanted entities, like the elderly couple walking. Try and clone areas around the couple so it doesn’t look odd and mix your usage of soft, and heavy round brushes to define those edges. 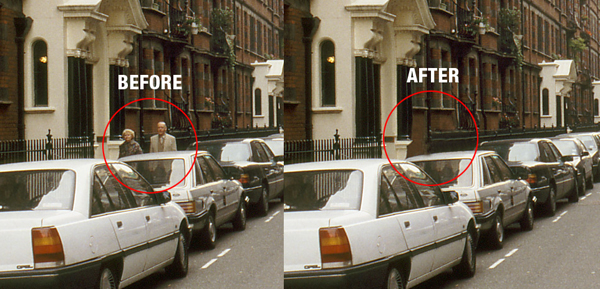 Step 2Next you will want to cut around the edges of the roof tops so we can add in our stormy sky. Use the Polygon Lasso Tool for this. Don’t worry about accuracy, as we’ll be blending everything later, just make sure that the sky is cut out. Once selected, unlock the “background.” Now double-click the layer, then rename it to “backdrop” and hit Enter. Delete the sky. 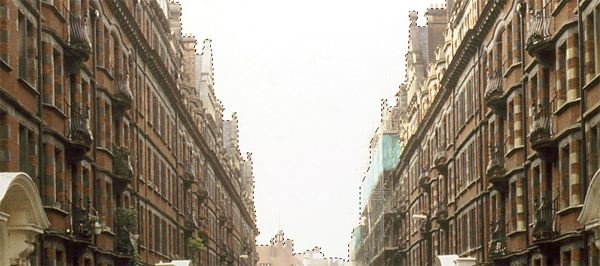 Step 3Open the Stormy Sky image and place it underneath your “backdrop” layer. Then press Command + T to Free Transform), hold Command while you drag the bottom corners inwards to add some perspective to the sky, don’t forget to resize if necessary. Apply the transformation when you are happy. 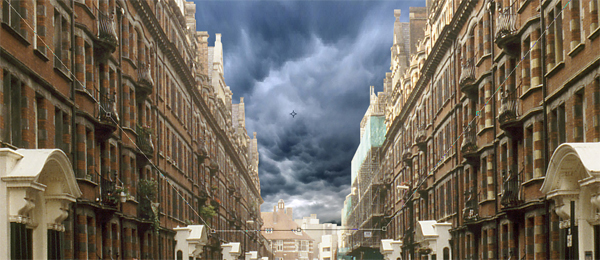 Step 4It doesn’t look very nice does it? That’s because we’re not done yet. Open and place the wave image in the center of the image. Now use the eraser, and a soft brush on it. Get in close and erase the bits you don’t want. Don’t worry if your messy, as the tidying comes later. Then go to Image > Adjustments > Brightness/Contrast and use the settings shown below. 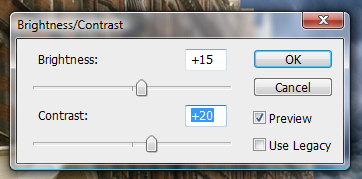 Then go to Image > Adjustments > Hue/Saturation and use these settings. 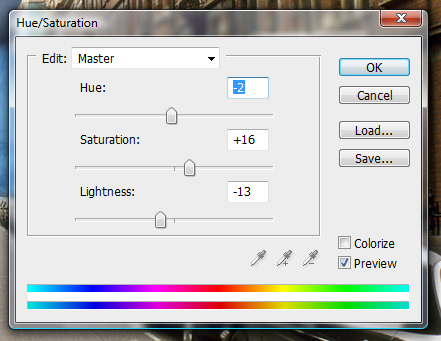 Rename the layer to “Wave,” and your image should now look like the one shown below. 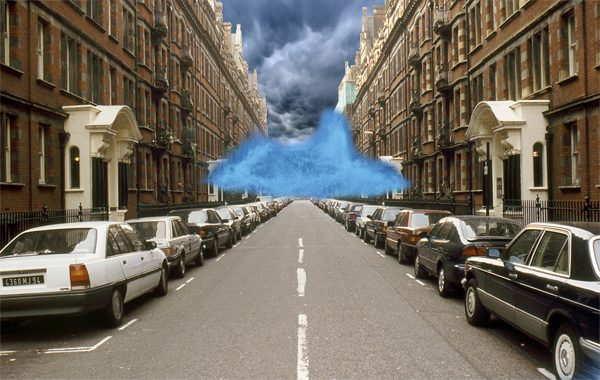 Step 5Now comes the complicated bit. What you’ll need to do is add all the water files to you’re image and one by one, free transform them to flow with the perspective of the water then erase the hard edges. You might also need to duplicate some files in order to fill up areas. Always remember to play about with the textures using the distortion method in free transform and a soft eraser. The more you do, the better it will look. You can see the phases of building up the flooding water in this image. 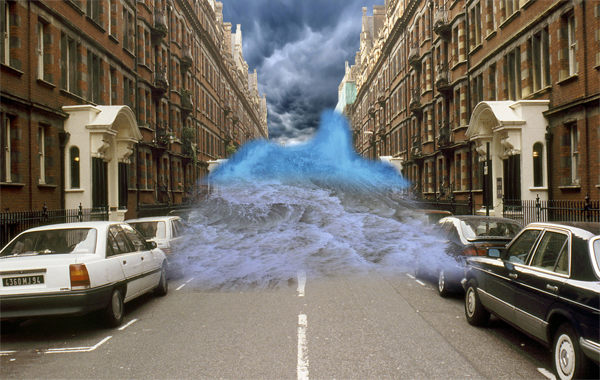 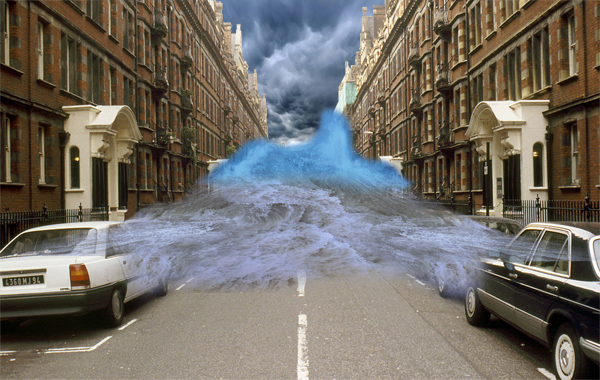 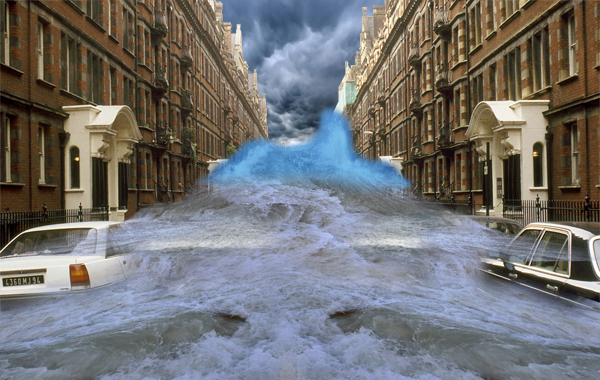 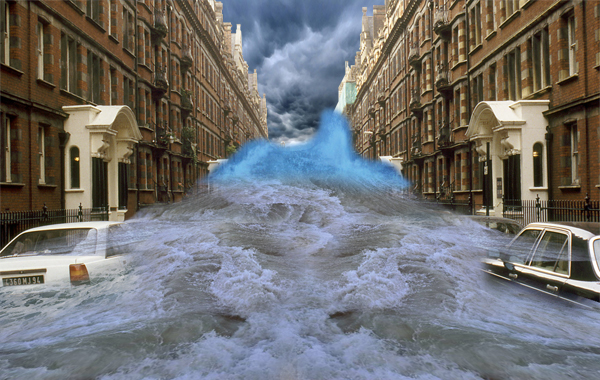 Step 6Now we have our water sorted, merge all the “water” layers into one single layer and go to Image > Adjustments > Color Balance and use the following settings. Your water should now be nice and blue and match the “wave” layer from earlier. Now merge the “wave” layer with the “water” one. 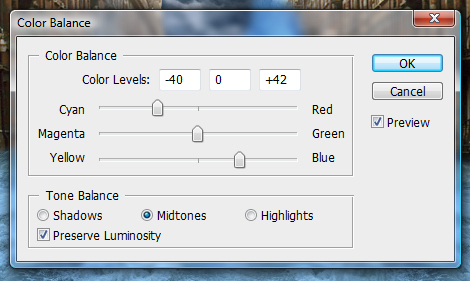 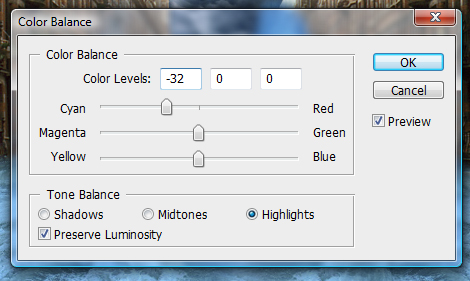 Step 7Remember the tidy up I mentioned a while back? Well its time now. Turn off the “water” layer so you are left with just the backdrop and the sky. With the Burn Tool selected at highlights and at 50% exposure, and a soft brush set, start burning the rooftops and the sky around the rooftops so they appear darker. 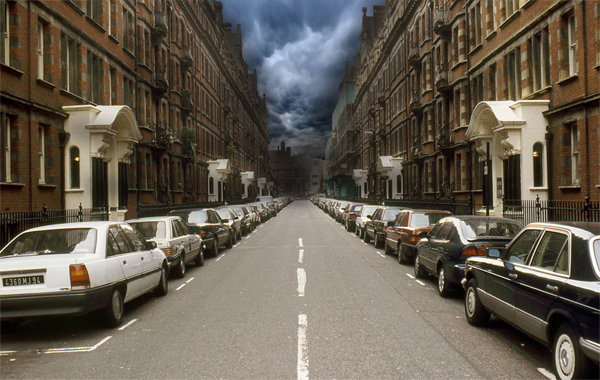 Open the derelict1 image and place it at the right side of the street in the distance. Use a soft eraser to remove those sharp edges. Merge it with the “backdrop” layer. 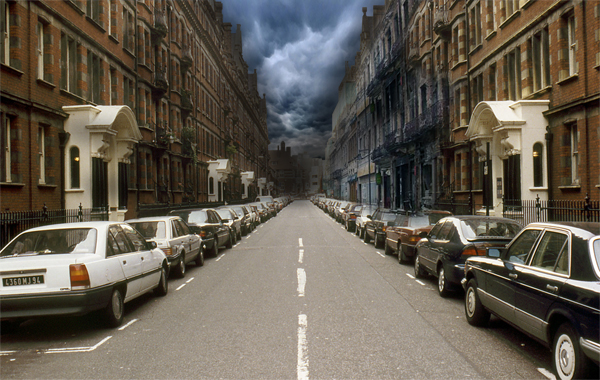 Step 8Let’s tidy up some more. Turn on the “water” layer sand and start tidying around the edges using a soft eraser. Then select the Smudge Tool and a 20px charcoal brush using the settings below. 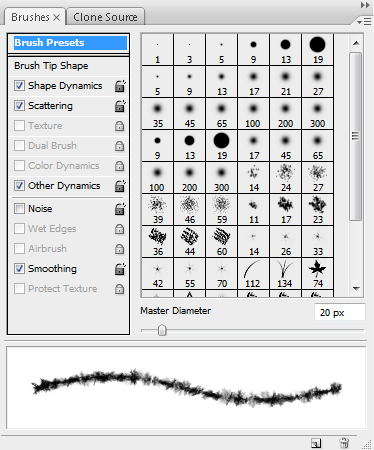 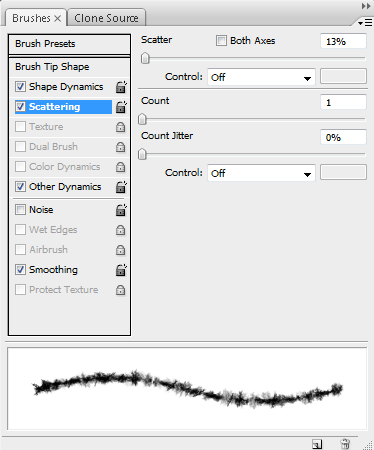 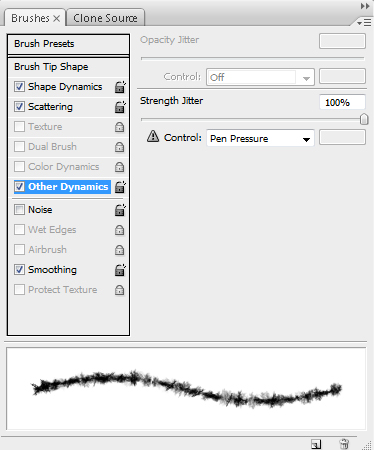 Start smudging the edges of the “water” layer creating very small splashes and more defined edges to realistically create the effect of water hitting a surface. This might require patience and a steady hand, but time will pay off. It might also be wise to duplicate the layer before smudging as you don’t want to use all your undo’s. 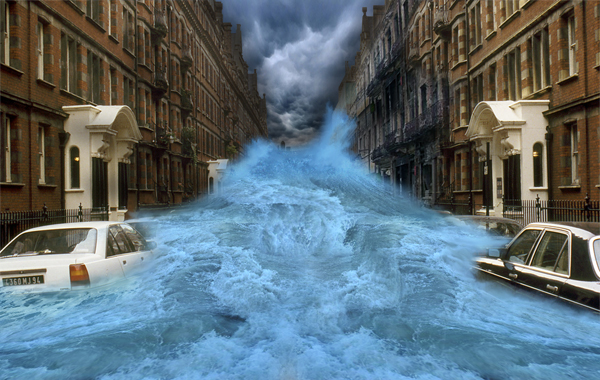 Step 9Next, select the backdrop layer and go to Image > Adjustments > Color Balance and use these settings. 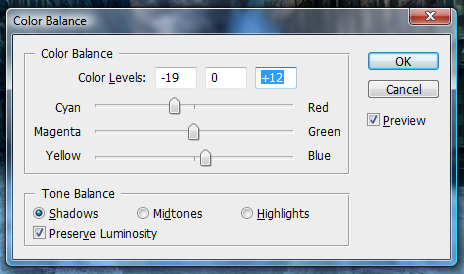 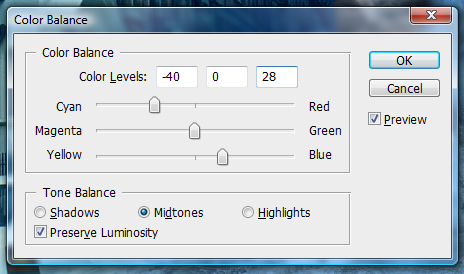 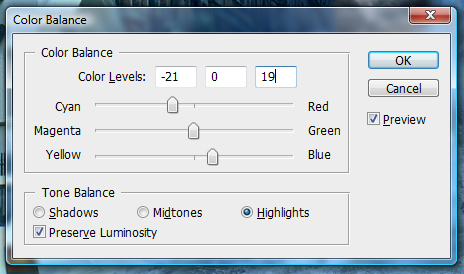 And your piece should now be coming together. Its still a little off, but there is a lot more to do, so lets move on! 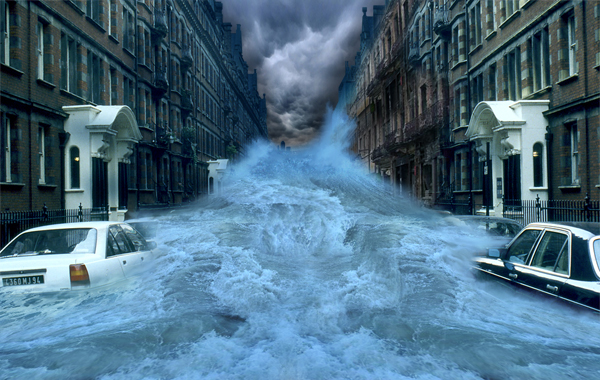 Step 10Time for the splashes. Now this is the hardest step of the tutorial, and requires a lot of patience, but persevere and you will find that patience is in fact a virtue (I know, silly right?). Open up the splash1 and splash2 images and carefully cut out the splashes themselves one by one. Place them onto the canvas. Now use the Warp Transformation (Edit > Transform > Warp) to get the arches you need to create effective splashes, and erase any unwanted areas. 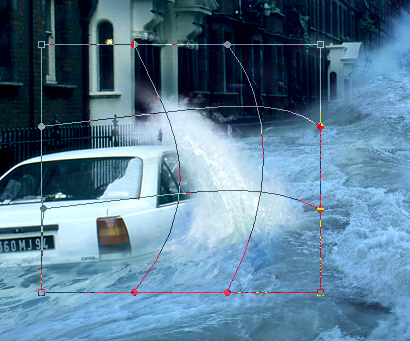 You’ll need to do this for the two cars and for where the water hits the wall down the buildings of the street. You might also benefit from smudging the edges of the splashes to give them more movement, as well as adding some white brushing to a new layer and smudging it. Now merge all your “splash” layers. 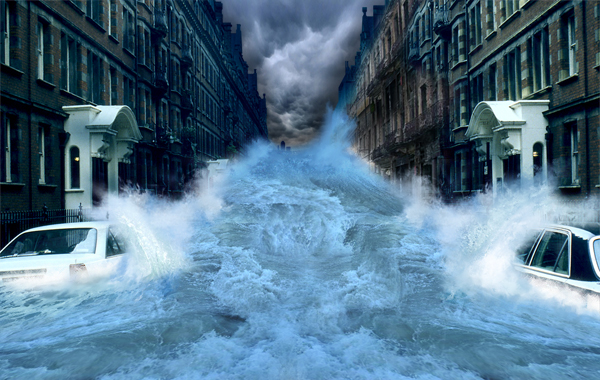 Step 11Getting there right? Now you need to do some tweaking to the colors of the image. This can mean anything from water, to the sky or the buildings. In my example, I think the water is a little too blue, so I’m going to desaturate it a little. Basically use this step for any odd bits and bobs to tweak your image to make it look more streamlined. Be creative, and more importantly, make it look tidy. I lowered the saturation of the water a little, and added some red to the buildings. 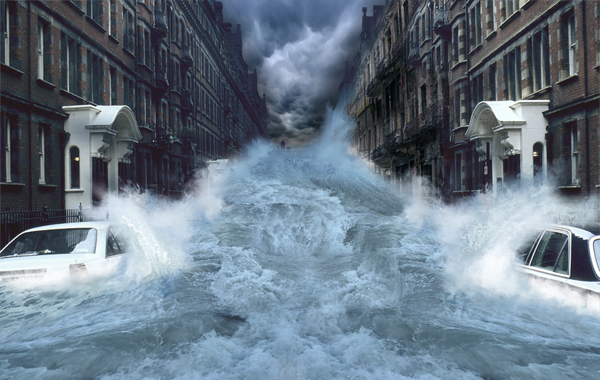 Step 12Now we’ll work on the fog. Its sounds daunting but its actually fairly simple to do. Select a blue color from your water using the Eyedropper Tool. Now select the Gradient Tool and use the following settings. You will need to create a new layer underneath you’re “water” layer and create the gradient so it blocks out any backdrop behind the water. Duplicate the layer (Command + J) and place it on top of your water layer, at about 30% opacity. Set this layer to Multiply. 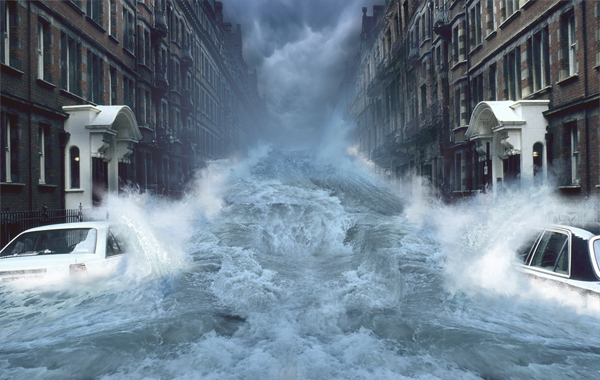 Step 13This next step is to add rain. There are lots of tutorials on the web that show how to create rain. Here is one that goes into great detail, which you could check out. We’ll keep it relatively simple in this tutorial though. First, create a new layer and fill it with black. Go to Filter > Noise > Add Noise and use these settings. 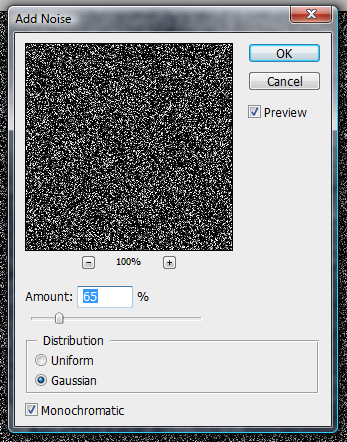 Then Filter > Blur > Motion Blur> and use these settings. 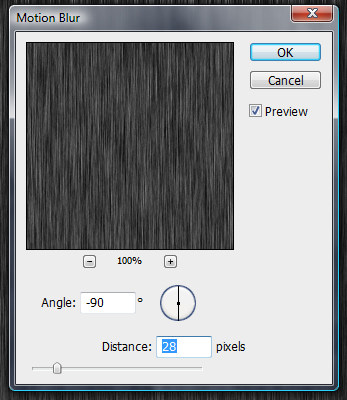 Then Image > Adjustments > Levels and use the following settings. 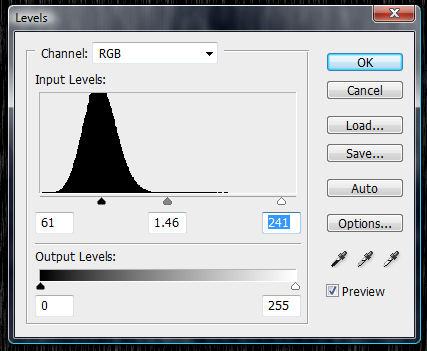 Set the Layer to Screen and use a soft eraser to erase the bottom and top of the Layer, then go to Edit > Transform > Free Transform the “rain” Layer so it covers the whole screen. 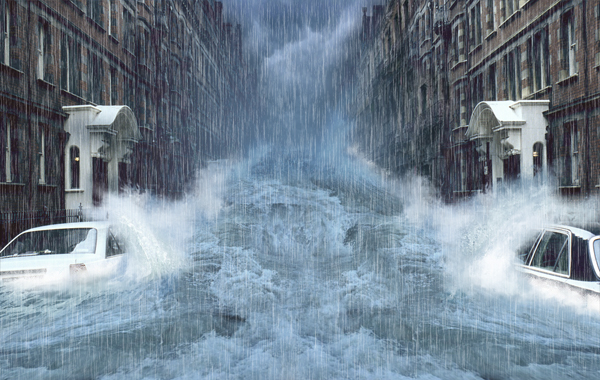 Step 14It looks a little bit empty in the middle of the water doesn’t it? Open up the car image and place it somewhere in the distance, underneath the “fog” layer. Resize the images and erase the edges carefully and use the splash1 image to give some life to the car. 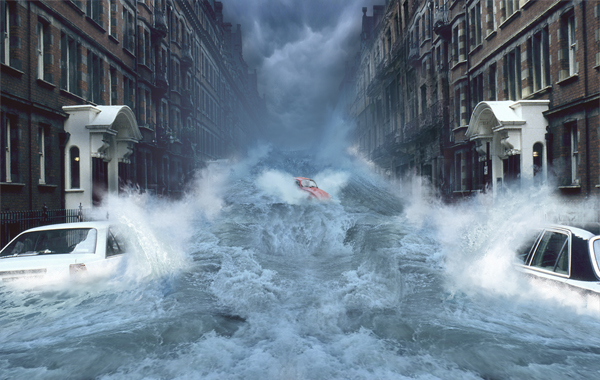 Step 15Now is the fun part. You’ll need to create a few gradient maps first. Click the Adjustment layer button located at the bottom of your layers window and select the Gradient Map option. Then Click the little arrow in the top-right of the box and select Pastels as shown. 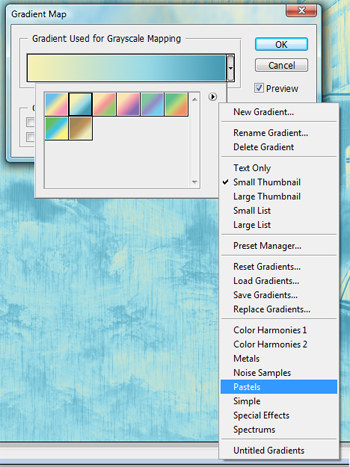 Use the following settings. Finally, set the layer to Multiply at 100%. 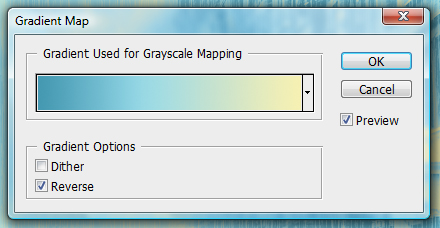 ConclusionNow its just a case of adding depth and a few other adjustments. Select the Blur Tool at 20% strength, then start blurring the “backdrop” layer in the distance and on the rooftops.  Create a new layer and go to Image > Apply Image and then go to Filter > Sharpen > Sharpen, which gives the image a more detailed and stylized feel. Now you’re done! 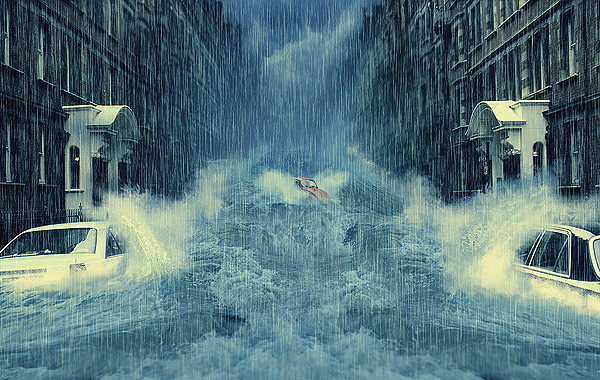 Subscribe to the Psdtuts+ RSS Feed for the best Photoshop tuts and articles on the web. Тэги: effect, photo, video Create a Surreal Rock Formation in Photoshop – Psd Premium Tutorial2011-05-19 17:00:24Advertise here While photo manipulation is an important part of just about everything we do in Photoshop, photo manipulation isn’t always the answer. Sometimes you’ll need to do a bit of digital painting to create the image that you need. In this Psd Premium tutorial, author Marco Casalvieri will demonstrate how to create a surreal rock formation in Photoshop. This image was part of SlashThree’s recent Paradigm Shift Exhibition and is available exclusively to Premium Members. If you are looking to take your photo manipulation and digital painting skills to the next level then Log in or Join Now to get started!
Professional and Detailed Instructions InsidePremium members can Log in and Download! Otherwise, Join Now! Below are some sample images from this tutorial. 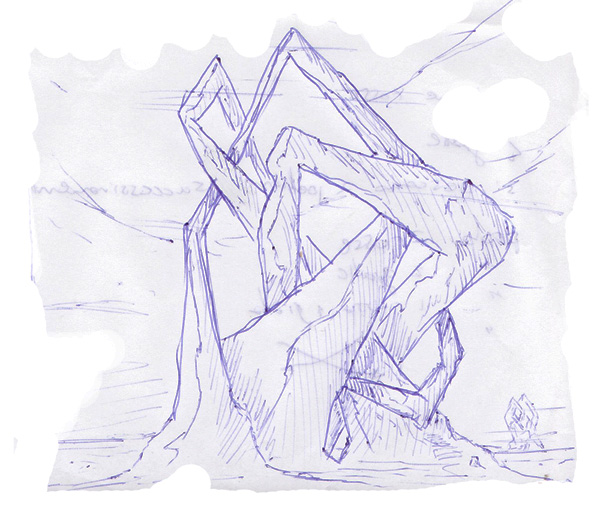 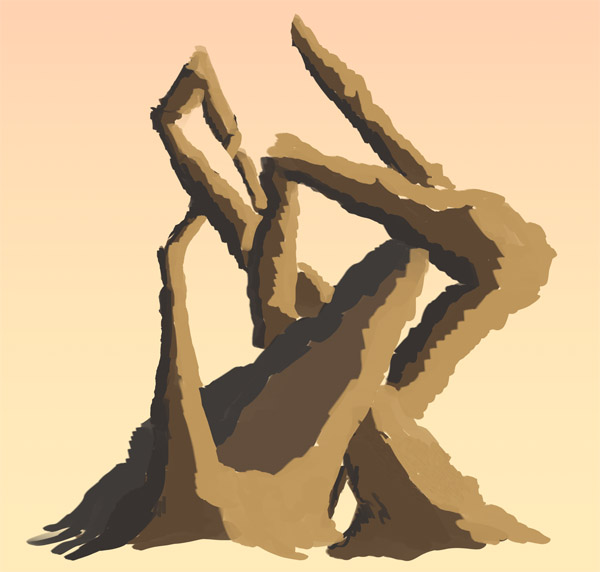 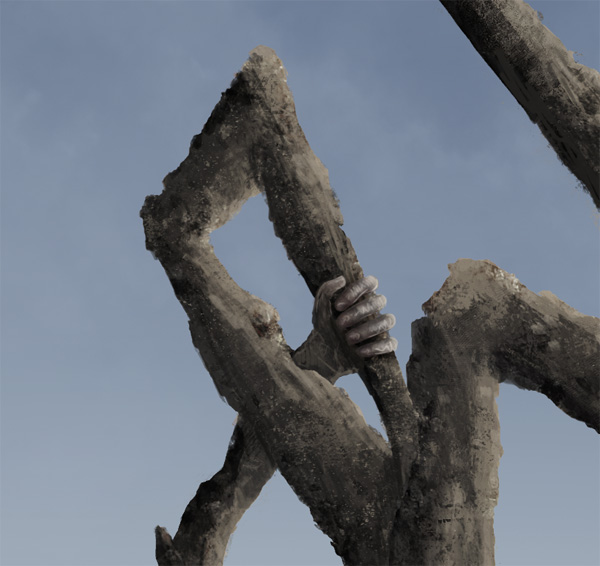 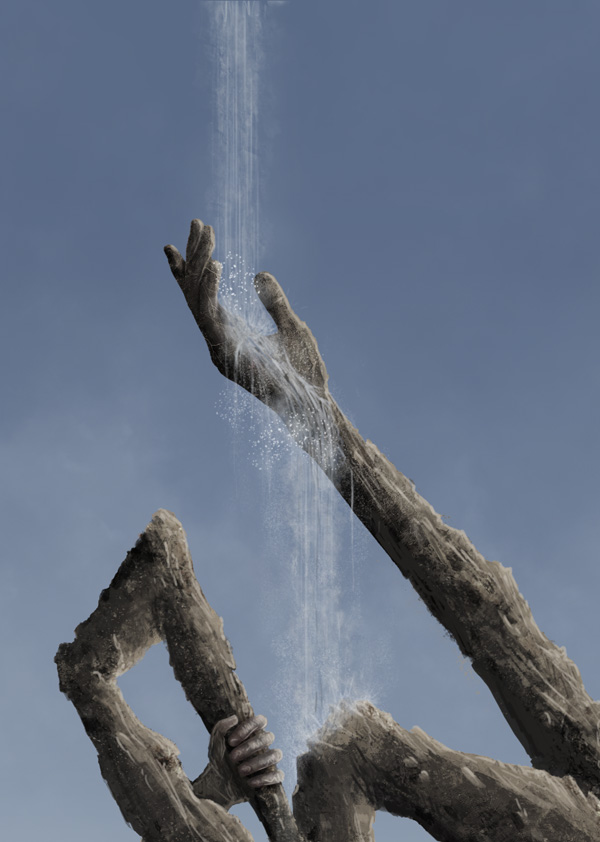 Final Image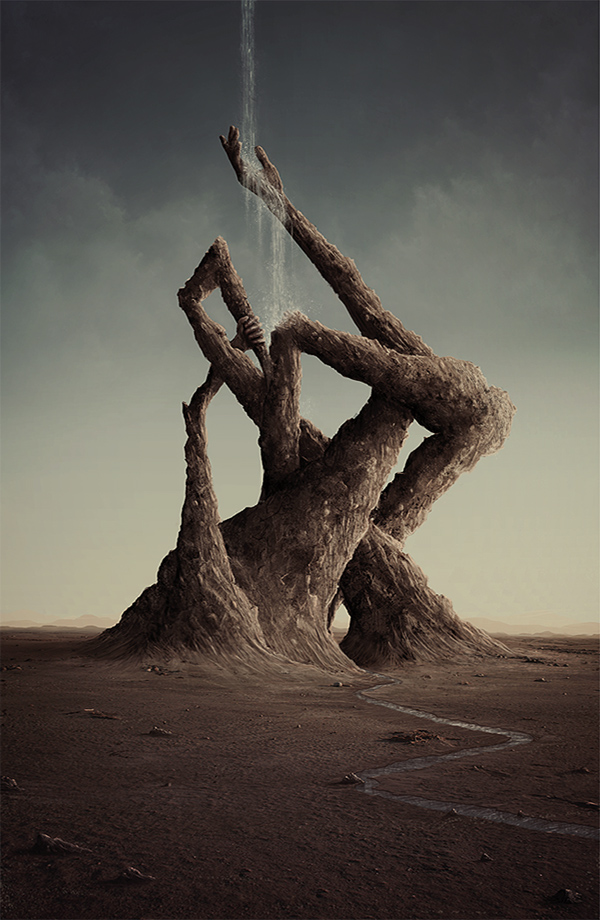 Psd Premium MembershipAs you know, we run a premium membership system here that costs $9 a month (or $22 for 3 months!) which gives members access to the Source files for tutorials as well as periodic extra tutorials, like this one! You’ll also get access to Net Premium and Vector Premium, too. If you’re a Premium member, you can Log in and Download the Tutorial. If you’re not a member, you can of course Join Today! Тэги: effect, photo, premium Selecting Hair is Easy – Basix2011-05-18 17:00:04Advertise here Are you new to Photoshop? Have you been trying to teach yourself the basics of Photoshop but have found the amount of educational material available on the net a bit overwhelming? As the world’s #1 Photoshop site, we’ve published a lot of tutorials. So many, in fact, that we understand how overwhelming our site may be to those of you who may be brand new to Photoshop. This tutorial is part of a 25-part video series demonstrating everything you will need to know to start working in Photoshop.
Photoshop Basix, by Adobe Certified Expert and Instructor, Martin Perhiniak includes 25 short video tutorials, around 5 – 10 minutes in length that will teach you all the fundamentals of working with Photoshop. Today’s tutorial, Part 21: Selecting Hair is Easy will explain how to combine selection tools, the non-destructive use of the Eraser tool, refine mask, and pen tool. Let’s get started! Тэги: basix, effect, photo, video «Новый Акс Эксайт – даже ангелы не устоят»2011-05-13 16:14:01Новая реклама Axe Exicte содержит жестокие сцены падения на землю бесполых ангелов в образах ...
Тэги: axe, effect, sell, sex Create a Fantasy Mini Planet – Psd Premium Tutorial2011-05-12 17:00:07Advertise here The best thing about Photoshop is that it allows us to create practically anything our imaginations can conceive. In this Psd Premium tutorial by author Alexandra Fomicheva will demonstrate how to combine several photos to create a fantasy, cosmic, mini planet in Photoshop. This tutorial is available exclusively to Premium Members. If you are looking to take your photo manipulation skills to the next level then Log in or Join Now to get started!
Professional and Detailed Instructions InsidePremium members can Log in and Download! Otherwise, Join Now! Below are some sample images from this tutorial. 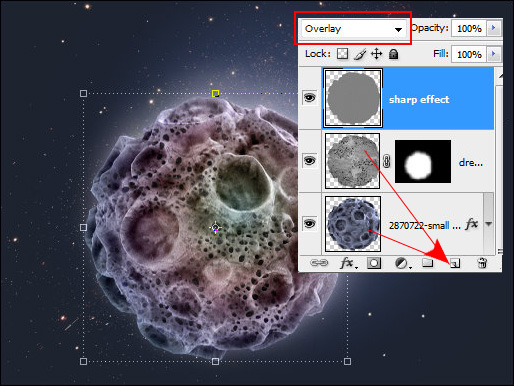 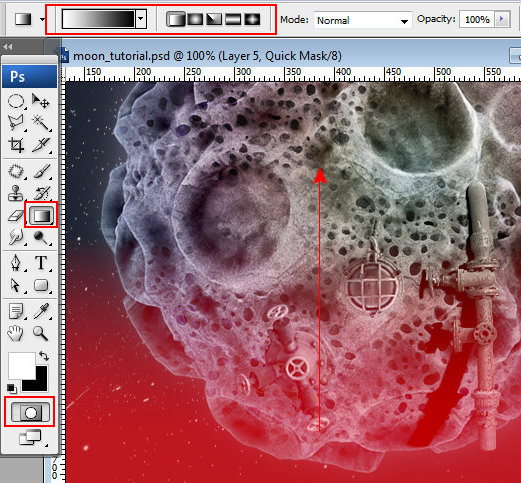 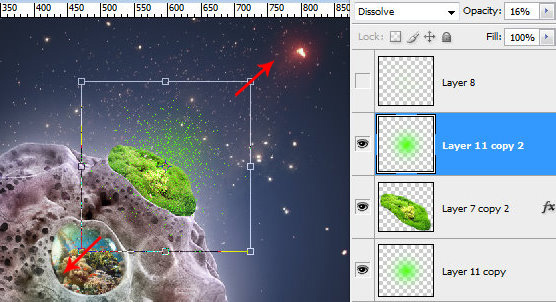 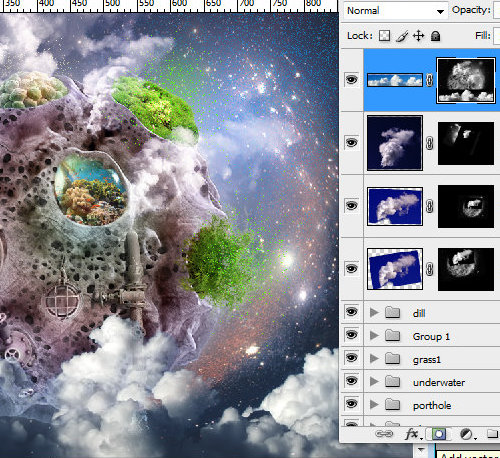 Final Image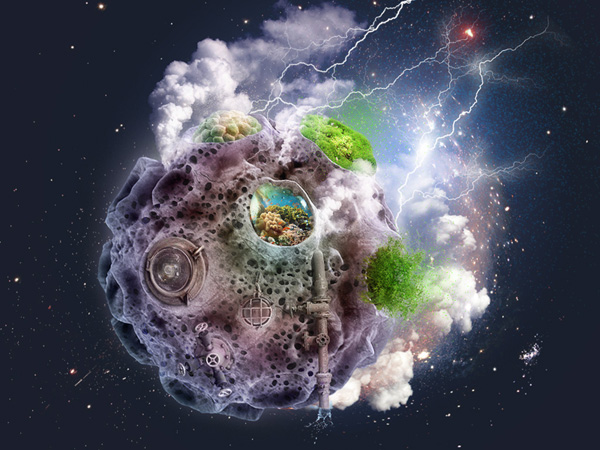 Psd Premium MembershipAs you know, we run a premium membership system here that costs $9 a month (or $22 for 3 months!) which gives members access to the Source files for tutorials as well as periodic extra tutorials, like this one! You’ll also get access to Net Premium and Vector Premium, too. If you’re a Premium member, you can Log in and Download the Tutorial. If you’re not a member, you can of course Join Today! Тэги: effect, photo, premium
Главная / Главные темы / Тэг «efect»
|
Категория «Поэты»
Взлеты Топ 5
Падения Топ 5
Популярные за сутки
|
Загрузка...
