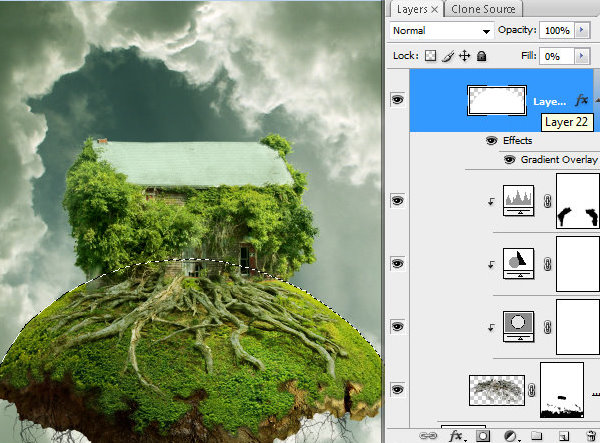
... %. Apply Gradient Overlay
to this layer ... Correction. Apply Vignette
.

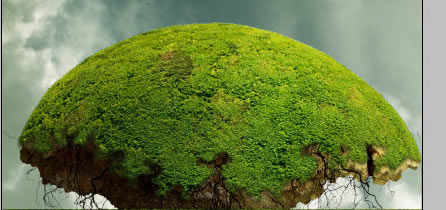
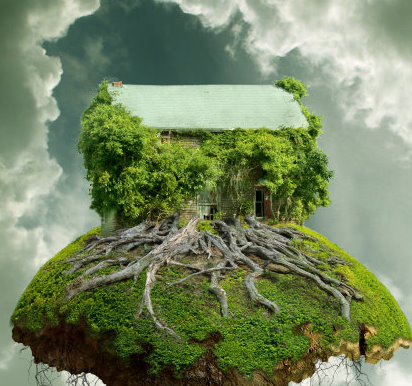
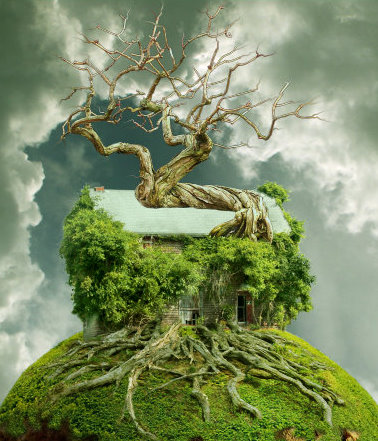
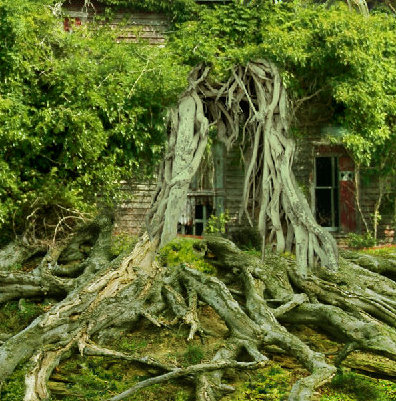
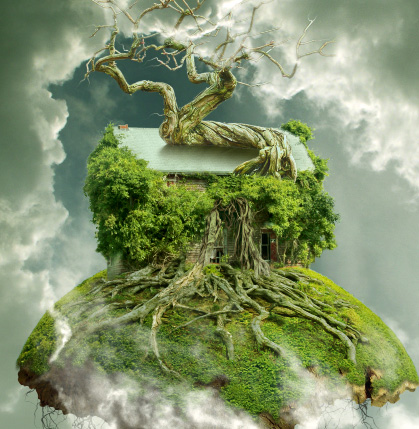
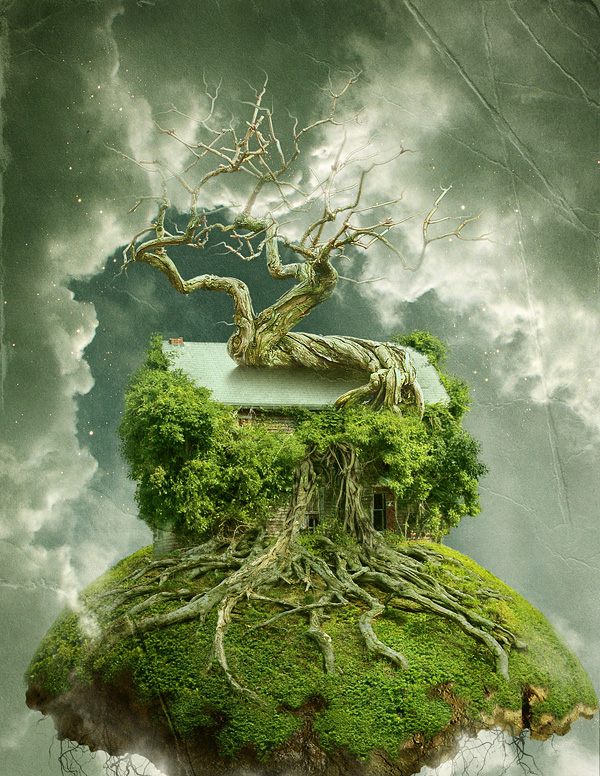
Photoshop is great because it allows us to create scenes that wouldn’t otherwise be possible in real life. In this tutorial we will combine several stock images to create a floating over-grown tree house in Photoshop.
Tutorial Assets
The following assets were used during the production of this tutorial.
- Roots
- Roots2
- Tree
- Old Barn
- Clouds
- Green texture
- Stars
- Old Paper
- Soil
- Branches
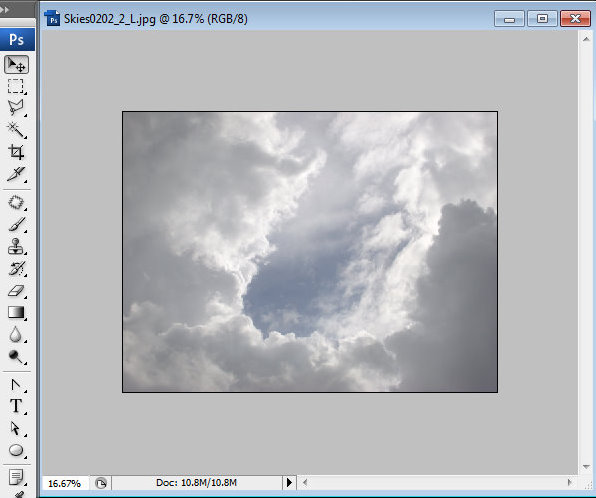
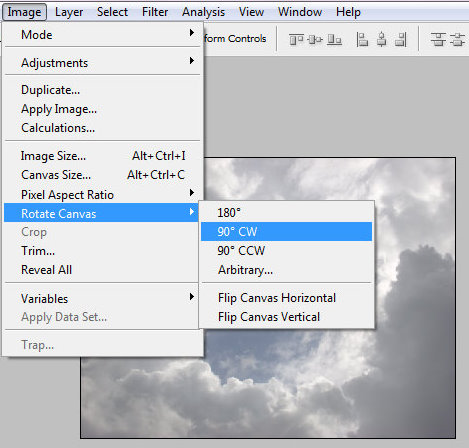
Step 1
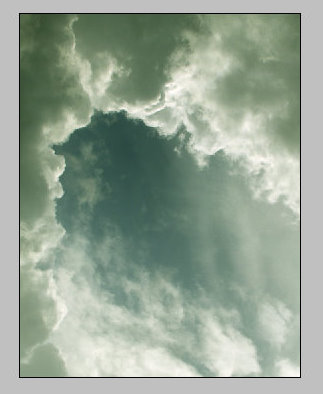
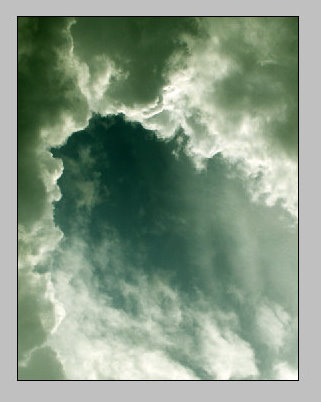
Download and open in Photoshop the large sky photo – 2240px * 1680px. Rotate the Canvas, choose Image > Rotate Canvas > 90° CW.
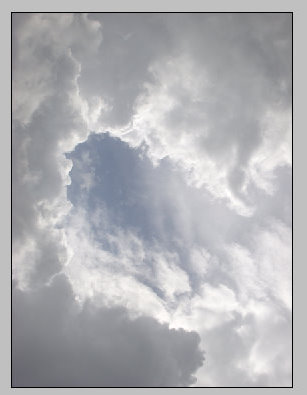
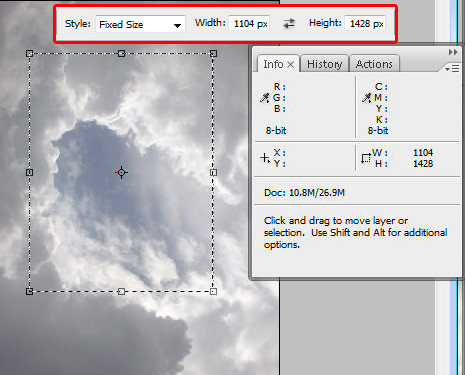
Step 2
Then choose Rectangular Marquee Tool  , choose Fixed Size with Width = 1104px and Height = 1428px and create selection of the area like on the screen shot. Go to Image > Crop.
Step 3
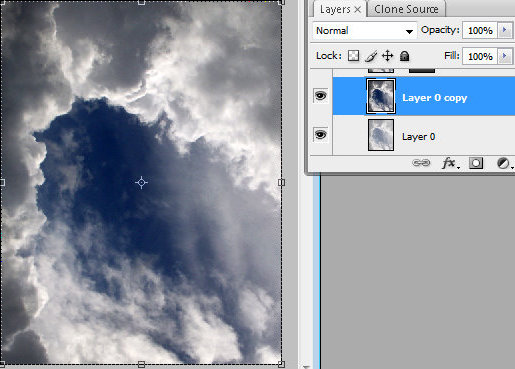
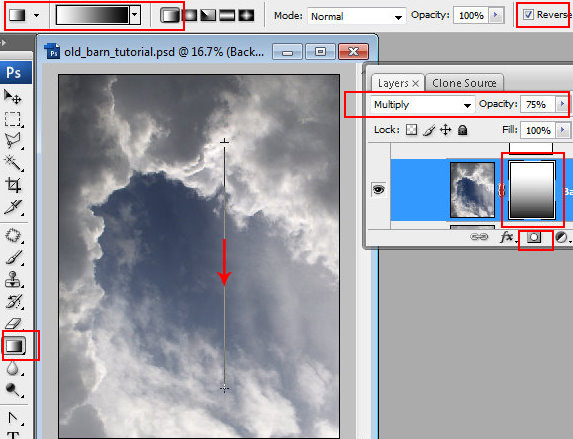
Duplicate sky background layer and apply Auto Contrast adjustment to it, Image > Adjustments > Auto Contrast. Apply Multiply Blending Mode to this layer and Opacity 75%. Add Layer Mask to the duplicated layer – click small icon in the bottom of layers palette. Make mask active and fill it with the linear Black and White gradient.
Step 4
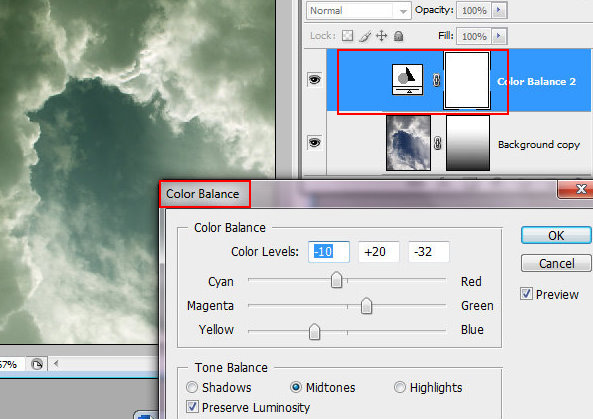
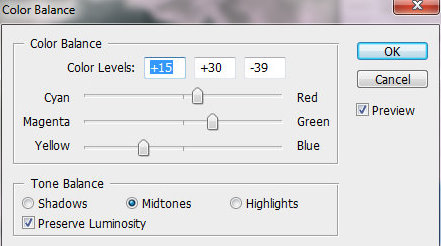
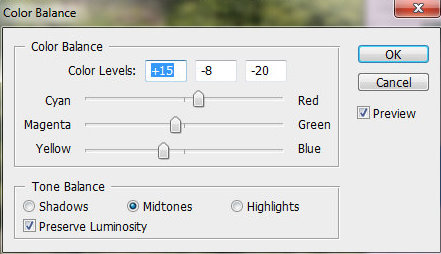
Create a new adjustment layer, click small icon in the bottom of layers palette, choose Color Balance from the drop down menu. Apply following settings.
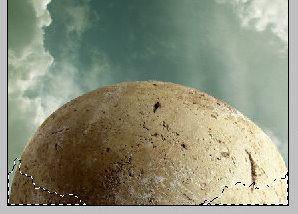
Step 5
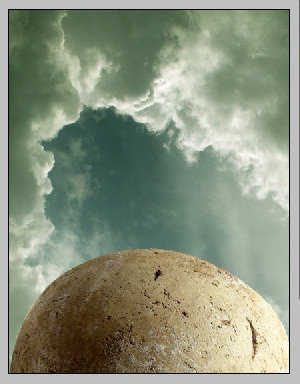
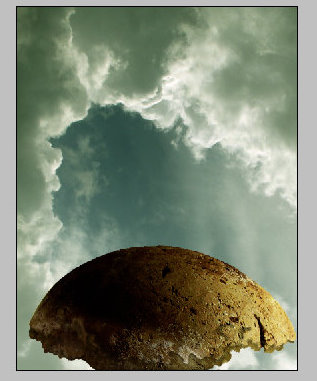
Insert soil sphere, select outside area and remove it. In order to load selection of white background, you may use Magic Wand Tool. Rotate this shape to move dark part of the sphere on the left side, Edit > Transform > Rotate.
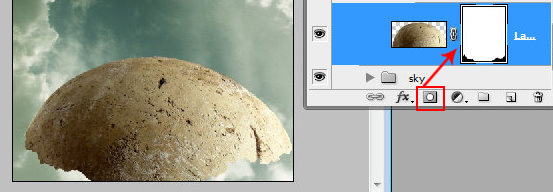
Step 6
Add Layer Mask to the soil layer and erase selected area with small round black brush. You may correct erased contour by using white brush.
Step 7
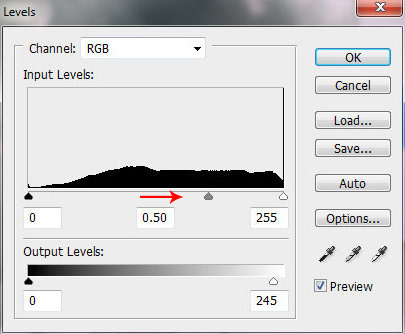
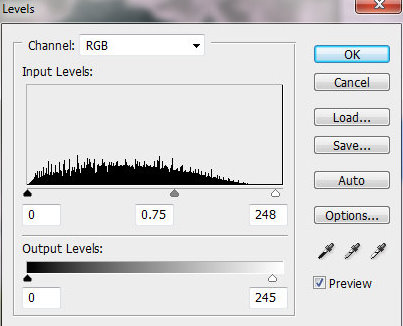
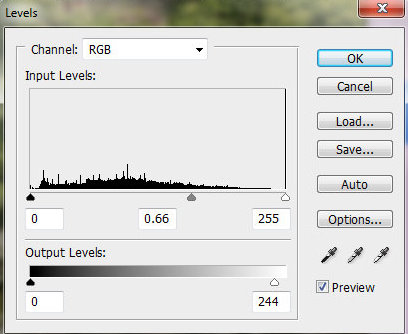
Create a new adjustment layer, click small icon in the bottom part of layers palette, choose Levels. In order to apply levels changes just for the soil shape, right click to adjustments layer and find "Create Clipping Mask". Set levels adjustments and erase left part of adjustment layer with large soft brush.
Step 8
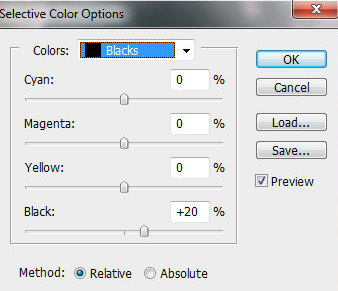
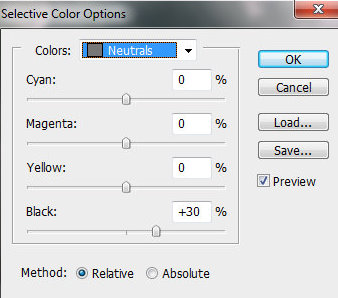
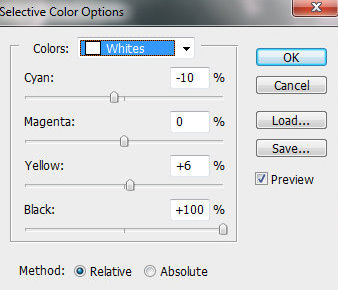
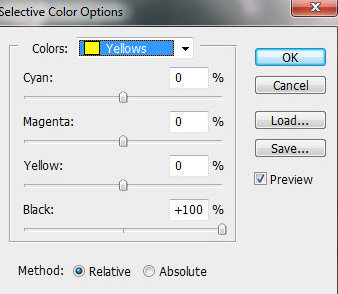
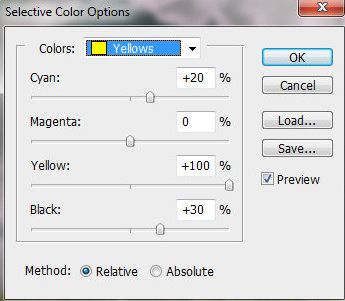
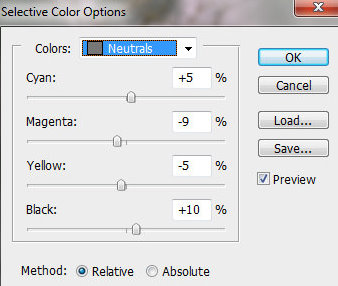
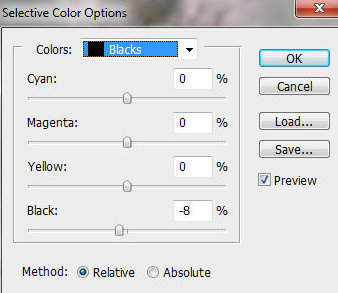
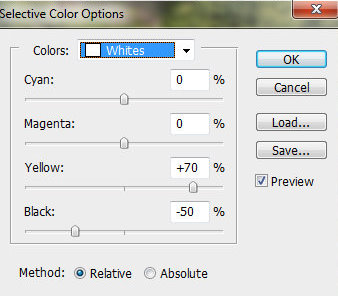
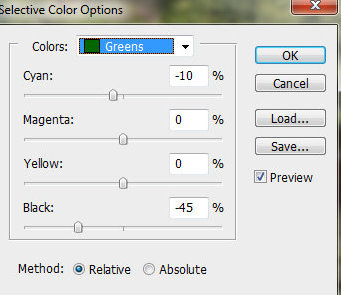
Then create one more adjustment layer clipping mask – "Selective Color" in this time. Apply setting like on the screen shot. Process layer mask with soft brush to create crumbly, spotty texture.
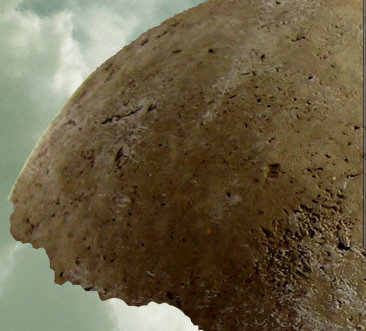
Step 9
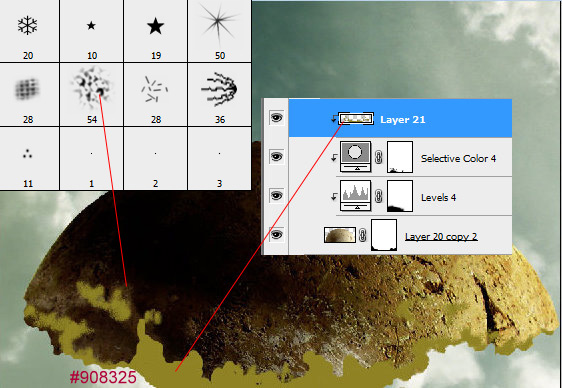
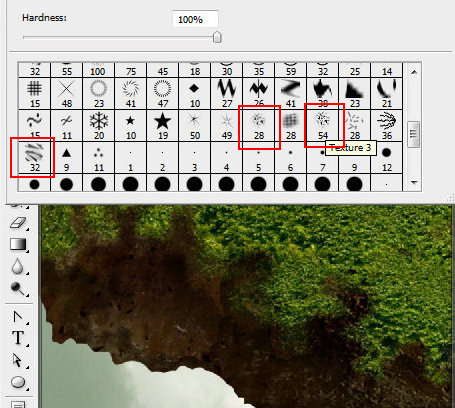
Create a new empty layer, make Clipping Mask from it like with the previous adjustments layers. Draw a ragged contour for the bottom part of the shape. Use regular round brush and "Texture 3" brush from assorted brushes set.
Step 10
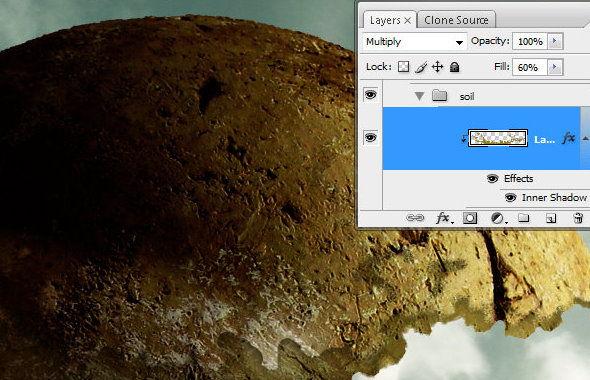
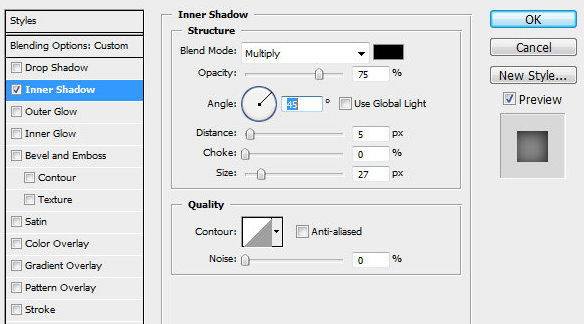
Apply Multiply Blending mode to the created clipping mask layer, set Fill = 60, apply Inner Shadow layer style effect.
Step 11
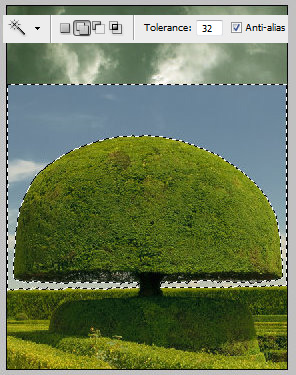
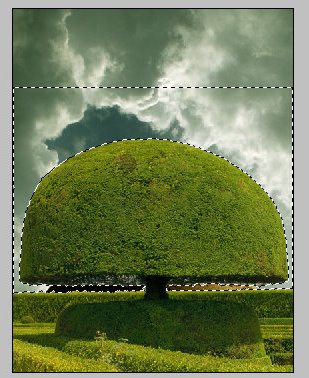
Insert green tree image, select blue sky and white clouds around the tree by using Magic Wand Tool  with setting like on the screen shot. click with Wand Tool several times to caver all sky and white clouds. Clear selected sky area and erase bottom part of the image with Eraser Tool.
Step 12
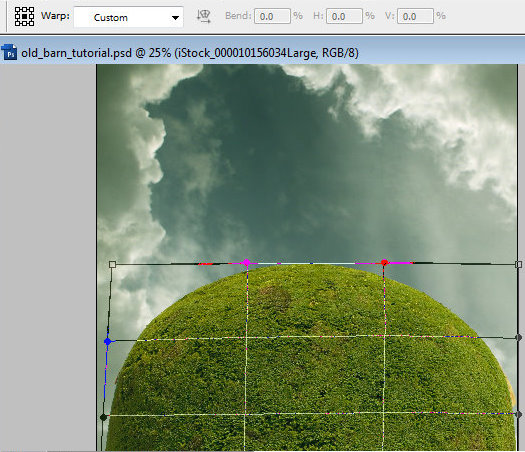
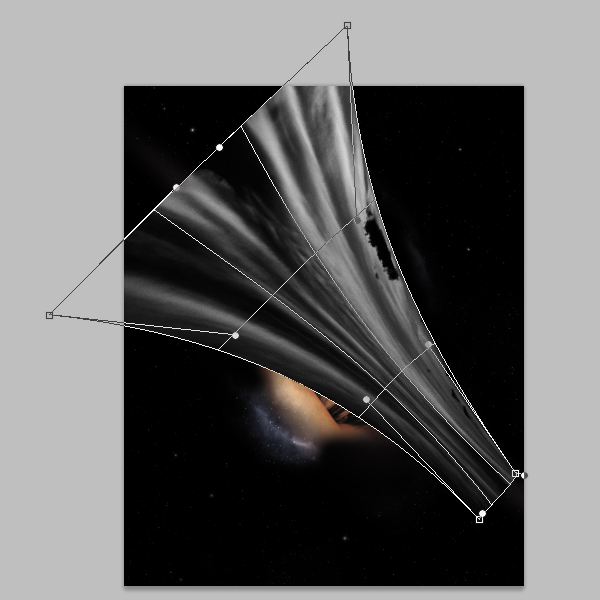
Correct the green shape with Warp transformation to make it more spherical. Edit > Transform > Warp.
Step 13
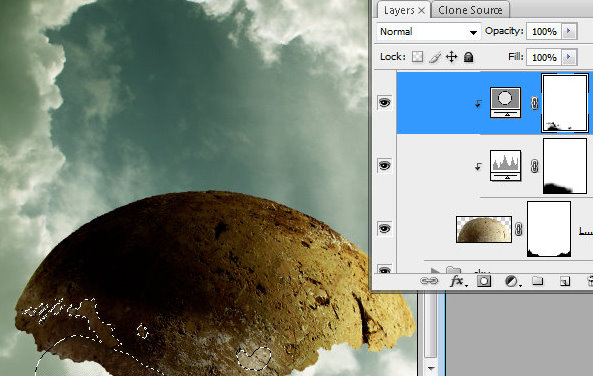
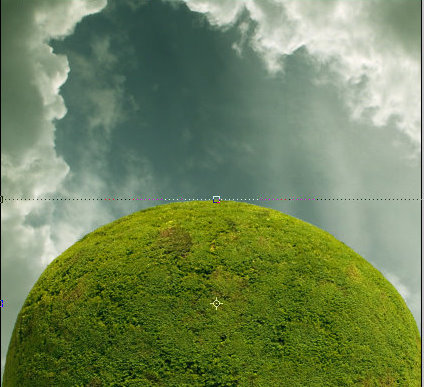
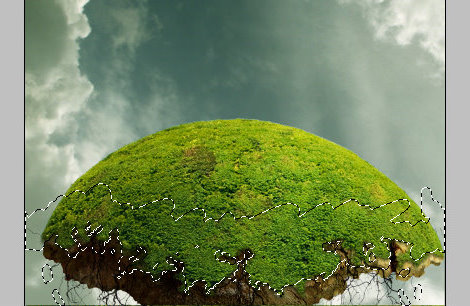
Add Layer Mask to the green sphere and erase bottom part. Try to create ragged and snaky contour. You may use textured brushes from the Photoshop preset assorted brushes set.
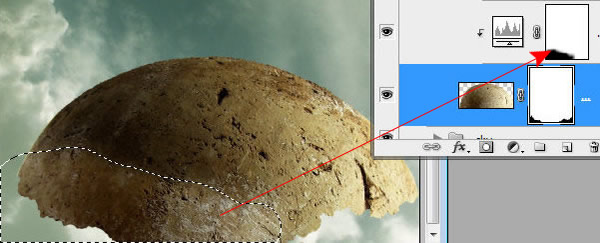
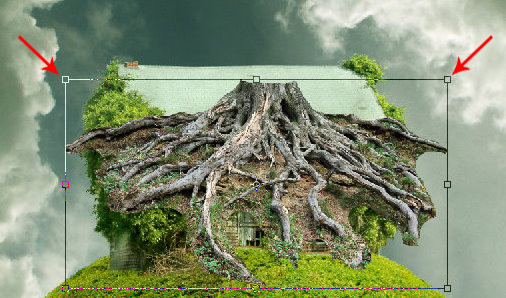
Step 14
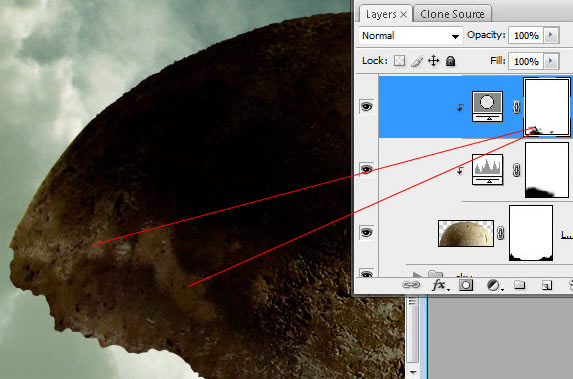
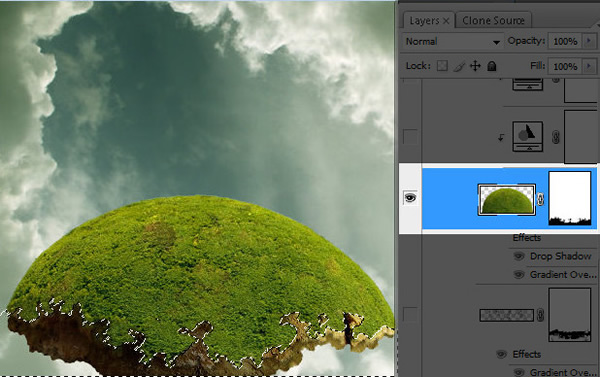
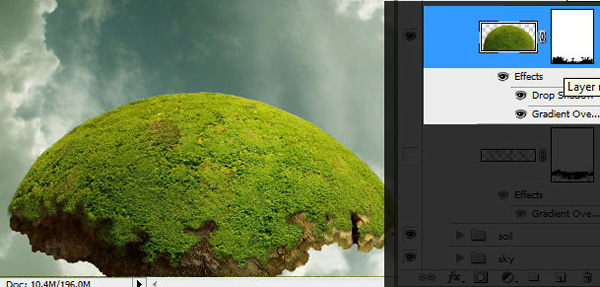
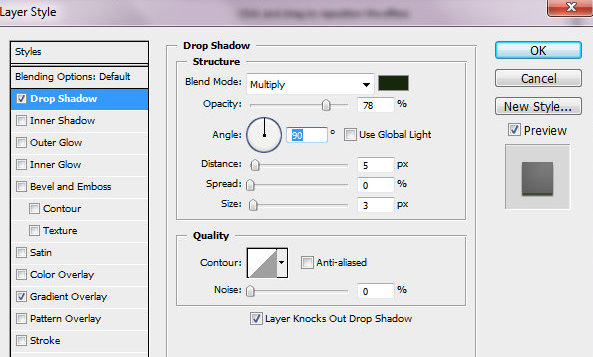
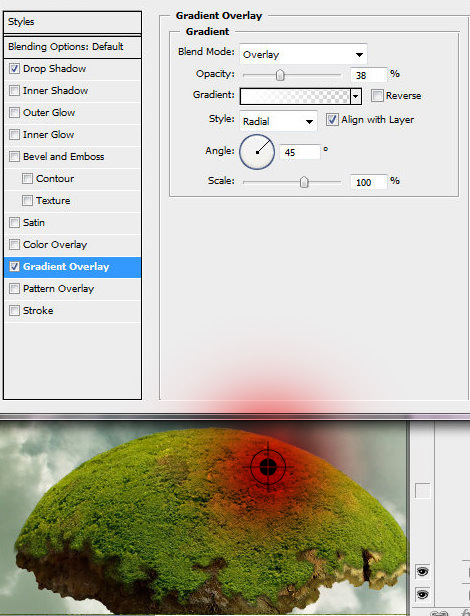
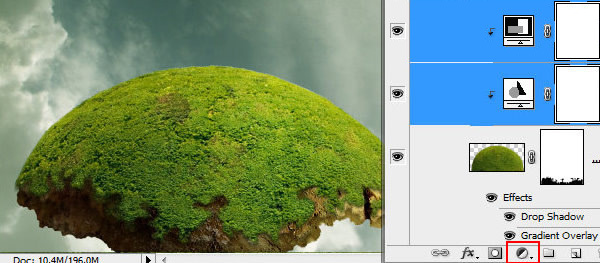
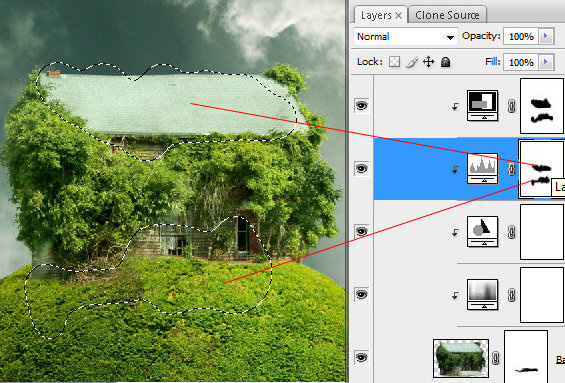
Add Drop Shadow and Gradient Overlay layer style effects to this layer. The center of gradient area is marked with red color on the second screen shot.
Step 15
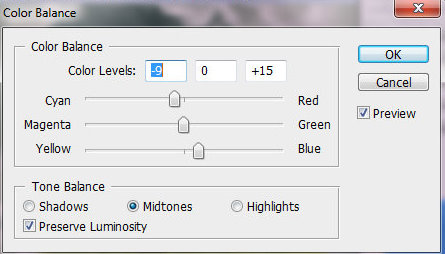
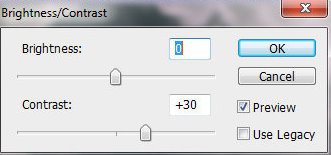
Create new adjustments layers for the green shape – "Color Balance" and "Brightness and Contrast", make clipping masks from them.
Step 16
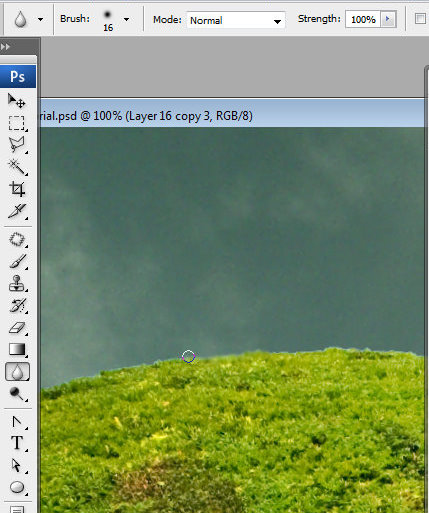
Process green shape top contour with Blur Tool, choose small soft brush for it and strength – 100%.
Step 17
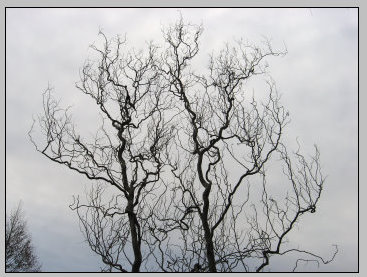
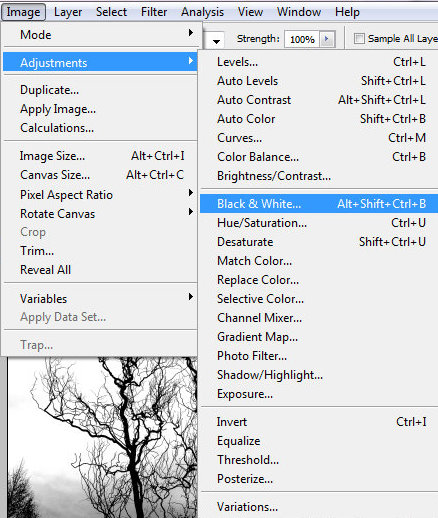
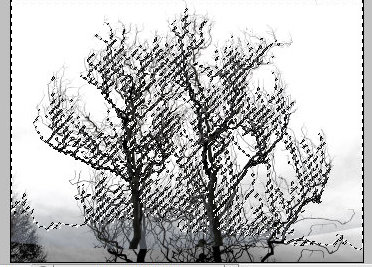
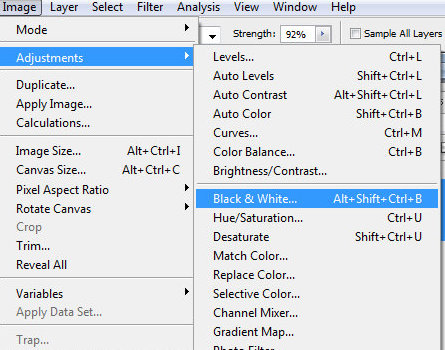
Open branches photo. Make this image black and white. Image > Adjustments > Black & White (none preset).
Step 18
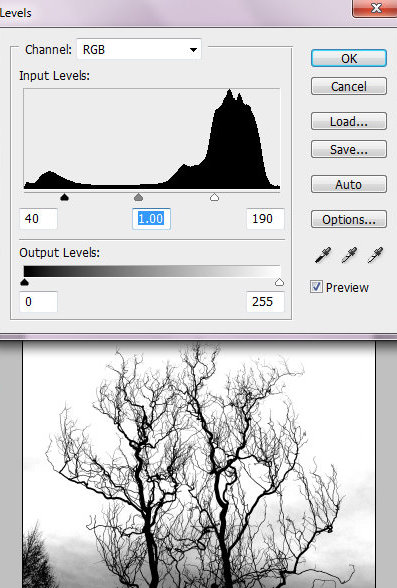
Correct levels settings for this photo, make it more contrast, play with black and white markers to make very dark branches and white background. Don’t pay attention to bottom part of the image. We will use only top branches.
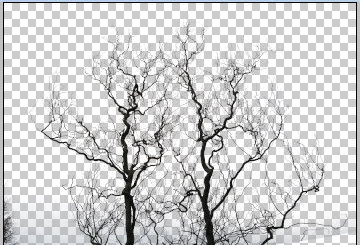
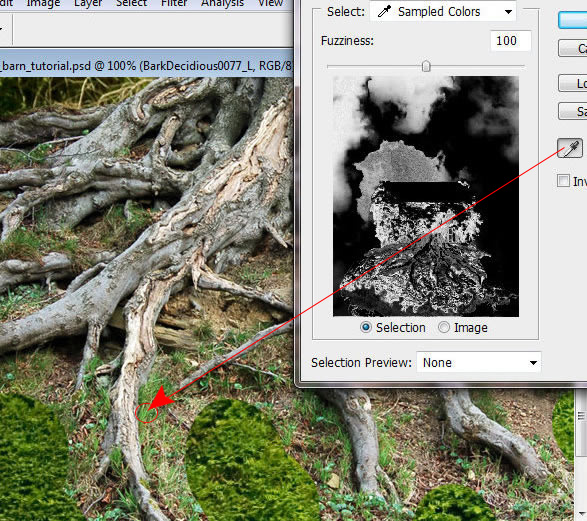
Step 19
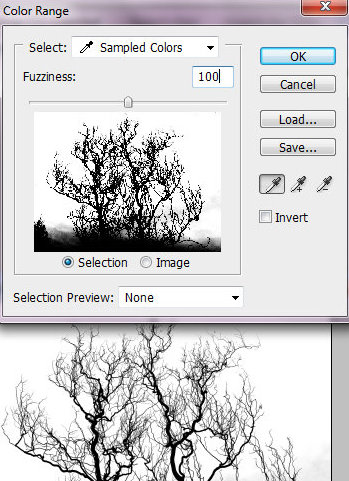
Then load selection for the white background. Go to Select > Color Range. Set Fuzziness around 100% and click with Eyedropper Tool in the white background area, say Ok. Clear selected area. You should have dark branches on the transparent background.
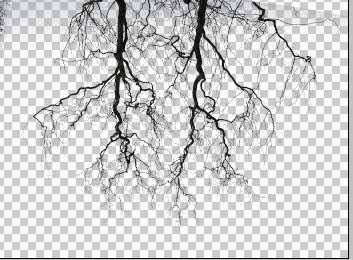
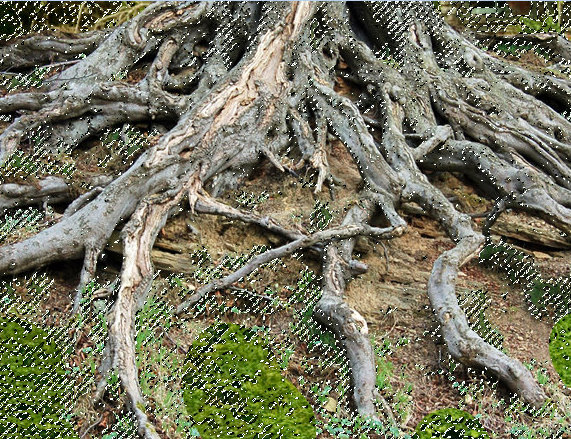
Step 20
Apply Flip Vertical transformation to the layer with branches. Edit > Transform > Flip Vertical. Select bottom part of branches and copy selected area.
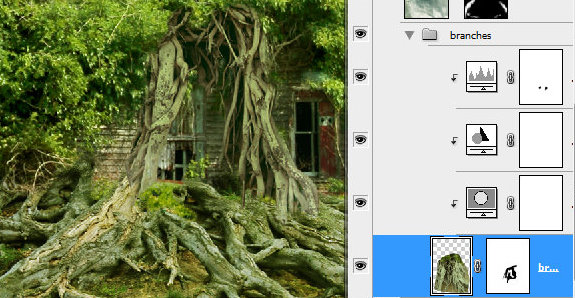
Step 21
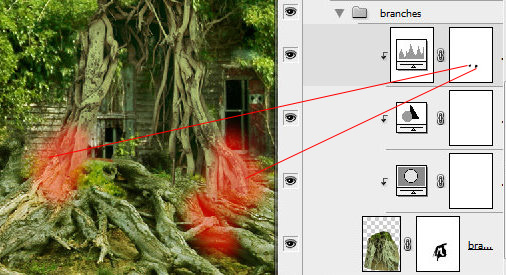
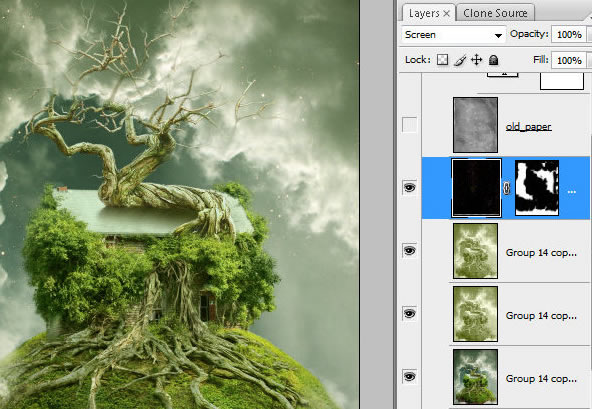
Paste copied part of branches above brown soil layers and below green sphere. Erase outside branches
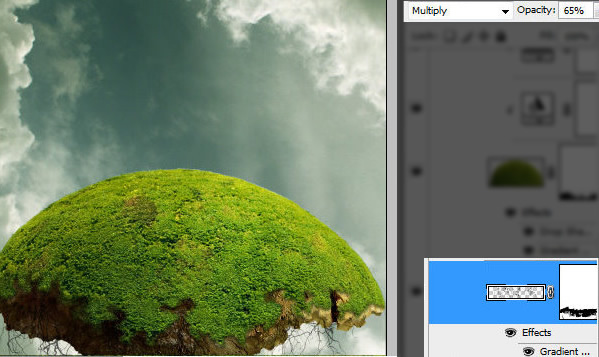
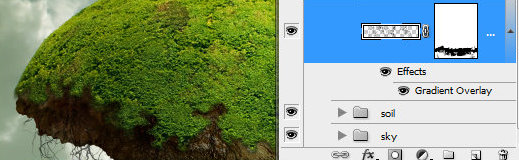
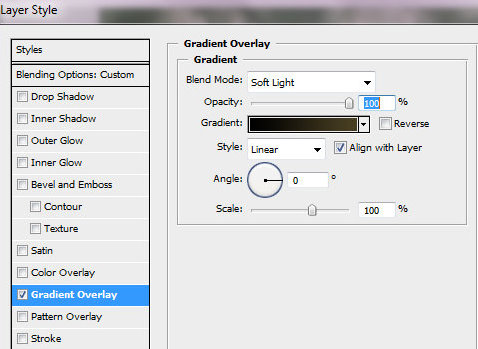
Step 22
Apply Multiply Blending Mode to branches and Opacity 65%. Add Gradient Overlay layer style effect.
Step 23
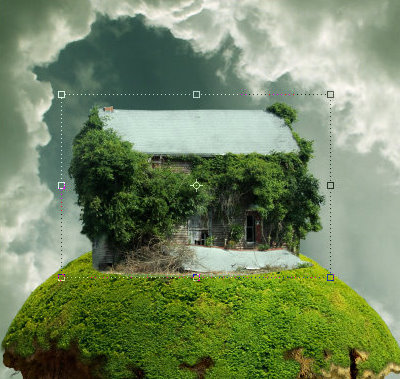
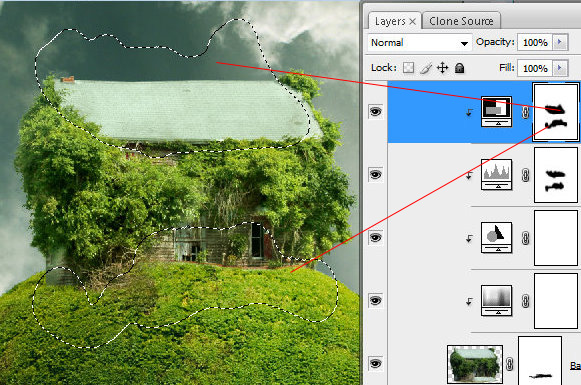
Insert Old Barn image. Erase bottom selected area, use Layer Mask as in the previous steps, it helps to correct erased area many times. Use black brush for erasing and white for restoring. In order to make contour smooth process bottom barn contour with translucent textured Brush.
Step 24
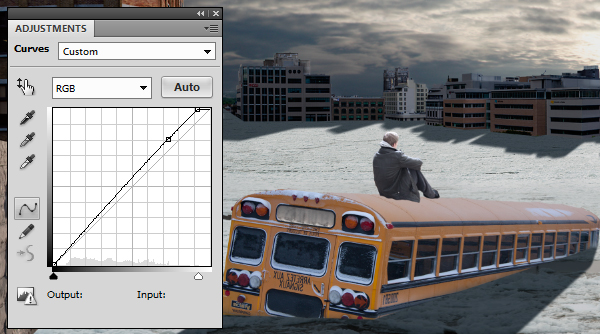
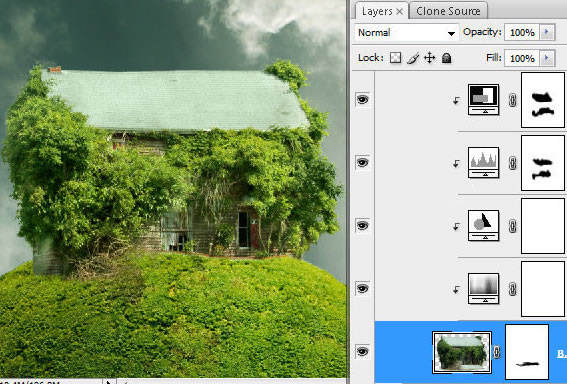
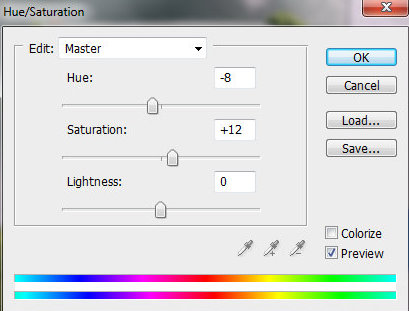
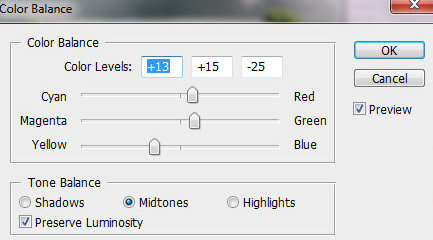
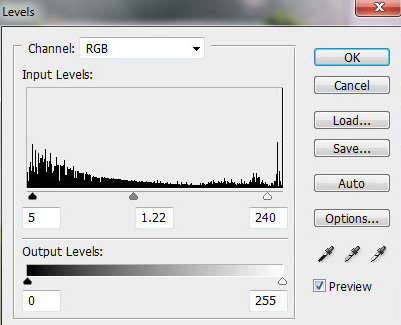
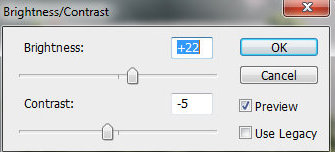
Create several adjustment layers – "Hue/Saturation", "Color Balance", Levels, "Brightness&Contrast". Apply settings like on the screen shot, play with them may be you will fin better combination.
Step 25
Erase selected areas in the "Levels" and "Brightness & Contrast" adjustments layers masks with using large soft brush.
Step 26
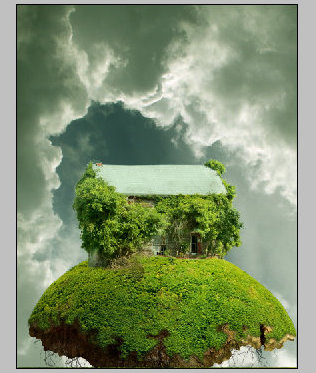
You should have something like this:
Step 27
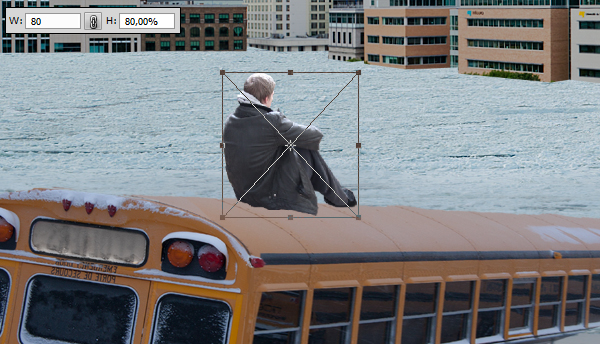
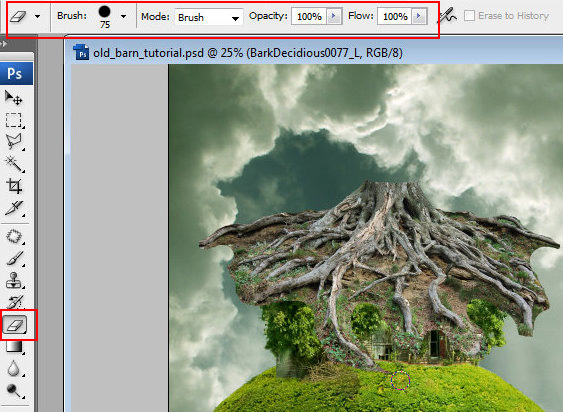
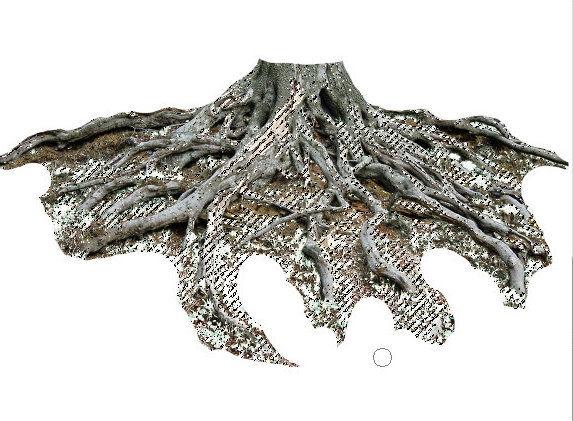
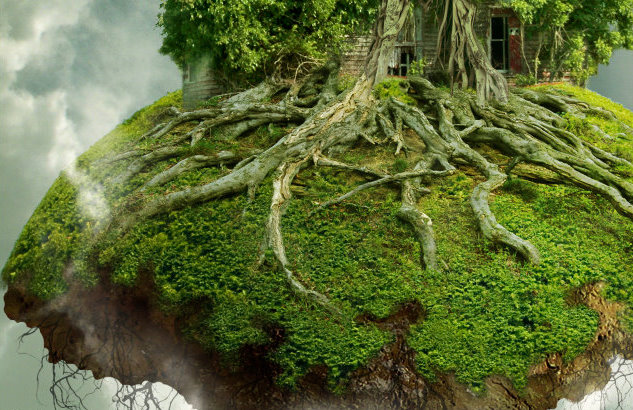
Insert roots image, erase background area with round Eraser Tool. Transform roots image to fit it into Green Sphere shape, Edit > Transform > Free Transformation.
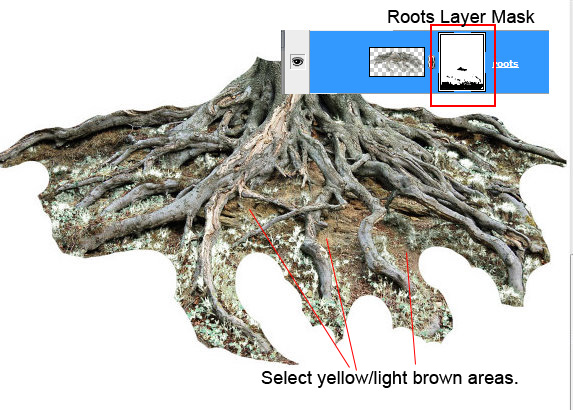
Step 28
Add Layer Mask to the roots layer, then make active main roots layer thumbnail, go to Select > Color Range click with eyedropper tool to the green spot, say "Ok". You will have very similar selection like on the screen shot.
Step 29
Keep selection, make active roots Layer Mask and erase selected green spots, avoid roots. Then go to Color Range again and click with Eyedropper Tool in the other color spot of roots background (yellow, light brown colors), load selection. Erase selected background spots again, avoid roots. Create temporary white layer below roots layer to see result of your actions.
Step 30
Repeat previous actions several times. In final, you may erase and correct roots contour without Color Range selection, just using textured brush. Background shouldn’t be absolutely clear. Correct roots shape with Warp transformation to make it more spherical.
Step 31
Remove white layer.
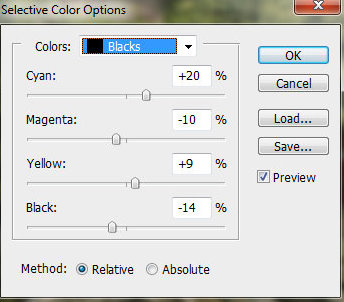
Step 32
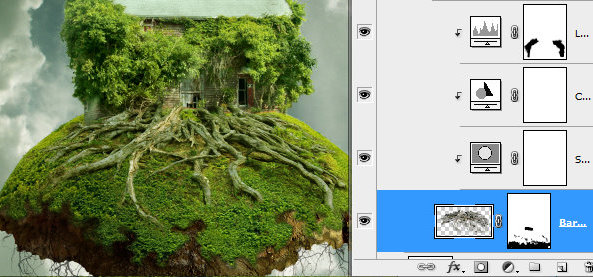
In order to correct brightness and color shade, create new adjustment layers – "Selective Color", "Color Balance", "Levels". Erase left and right side of the "Levels" mask with large soft brush.
Step 33
Create a new empty layer above roots layers, load selection for green shape and fill selected area in a new layer with any color, adjust Fill = 0%. Apply Gradient Overlay effect, the same as for Green Sphere early.
Step 34
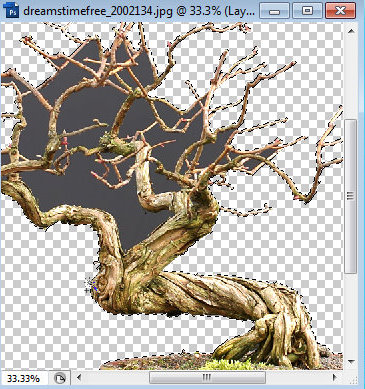
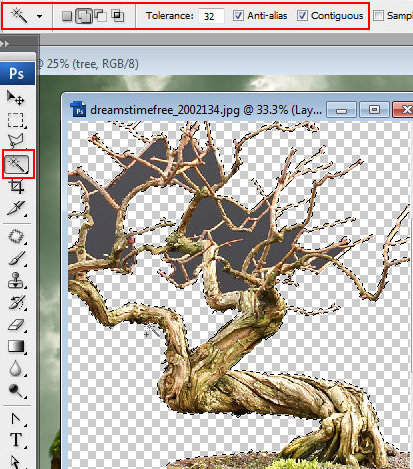
Open tree image, unlock background layer, load selection for background color with Magic Wand Tool and clear selected areas. Erase bottom part with Eraser Tool.
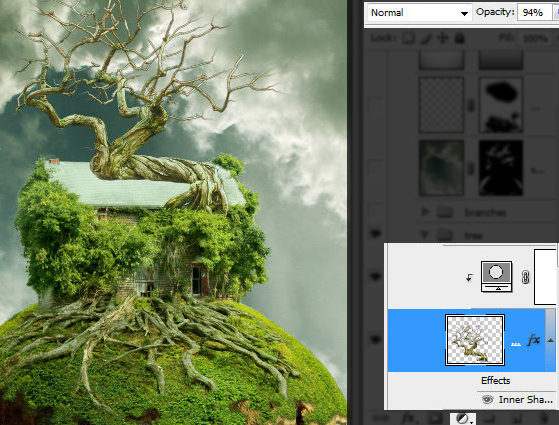
Step 35
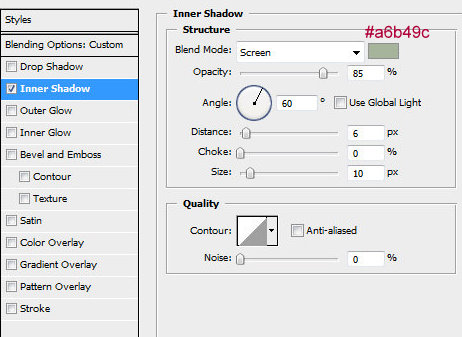
Place tree layer with transparent background to the top of all crated layers. Set Opacity 94%, add adjustment "Selective color" layer and Inner Shadow effect.
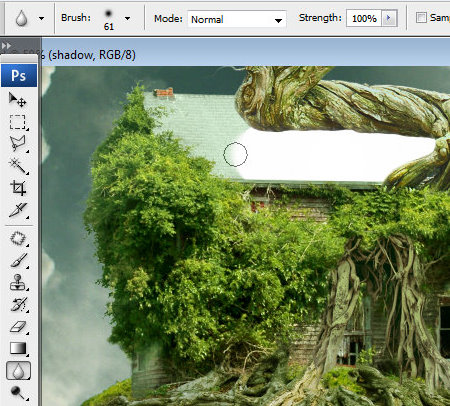
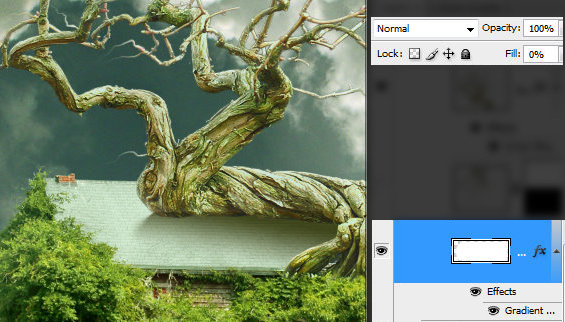
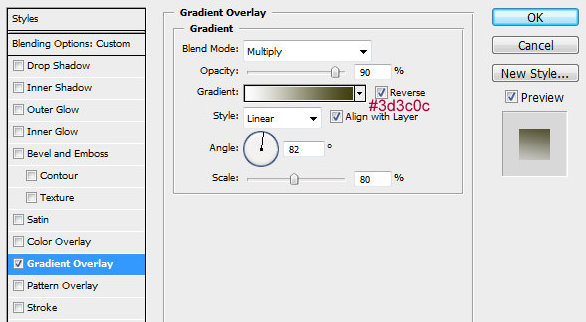
Step 36
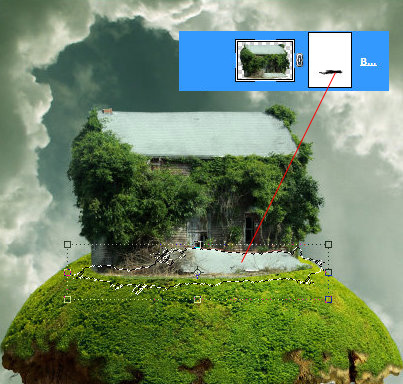
In order to make shadow effect on the roof, create a new layer below tree layer and draw a simple shape like on the screen shot, process left edge with Blur Tool. Set Fill = 0%. Apply Gradient Overlay effect to this layer.
Step 37
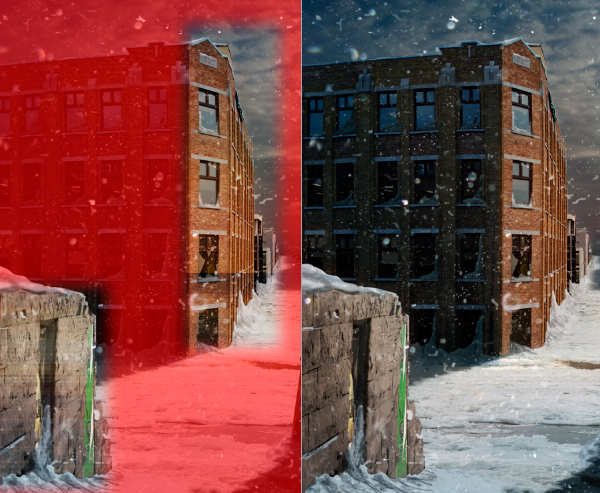
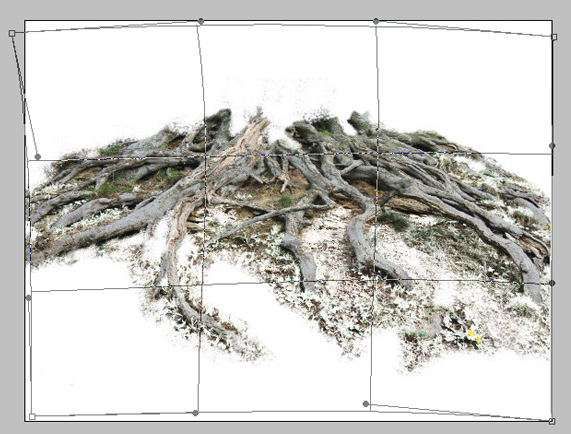
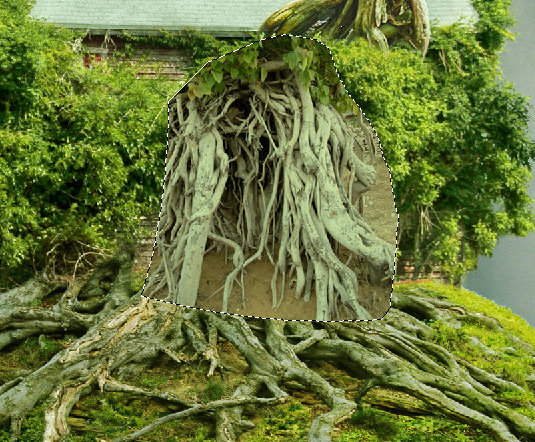
Insert another roots picture, erase red marked space.
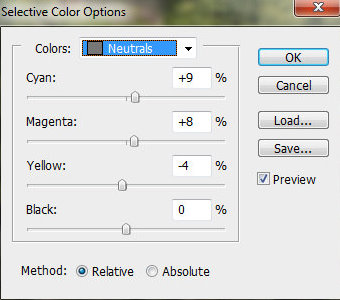
Step 38
Create adjustments Clipping Masks – "Selective Color", "Color Balance", "Levels". Correct "Levels" Layer Mask with round soft brush.
Step 39
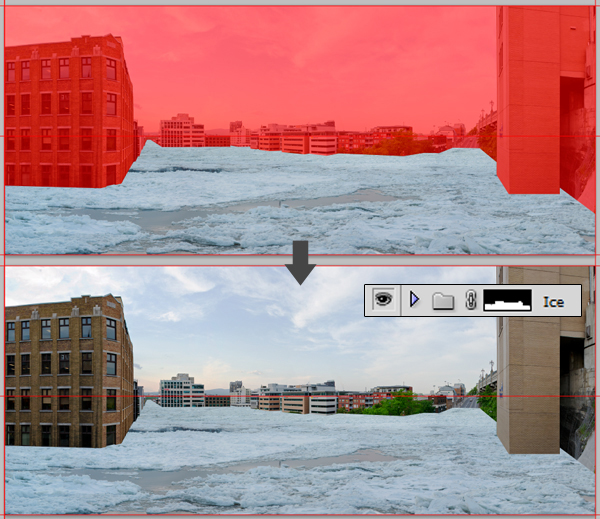
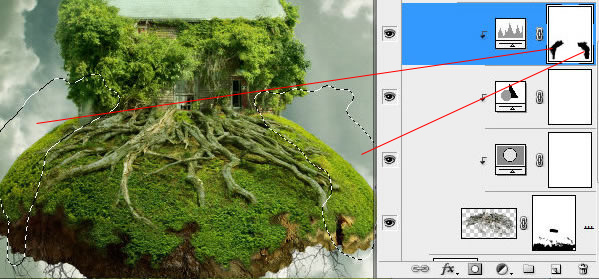
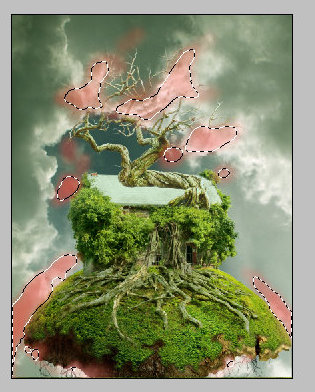
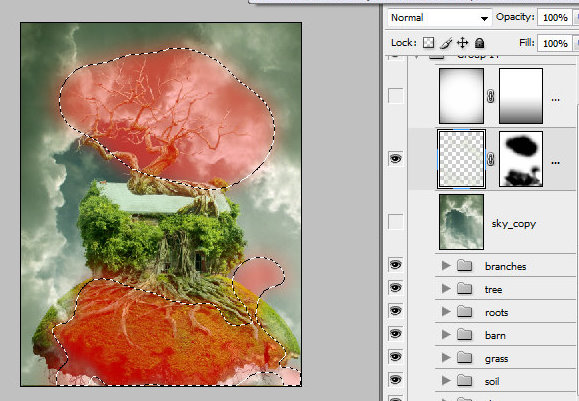
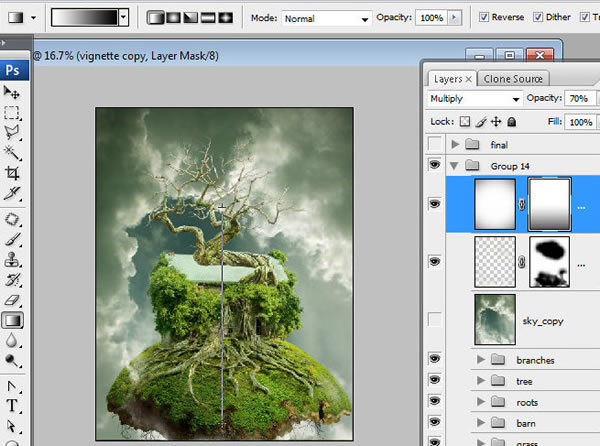
Return to the bottom sky levels. Group sky and sky adjustments layers. Duplicate the group and merge it. Place merged sky layer above all created layers. Add layer mask to this layer and fill it with black color. Then chose translucent soft and round white color Brush Tool (Opacity ~ 16-20%). And restore some areas next to the top branches of the tree and green sphere contour – see red marked spots. Restored areas should be translucent.
Step 40
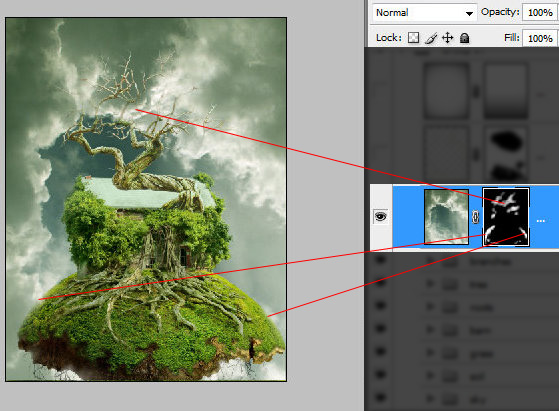
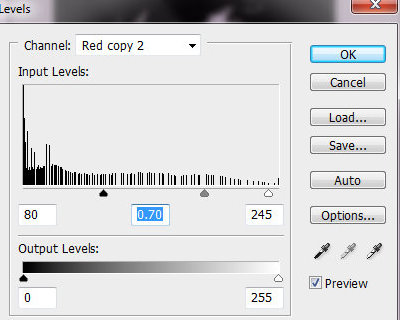
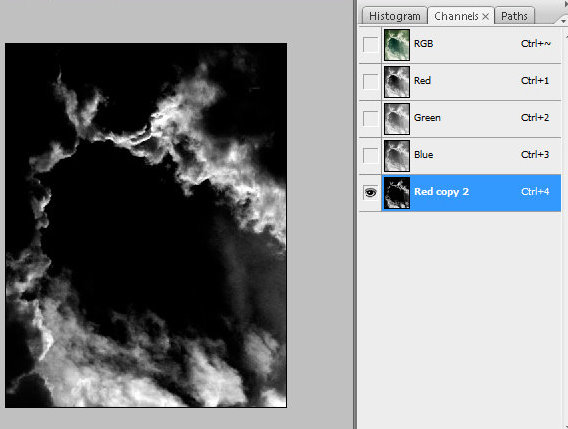
Duplicate merged sky group once again, place it above just created layer from the previous step. Find Channels palette and duplicate red channel. Make duplicated channel very contrast by using levels settings. Command/Ctrl + click red channel thumbnail to load selection for the white area or click small icon  in the bottom part of channels palette.
Step 41
Keep selection, make visible RGB channel and return to layers palette, go to Select > Inverse. Then clear inverted selection area. You should have something similar:
Step 42
Add layer mask to the white clouds layer and erase most part of it (red marked zone). Just leave some white clouds in the bottom left and right parts of photo manipulation.
Step 43
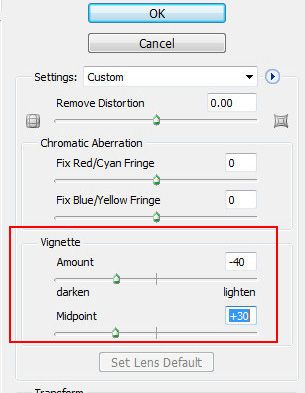
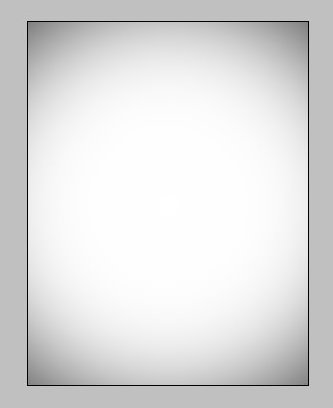
Create a new white layer. Go to Filter > Distort > Lens Correction. Apply Vignette effect.
Step 44
Apply Multiply Blending Mode to created layer, Opacity 70%, add layer Mask and fill it with linear black and white gradient.
Step 45
Merge all created layers.
Step 46
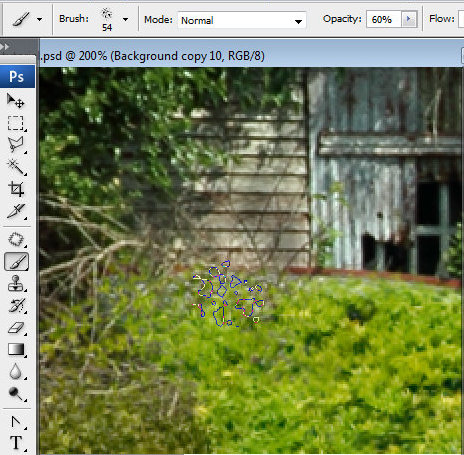
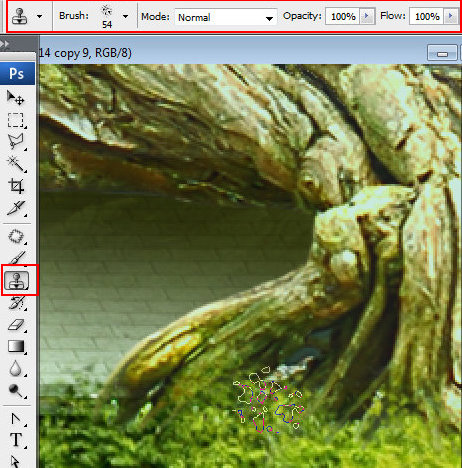
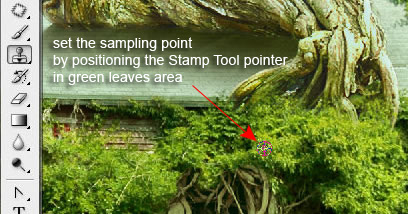
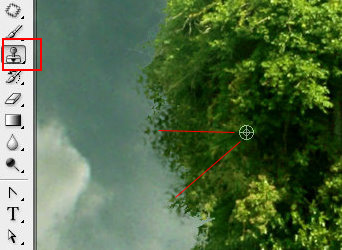
Retouch merged layer. Hide scratchy areas and edges between different details of composition by using Stamp Tool. In order to make edges between tree branched and green leaves smoother choose textured brush for the stamp, set the sampling point by positioning the pointer in green leaves area and Alt-clicking (Windows) or Option-clicking (Mac OS). Then add some green spots from cloned source above branches. Repeat this action several times to hide all rough spots. You may use this instrument to correct and smooth foliage area between sky and barn wall.
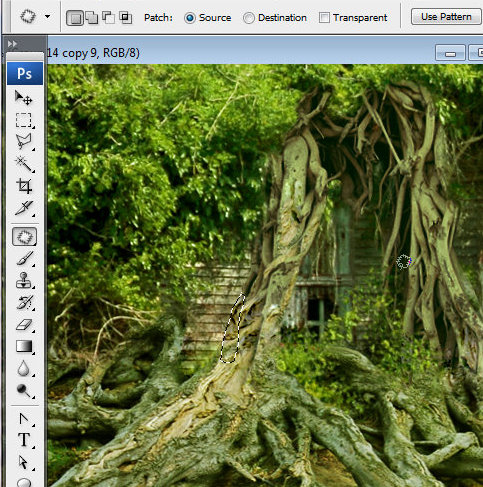
Step 47
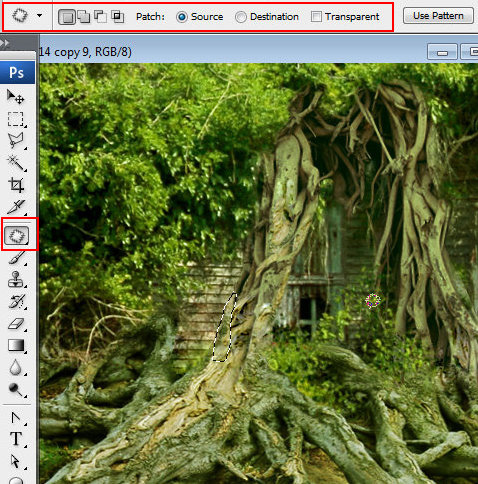
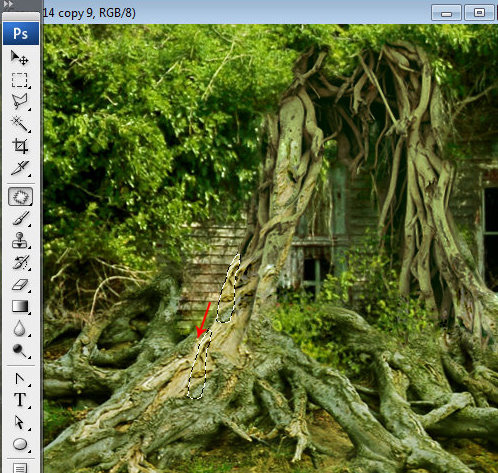
You may also use Patch Tool to correct some bugs. Drag the selection border to mask edges between different stock images. When you release the mouse button, the trace of the selected area is patched with the sampled pixels.
Step 48
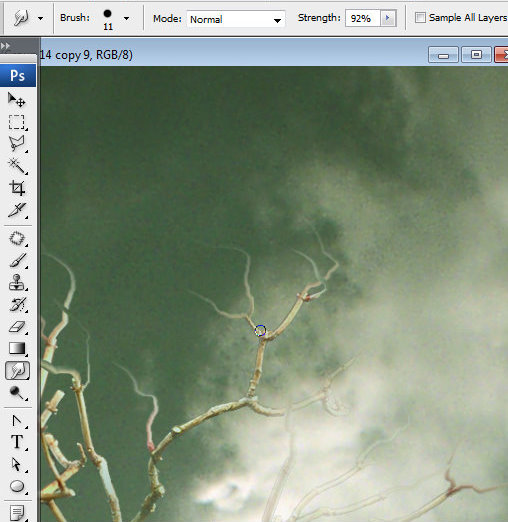
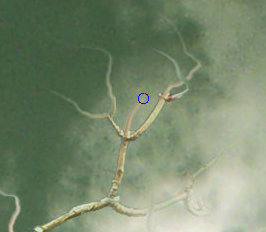
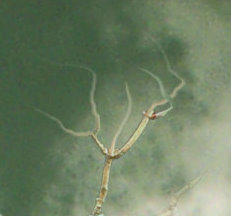
Correct branches tips with Smudge Tool.
Step 49
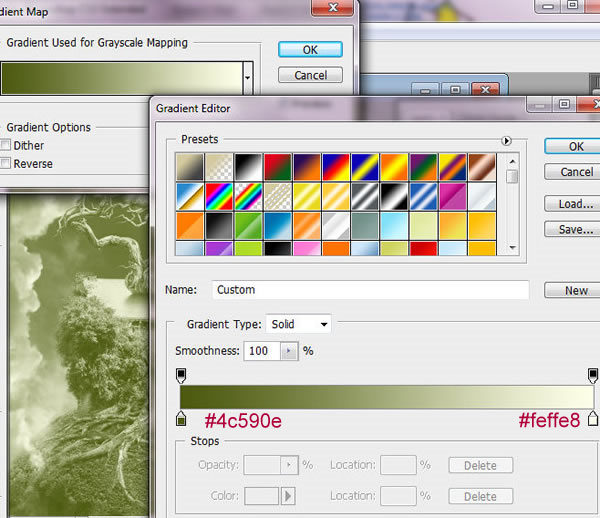
Duplicate retouched layer, apply Gradient Map to it. Image > Adjustment > Gradient map.
Step 50
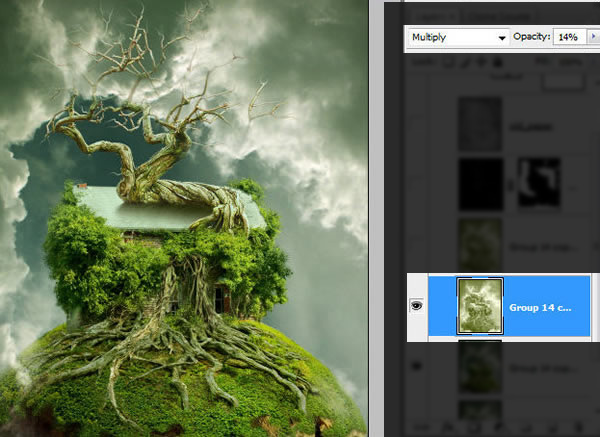
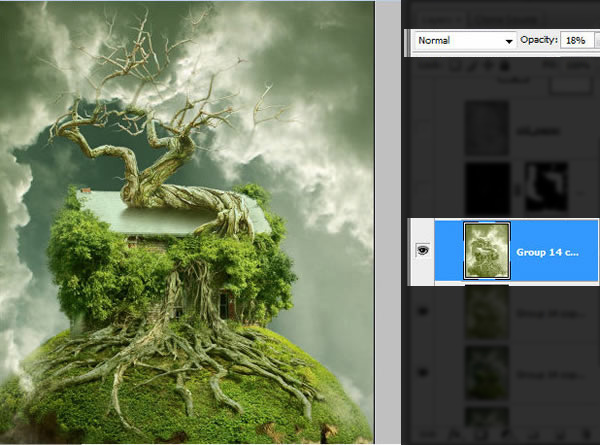
Duplicate layer with Gradient Map effect two times. Apply Multiply Blending Mode and Opacity 14% for the bottom one and Normal Blending Mode and Opacity 18% for the top gradient layer.
Step 51
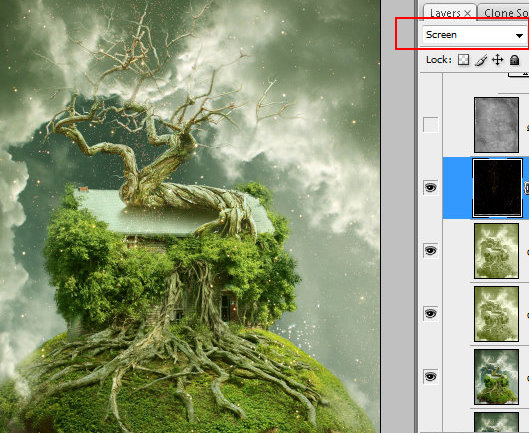
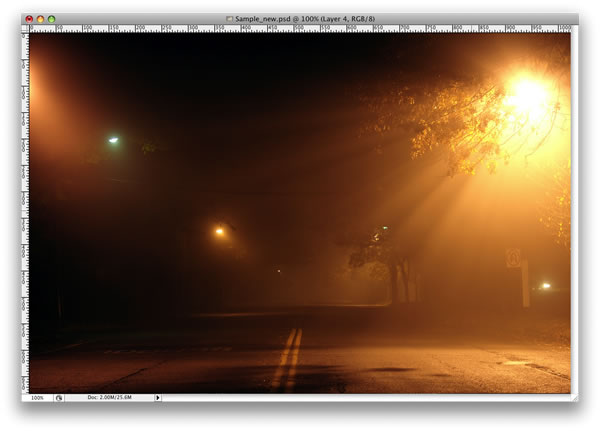
Insert stars image, apply Auto Contrast and Auto Levels to it, choose Screen Blending mode. Also open Levels setting and move black marker little bit right, until the star background becomes absolutely transparent. Erase some stars.
Step 52
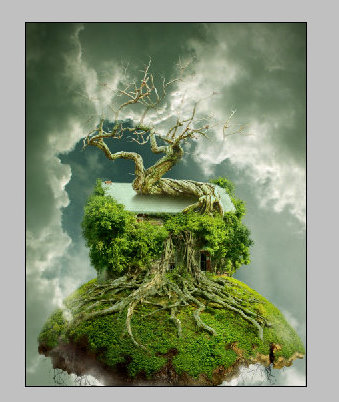
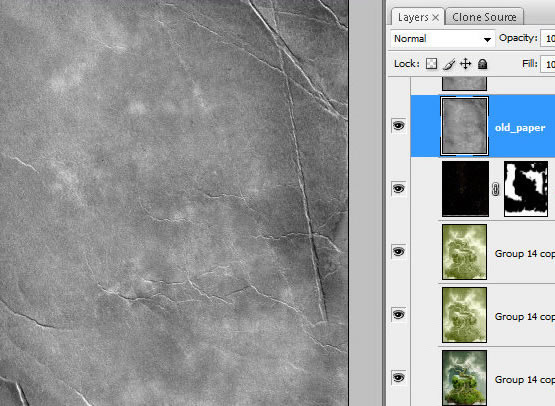
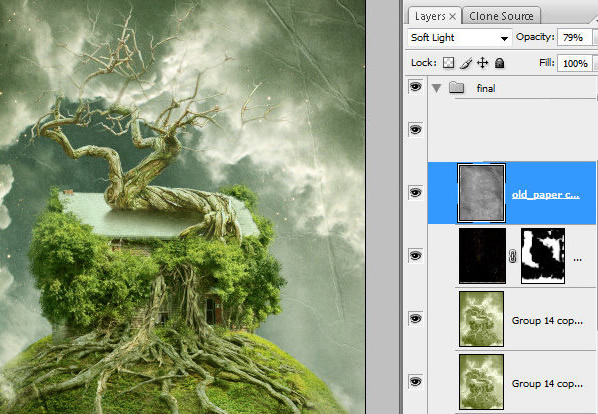
Insert old paper image, make it black and white. Image > Adjustments > Black and White (preset none). Apply Soft Light Blending Mode to this layer and Opacity 79%.
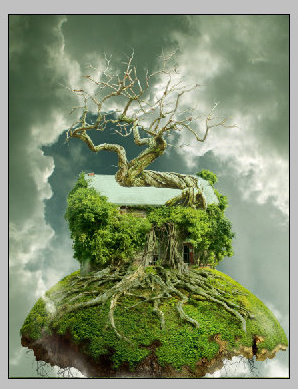
Final Image


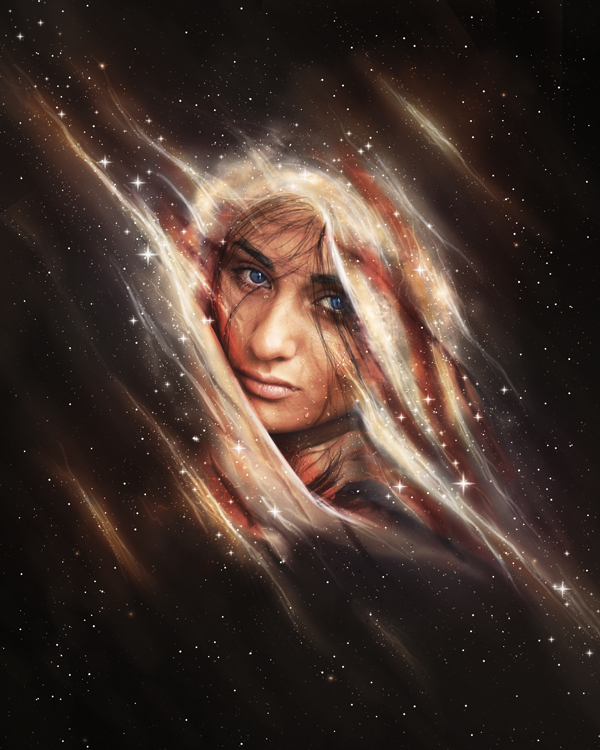
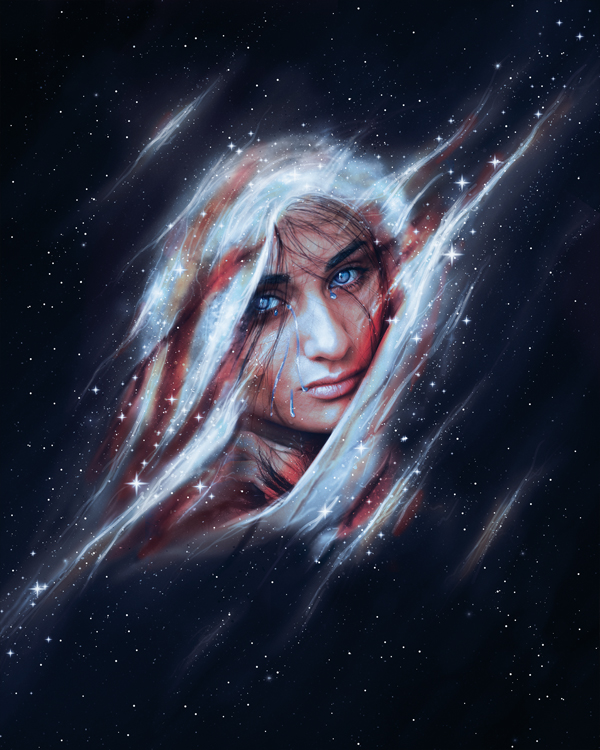
Our culture depicts aliens in all shapes and sizes – but what would a creature from another planet really look like? Would it be the classic anthropomorphic, almond-eyed beings from the X-Files and countless Hollywood movies, or would it be so different from our own DNA to be totally unrecognizable? In this Psd Premium tutorial, author Mark Mayers will mix human and animal textures to transform a 3D render into a fantastical extra terrestrial portrait. This tutorial is available exclusively to Premium Members. If you are looking to take your photo manipulation and 3D rendering skills to the next level then Log in or Join Now to get started!
Author Mark Mayers is a talented designer and illustrator from the UK. He has worked as a designer and creative director for several design/advertising agencies and specializes in print, branding, packaging, and exhibition graphics. Mark began his career when the tools of the trade were markers, layout pads, and most importantly, the ability to draw, but he embraced the digital revolution in the early 90′s and swapped his drawing board for a Mac. Today, Mark freelances from his studio in Cornwall for such clients as American Express, BMW, Future Publishing, IDG Communications and Imagine Publishing.
Premium members can Log in and Download! Otherwise, Join Now! Below are some sample images from this tutorial.
As you know, we run a premium membership system here that costs $9 a month (or $22 for 3 months!) which gives members access to the Source files for tutorials as well as periodic extra tutorials, like this one! You’ll also get access to Net Premium and Vector Premium, too. If you’re a Premium member, you can Log in and Download the Tutorial. If you’re not a member, you can of course Join Today!