Какой рейтинг вас больше интересует?
|
Главная / Главные темы / Тэг «html5»

Тег map 2014-02-21 00:17:48
Теги Код:
+ развернуть текст сохранённая копия
Теги Код: <map> </map> определяют навигационную карту: Код: <html>
<body>
<img src="../images/casino.jpg" width="300" height="200" usemap="#fishki" border="0" hspace="27" />
<map name="fishki">
<area shape="rect" coords="192,90,230,140" alt="Красные фишки" href="#" />
<area shape="circle" coords="275,147,18" alt="Зеленая фишка" href="#" />
</map>
</body>
</html> Атрибут name="" – обязателен. Его значение используется атрибутом usemap="", который находится внутри тега Код: <img /> . Спецификация XHTML также содержит теги Код: <map> </map> .
Тэги: html5
Manual de HTML, CSS (y algo de Javascript) 2014-02-17 12:58:46
Recopilación ordenada de apuntes de diferentes módulos (Lenguajes de marcas, Implementación de ...
+ развернуть текст сохранённая копия
Recopilación ordenada de apuntes de diferentes módulos (Lenguajes de marcas, Implementación de aplicaciones web, etc.) que, unidos, constituyen un completo manual de casi 130 páginas, válido tanto para quien quiera iniciarse en la realización de páginas web como para quien desee aprender algunos trucos avanzados (transpariencias, contorneos, menús, solapas, etc) o quiera empezar a manejar […] - Este artículo pertenece a Un lugar en el mundo... Si quieres ver actualizaciones y comentarios interesantes visita el texto original en: Manual de HTML, CSS (y algo de Javascript) || Hospedado en un Cloud VPS de Gigas.
Тэги: css, css3, desarrollo, html, html5, javascript, lenguajes, marcas, web
Фоновое слайд шоу с BLUR эффектом HTML5 2014-02-16 02:39:42
Красивое фоновое слайд шоу с плавными переходом между изображениям. Я вам распишу как ...
+ развернуть текст сохранённая копия
Красивое фоновое слайд шоу с плавными переходом между изображениям. Я вам распишу как установить этот слайдер на ваш сайт,а как работает это смотрите на сайте источнике. 1.Скачиваем исходник [isnt-logged] Вы не можете скачивать файлы с нашего сайта ,рекомендуем Вам fullscreenimageblureffect.zip (330.88 Kb)[/is-logged] распаковываем и заливаем папки js,css,images в папку с шаблоном.
2.Подключаем стили и скрипты в head в файле main.tpl
Код: <link rel="stylesheet" type="text/css" href="{tpl_url}/css/style.css" />
<noscript>
<style>
.bx-loading{display:none;}
</style>
</noscript>3.Это в тело страницы ,сама структура слайдера.
Код: <div id="bx-wrapper" class="bx-wrapper">
<div class="bx-loading">
<span>Loading...</span>
</div>
<div class="bx-content">
<h2>Shushi Town</h2>
</div>
<div class="bx-thumbs">
<a href="#" class="bx-thumbs-current" style="background-image:url({tpl_url}/images/thumbs/1.jpg)"></a>
<a href="#" style="background-image:url({tpl_url}/images/thumbs/2.jpg)"></a>
<a href="#" style="background-image:url({tpl_url}/images/thumbs/3.jpg)"></a>
<a href="#" style="background-image:url({tpl_url}/images/thumbs/4.jpg)"></a>
<a href="#" style="background-image:url({tpl_url}/images/thumbs/5.jpg)"></a>
<a href="#" style="background-image:url({tpl_url}/images/thumbs/6.jpg)"></a>
<a href="#" style="background-image:url({tpl_url}/images/thumbs/7.jpg)"></a>
</div>
<div class="bx-container">
<img src="{tpl_url}/images/large/1.jpg" alt="image01" title="Shushi Town"/>
<img src="{tpl_url}/images/large/2.jpg" alt="image02" title="Raw Love"/>
<img src="{tpl_url}/images/large/3.jpg" alt="image03" title="Freshness"/>
<img src="{tpl_url}/images/large/4.jpg" alt="image04" title="Crunchbite"/>
<img src="{tpl_url}/images/large/5.jpg" alt="image05" title="Flavour Bomb"/>
<img src="{tpl_url}/images/large/6.jpg" alt="image06" title="Tenderness"/>
<img src="{tpl_url}/images/large/7.jpg" alt="image07" title="Aroma Paradise"/>
</div>
<div class="bx-overlay"></div>
</div> 4.Перед закрытием /body добавляем скрипты
Код: <script type="text/javascript" src="http://ajax.googleapis.com/ajax/libs/jquery/1.7.0/jquery.min.js"></script>/*если уже подключен jquery то повторно подключать не надо*/
<script type="text/javascript" src="{tpl_url}/js/StackBlur.js"></script>
<script type="text/javascript">
$(function() {
var BlurBGImage = (function() {
var $bxWrapper = $('#bx-wrapper'),
// loading status to show while preloading images
$bxLoading = $bxWrapper.find('div.bx-loading'),
// container for the bg images and respective canvas
$bxContainer = $bxWrapper.find('div.bx-container'),
// the bg images we are gonna use
$bxImgs = $bxContainer.children('img'),
// total number of bg images
bxImgsCount = $bxImgs.length,
// the thumb elements
$thumbs = $bxWrapper.find('div.bx-thumbs > a').hide(),
// the title for the current image
$title = $bxWrapper.find('h2:first'),
// current image's index
current = 0,
// variation to show the image:
// (1) - blurs the current one, fades out and shows the next image
// (2) - blurs the current one, fades out, shows the next one (but initially blurred)
// speed is the speed of the animation
// blur Factor is the factor used in the StackBlur script
animOptions = { speed : 700, variation : 1, blurFactor : 10 },
// control if currently animating
isAnim = false,
// check if canvas is supported
supportCanvas = Modernizr.canvas,
// init function
init = function() {
// preload all images and respective canvas
var loaded = 0;
$bxImgs.each( function(i) {
var $bximg = $(this);
// save the position of the image in data-pos
$('<img data-pos="' + $bximg.index() + '"/>').load(function() {
var $img = $(this),
// size of image to be fullscreen and centered
dim = getImageDim( $img.attr('src') ),
pos = $img.data( 'pos' );
// add the canvas to the DOM
$.when( createCanvas( pos, dim ) ).done( function() {
++loaded;
// all images and canvas loaded
if( loaded === bxImgsCount ) {
// show thumbs
$thumbs.fadeIn();
// apply style for bg image and canvas
centerImageCanvas();
// hide loading status
$bxLoading.hide();
// initialize events
initEvents();
}
});
}).attr( 'src', $bximg.attr('src') );
});
},
// creates the blurred canvas image
createCanvas = function( pos, dim ) {
return $.Deferred( function(dfd) {
// if canvas not supported return
if( !supportCanvas ) {
dfd.resolve();
return false;
}
// create the canvas element:
// size and position will be the same like the fullscreen image
var $img = $bxImgs.eq( pos ),
imgW = dim.width,
imgH = dim.height,
imgL = dim.left,
imgT = dim.top,
canvas = document.createElement('canvas');
canvas.className = 'bx-canvas';
canvas.width = imgW;
canvas.height = imgH;
canvas.style.width = imgW + 'px';
canvas.style.height = imgH + 'px';
canvas.style.left = imgL + 'px';
canvas.style.top = imgT + 'px';
canvas.style.visibility = 'hidden';
// save position of canvas to know which image this is linked to
canvas.setAttribute('data-pos', pos);
// append the canvas to the same container where the images are
$bxContainer.append( canvas );
// blur it using the StackBlur script
stackBlurImage( $img.get(0), dim, canvas, animOptions.blurFactor, false, dfd.resolve );
}).promise();
},
// gets the image size and position in order to make it fullscreen and centered.
getImageDim = function( img ) {
var $img = new Image();
$img.src = img;
var $win = $( window ),
w_w = $win.width(),
w_h = $win.height(),
r_w = w_h / w_w,
i_w = $img.width,
i_h = $img.height,
r_i = i_h / i_w,
new_w, new_h, new_left, new_top;
if( r_w > r_i ) {
new_h = w_h;
new_w = w_h / r_i;
}
else {
new_h = w_w * r_i;
new_w = w_w;
}
return {
width : new_w,
height : new_h,
left : ( w_w - new_w ) / 2,
top : ( w_h - new_h ) / 2
};
},
// initialize the events
initEvents = function() {
$( window ).on('resize.BlurBGImage', function( event ) {
// apply style for bg image and canvas
centerImageCanvas();
return false;
});
// clicking on a thumb shows the respective bg image
$thumbs.on('click.BlurBGImage', function( event ) {
var $thumb = $(this),
pos = $thumb.index();
if( !isAnim && pos !== current ) {
$thumbs.removeClass('bx-thumbs-current');
$thumb.addClass('bx-thumbs-current');
isAnim = true;
// show the bg image
showImage( pos );
}
return false;
});
},
// apply style for bg image and canvas
centerImageCanvas = function() {
$bxImgs.each( function(i) {
var $bximg = $(this),
dim = getImageDim( $bximg.attr('src') ),
$currCanvas = $bxContainer.children('canvas[data-pos=' + $bximg.index() + ']'),
styleCSS = {
width : dim.width,
height : dim.height,
left : dim.left,
top : dim.top
};
$bximg.css( styleCSS );
if( supportCanvas )
$currCanvas.css( styleCSS );
if( i === current )
$bximg.show();
});
},
// shows the image at position "pos"
showImage = function( pos ) {
// current image
var $bxImage = $bxImgs.eq( current );
// current canvas
$bxCanvas = $bxContainer.children('canvas[data-pos=' + $bxImage.index() + ']'),
// next image to show
$bxNextImage = $bxImgs.eq( pos ),
// next canvas to show
$bxNextCanvas = $bxContainer.children('canvas[data-pos='+$bxNextImage.index()+']');
// if canvas is supported
if( supportCanvas ) {
$.when( $title.fadeOut() ).done( function() {
$title.text( $bxNextImage.attr('title') );
});
$bxCanvas.css( 'z-index', 100 ).css('visibility','visible');
$.when( $bxImage.fadeOut( animOptions.speed ) ).done( function() {
switch( animOptions.variation ) {
case 1 :
$title.fadeIn( animOptions.speed );
$.when( $bxNextImage.fadeIn( animOptions.speed ) ).done( function() {
$bxCanvas.css( 'z-index', 1 ).css('visibility','hidden');
current = pos;
$bxNextCanvas.css('visibility','hidden');
isAnim = false;
});
break;
case 2 :
$bxNextCanvas.css('visibility','visible');
$.when( $bxCanvas.fadeOut( animOptions.speed * 1.5 ) ).done( function() {
$(this).css({
'z-index' : 1,
'visibility' : 'hidden'
}).show();
$title.fadeIn( animOptions.speed );
$.when( $bxNextImage.fadeIn( animOptions.speed ) ).done( function() {
current = pos;
$bxNextCanvas.css('visibility','hidden');
isAnim = false;
});
});
break;
};
});
}
// if canvas is not shown just work with the bg images
else {
$title.hide().text( $bxNextImage.attr('title') ).fadeIn( animOptions.speed );
$.when( $bxNextImage.css( 'z-index', 102 ).fadeIn( animOptions.speed ) ).done( function() {
current = pos;
$bxImage.hide();
$(this).css( 'z-index', 101 );
isAnim = false;
});
}
};
return {
init : init
};
})();
// call the init function
BlurBGImage.init();
});
</script> 5.Вроде все,кому что не понятно пишем комментарии или смотрим исходник.
Тэги: html5,, анимация, интерфейс,, слайдшоу
Дайджест интересных материалов из мира веб-разработки и IT за последнюю неделю №96 (9 — 15 февраля 2014) 2014-02-15 23:33:19
Предлагаем вашему вниманию подборку с ссылками на полезные ресурсы, интересные материалы и IT- ...
+ развернуть текст сохранённая копия
Предлагаем вашему вниманию подборку с ссылками на полезные ресурсы, интересные материалы и IT-новости
Читать дальше →
Тэги: api, css, css3, emberjs, group, html, html5, jquery, zfort, блог, браузеры, веб-дизайн, веб-разработка, дайджест, интересное, компании, новости, ресурсы, сми, ссылки
[Из песочницы] Bootstrap Modal Iframe Костыль 2014-02-12 13:46:09
 + развернуть текст сохранённая копия + развернуть текст сохранённая копия
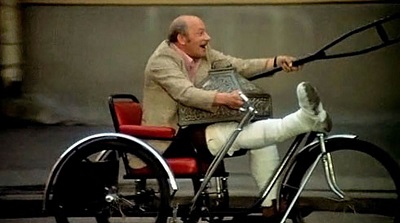
«Не надо, я сам»
Хромой Итальянец
Постановка задачи
Предлагается следующий сценарий: заказчик хочет разместить на сайтах своих партнёров небольшой горизонтальный динамический баннер с некой бизнес логикой, несложная калькуляция, табличка, локализация. Помимо этого, требуется всплывающее окно с крупной картинкой и контентом, которые по высоте больше чем родительский баннер.
Сразу дали понять, что партнёры, хоть и партнёры, но размещать у себя что-либо сложное не будут, то есть про jQuery забыли. Стандартное решение – iframe с минимальной функцией resize на голом JavaScript.
Подробности, пример, код
Тэги: bootstrap, child, html, html5, iframe, javascript, jquery, modal, parent, resize, window.postmessage, веб-разработка
Главная / Главные темы / Тэг «html5»
|
Взлеты Топ 5
Падения Топ 5
|