|
Какой рейтинг вас больше интересует?
|
Главная /
Каталог блоговCтраница блогера PSDTUTS/Записи в блоге |
|
PSDTUTS
Голосов: 2 Адрес блога: http://psdtuts.com Добавлен: 2008-10-26 20:48:58 блограйдером DrakAngel |
|
Best of the Web – August 2011
2011-08-31 17:00:29 (читать в оригинале)As you know, each month, we round up some of the best Photoshop-related content from around the web. This month, there were some excellent Photoshop tutorials and articles to choose from so please take a moment to review our favorites from August 2011.
Photoshop Tutorials
-

Captain America Shield in Photoshop
In this tutorial, Abduzeedo will demonstrate how to create Captain America’s shield in Photoshop.
Visit Tutorial
-

How to Make a Car Advertisement Poster Design
In this tutorial, Creative Fan will show how to create a cool off-road auto advertisement.
Visit Tutorial
-

How Many Layers?
In this video tutorial, Ctrl+Paint will explain how many layers you will need in your digital painting.
Visit Tutorial
-

Photoshop Tutorial: Create a Feathery Shoe from Scratch
This tutorial from Pxleyes will show how to create a feathery shoe from scratching using Photoshop.
Visit Tutorial
-

Cold Beer Glass Illustration
This tutorial from Alfoart will explain how to illustrate a cold beer mug in Photoshop.
Visit Tutorial
-

Hidden Gems: Quickly Remove Power Lines With Photoshop CS5
In this tutorial, Photoshop Sr. Product Manager Bryan O’Neil Hughes will show how to remove power lines using Photoshop CS5 and the path tool.
Visit Tutorial
-

Landscape Photography Editing – Gradients & Adjustments
In this tutorial from Psdbox you will learn how to use adjustments to improve your photos.
Visit Tutorial
-

Create a Detailed Vintage TV from Scratch in Photoshop
In this tutorial from WeGraphics you will learn how to create a detailed vintage television in Photoshop from scratch.
Visit Tutorial
Articles, Inspiration, and Freebies
-

The Grid: Special Grill Bryan Episode
In this video interview, Photoshop Sr. Product Manager Bryan O’Neil Hughes makes a second appearance in our round up and answers some tough questions from the cast of The Grid.
Visit Article
-

Stunningly Creative and Unforgettable Print Ads
This showcase of creative and unforgettable print ads includes some excellent examples for inspiration.
Visit Article
-

30 Designs and Illustrations with Great Masking Techniques
This round up from Design Instruct includes 30 inspiring examples of illustrations that use masking techniques.
Visit Article
-

Design Trend: Ribbons, Badges and Banners
Ribbons with a 3D look are especially popular right now. In this post Vandelay Design will showcase 30 websites using these types of elements.
Visit Article
-

Tips for Designing With Multiple Photos
Photography can be a powerful resource for a designer. This post from Design Shack will take a look at some clever and unique ways to create photo-centric designs using multiple images.
Visit Article
-

30 Examples of Amazing Character Design
In Vandelay Design’s second appearance in this round up they will present some amazing character designs for you to enjoy!
Visit Article
-

Protecting Yourself as a Designer
As a designer and a businessperson it is important to protect yourself. This article from Web Designer Depot explains some ways that you can protect yourself and business.
Visit Article
-

Lion UI Kit Preview
This post on Dribble includes some fantastic OSX Lion UI elements that you can use in your mockups.
Visit Article
Five Years of Envato
2011-08-31 05:03:16 (читать в оригинале)It’s kinda crazy to think, but our little internet startup, Envato, has been on the air now for five years. We started back in 2006 as four very enthusiastic and totally green entrepreneurs with a shoestring budget and a love of the web. Fast forward five years and while we’re hopefully a little less green, we’re still incredibly passionate about Education, Marketplaces and the web! It’s been an amazing time and we’d like to share a look inside our Melbourne HQ offices, some stats about Envato and a big thank you to the community.
Behind the Scenes
With such a big milestone, we thought it might be good to give an inside glimpse into our Melbourne HQ offices and some of the people that work here. So we invited a Melbourne film crew called Compulsive to come in and shoot a 3 minute video about Envato. I hope you enjoy it!
As you may know, we also have a large remote team working around the globe on our sites. Next year we’re hoping to gather all of Envato and as much of the community as possible for an epic meetup, but in the meantime if you’re curious to see who’s who, you can check out this little video from our remote staff meetup last year in Chicago.
Some Stats
Looking back at five years of exciting and sometimes exhausting Envato work, I put together some stats about Envato from our time online so far. In five years we have:
- Published over 10,000 tutorials and articles helping people learn everything from Photoshop to Freelancing
- Hosted over 300,000 items for sale on our marketplaces from WordPress themes to Stock Photos
- Showcased over 12,000 items of inspirational design, photography and a host of other creative mediums on Creattica
- Listed over 8,000 jobs on our freelance job board
- Reviewed and rounded up over 3,000 apps on our AppStorm network
- Launched 9 marketplaces, 11 tutorial sites, 9 blogs, 18 books, 7 bundles, 4 Regular Podcasts, and more social media accounts than you can poke a stick at
- Accumulated close to 1 million RSS subscribers and twitter followers
- Signed up almost 1 million marketplace members, 90,000 Creattica members, 50,000 FreelanceSwitch members, and 40,000 Tuts+ Premium subscribers
- Served up well over 1.5 billion pageviews across all our sites since inception
Holy toledo batman!!
Thank You
I can’t say thank you enough to all of you for supporting Envato all these years. Whether you are long-time user of the Marketplaces, Tuts+, AppStorm, FreelanceSwitch or Creattica, or just a casual visitor, we’re really proud that you stop in and use our sites. If you’re one of the thousands of contributors, authors, writers, and subscribers, we’re honored and humbled that you have helped us build this company and filled these sites with such amazing content. And regardless of who you are, we hope that we can continue to provide value and service to you for many more years to come!
On behalf of the whole team, thank you all!
Collis
CEO, Chief Tea Drinker and Web Designer Who Doesn’t Get to Design Anymore
Envato
P.S. If you’re not all video’d out, you can check out this video of one of our early Envato staff
A Look Into Intrinsic Nature’s 10th Experiment
2011-08-30 17:00:33 (читать в оригинале)Design Collective Intrinsic Nature’s 10th Experiment hit the net back in early May. It features a stunning collection of 85 works created by over 50 international artists. With the help of designer Anthony Giacomino we rounded up some of our favorite works from this pack. Be sure to check out the whole experiment over at Intrinsic Natures website.
Intrinsic Nature, also known as "IN," is an online art group consisting of a select community of creative minds from around the world. The name Intrinsic Nature speaks of the organic, creative, free-flowing spirit of art residing within every one of us that finds its way to a canvas. The work we create is natural, birthed from who we are: our very nature. Every few months Intrinsic Nature releases a public showcase of this art in what we call our "Experiments.
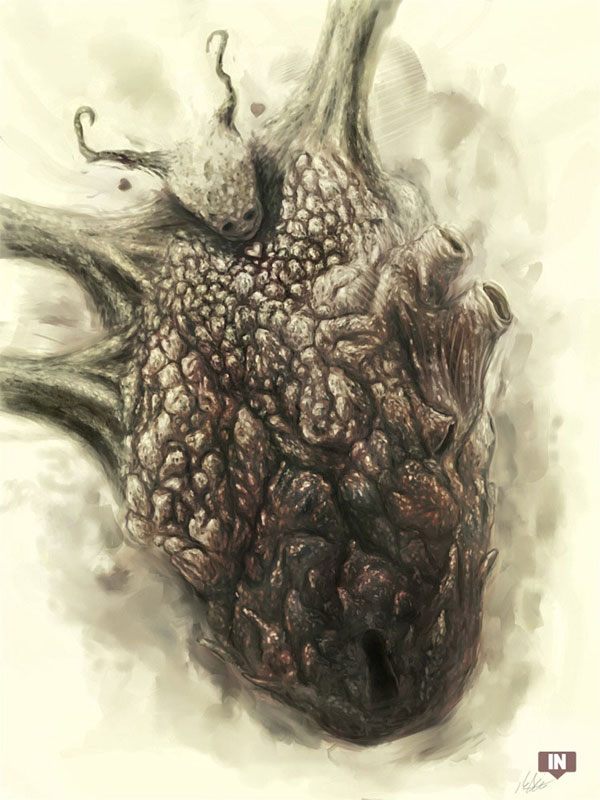
Savage By 3abden
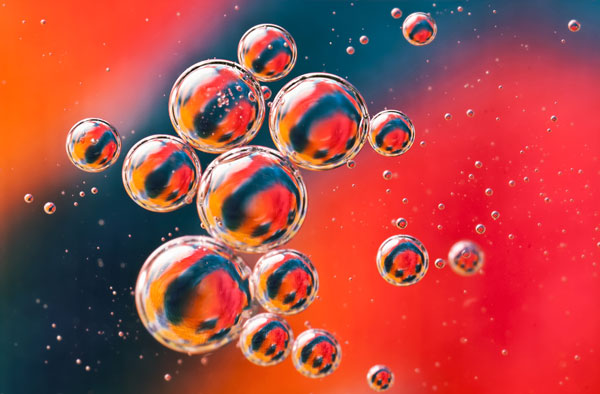
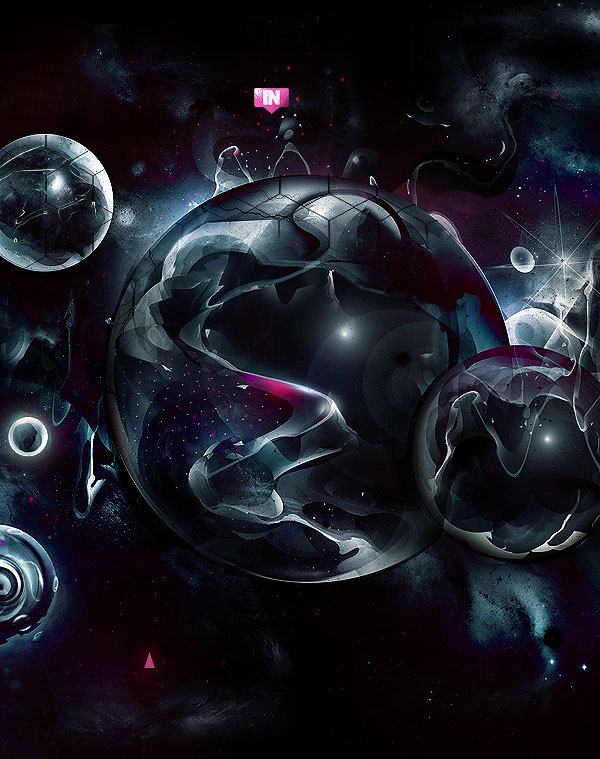
Microspheres By Agiaco
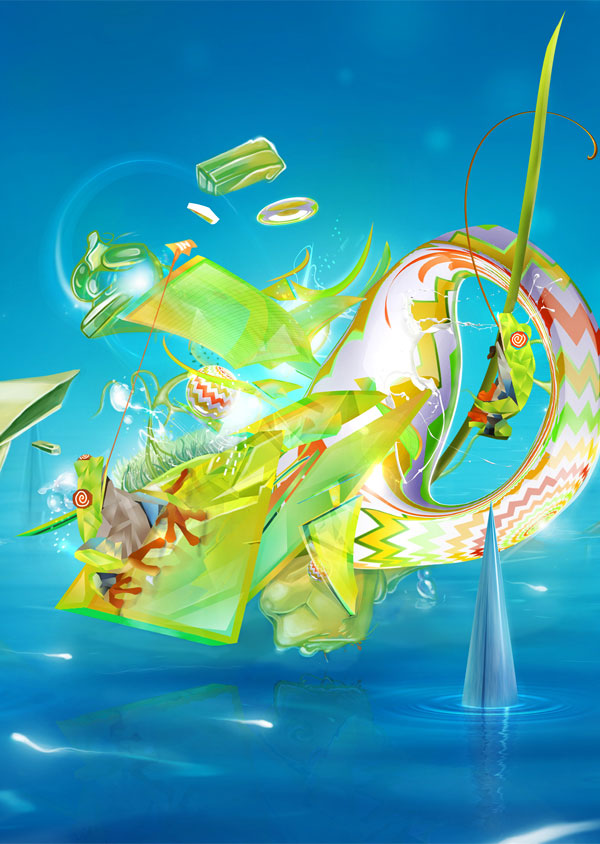
Tetrapoda Abstrakta By Agiaco & Yago
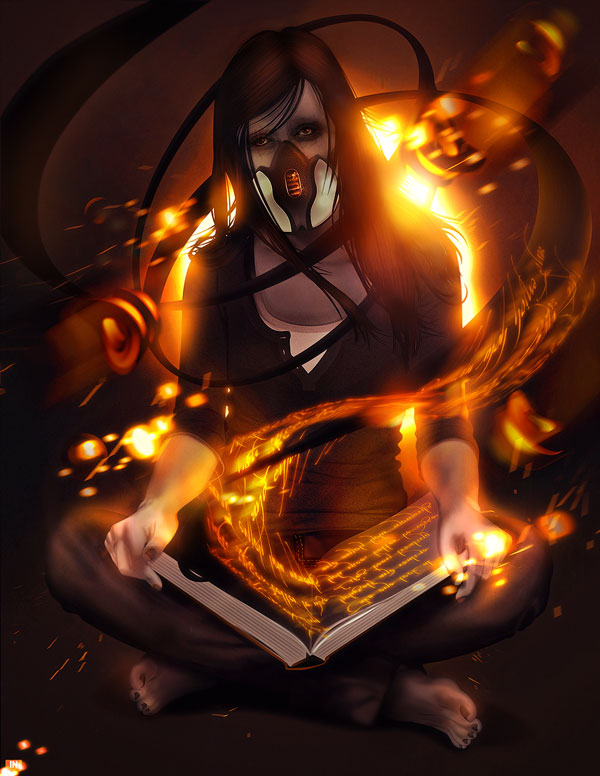
The Intrinsic Book By aleebr
Sweet Dreams By Aleebr
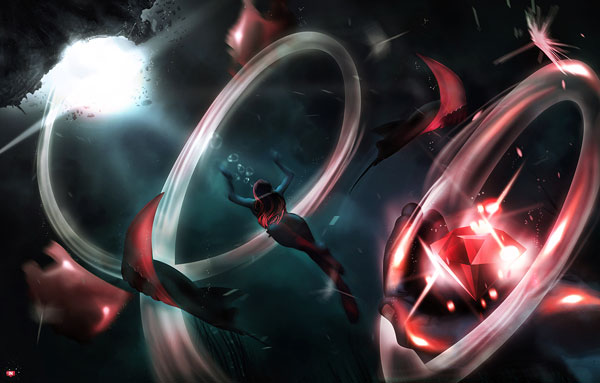
Cocoon By Ameliajane
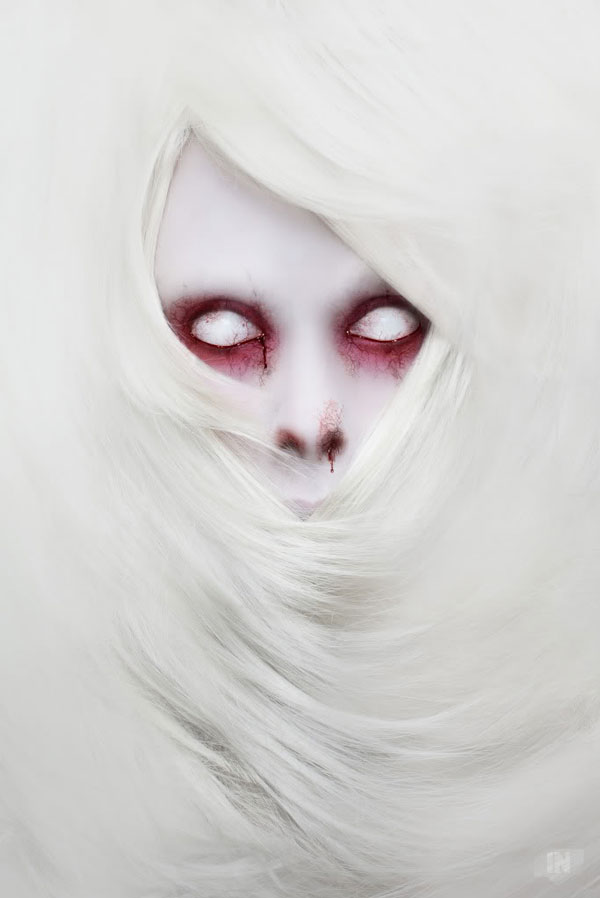
Moriae Encomium
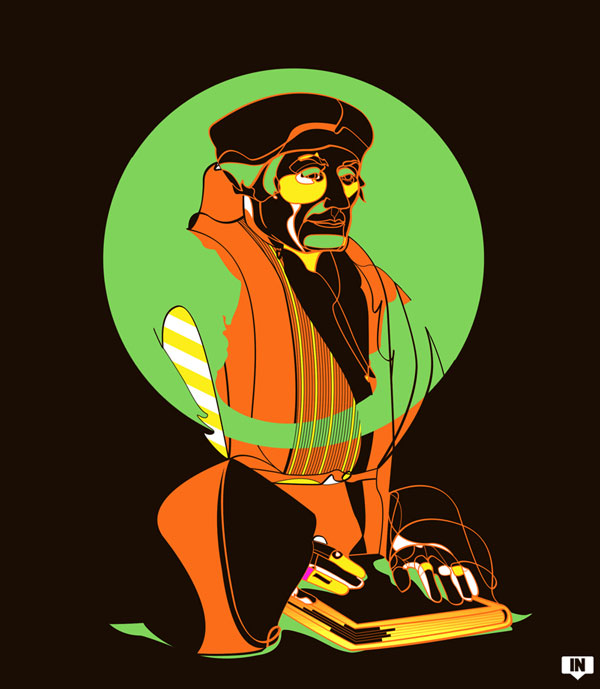
Art For Our Sake By Dejavu
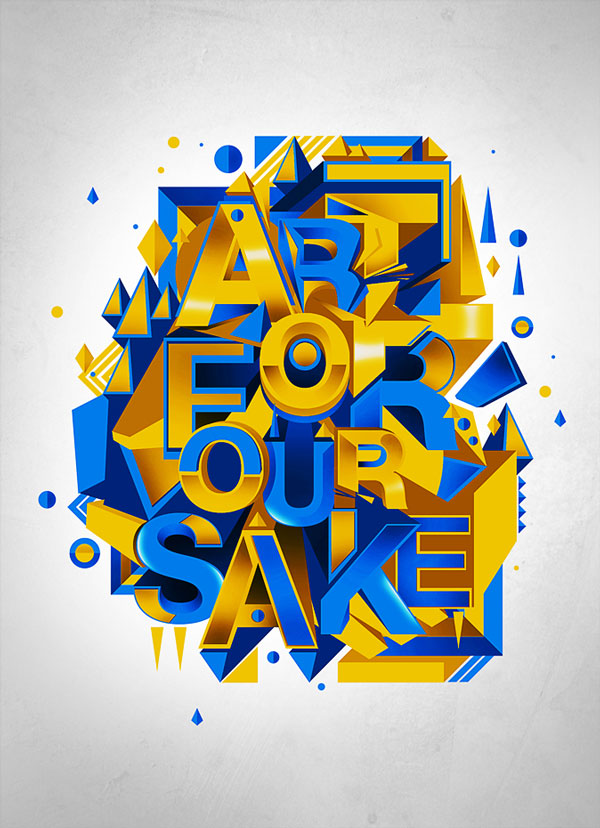
Awakening By Drake
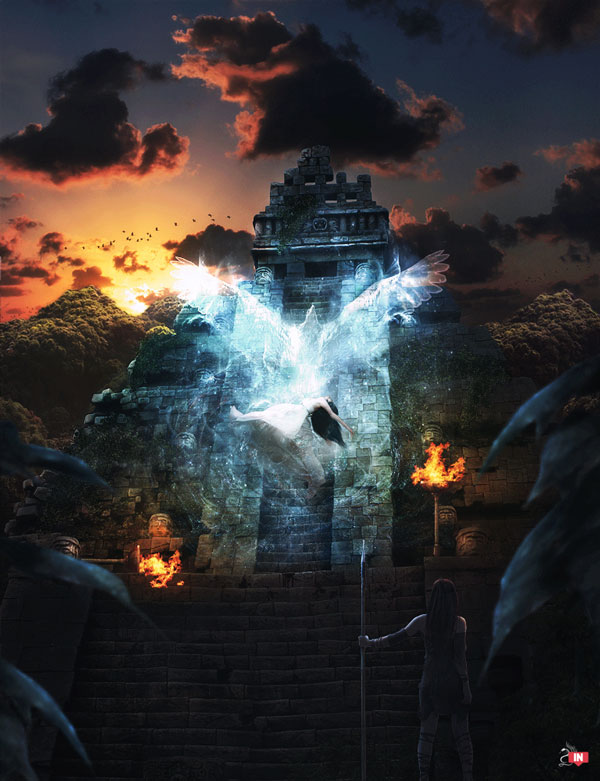
Melachodia By Dyst
We strive to build a core of talented artists and give them another platform to share their artwork. We work as a team to help each artist improve and learn from each other. In a competitive and ever growing field, it’s important to have others to collaborate with and learn from. IN really is beneficial in this regard. Aside from these goals, Intrinsic Nature works to build a strong presence in digital art community as a talented art collective filled with artists from all disciplines ranging from digital art, photography, music, traditional art and more.
Anecdotal Universe By Dyst

Lost In The Blur By Enspyre
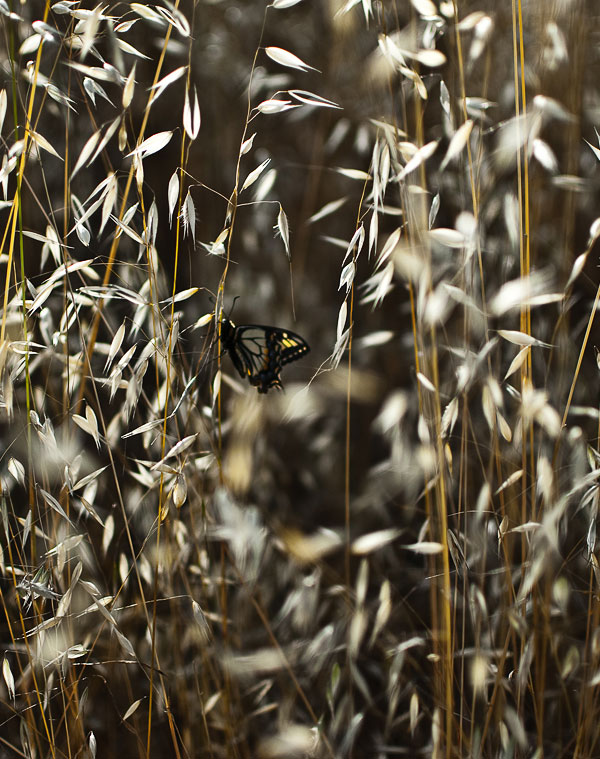
Sway By .esk
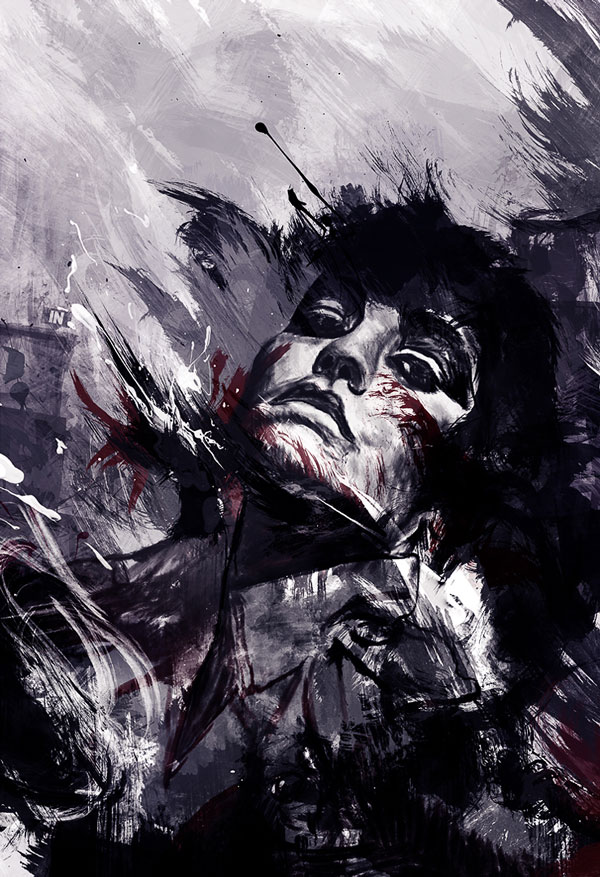
One Zero By Galaxyturbo

Intrinsic Yummy By Human After All
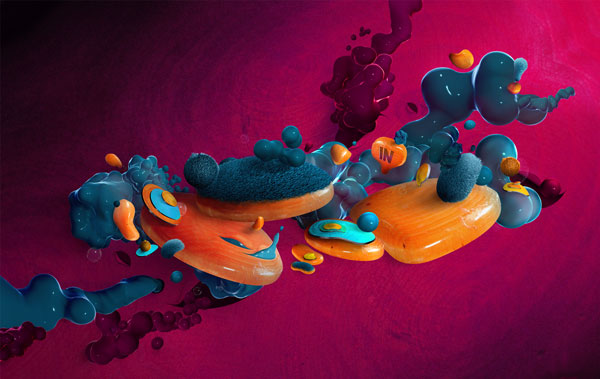
Repossession By John Mark
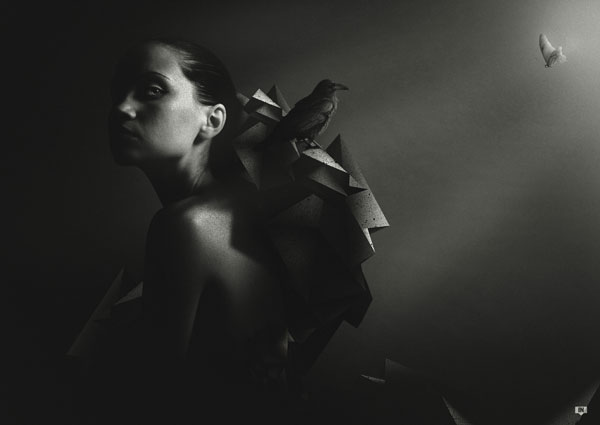
Solidarity By John Mark
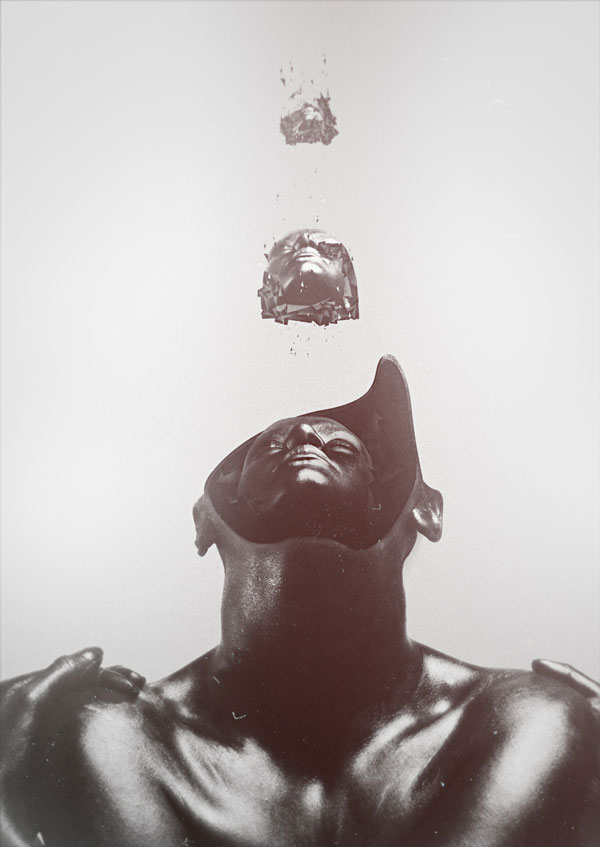
Faraway Love By Karim
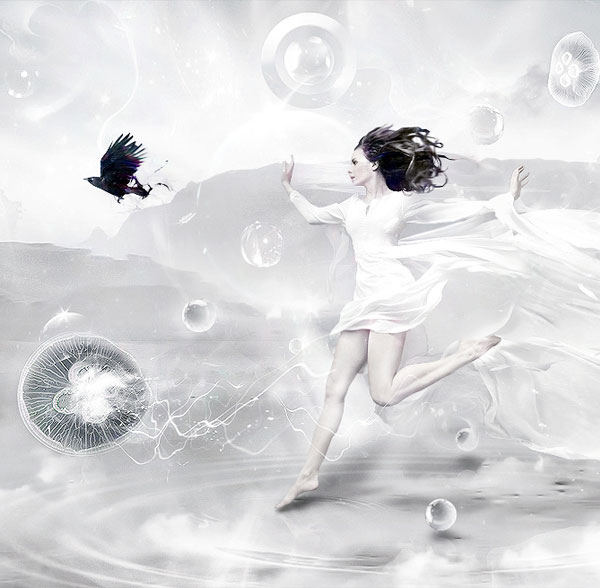
Genesis By Karim
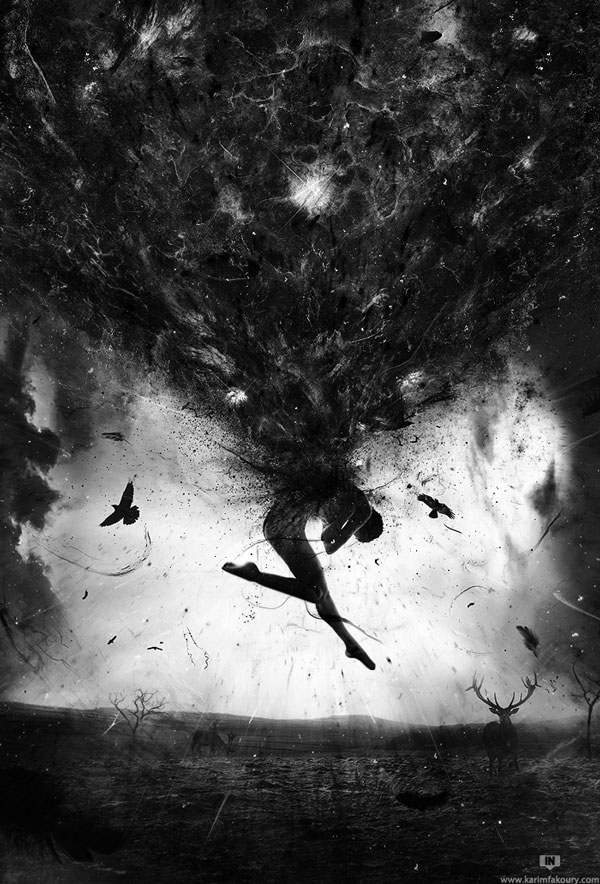
Lonliness By Leonk
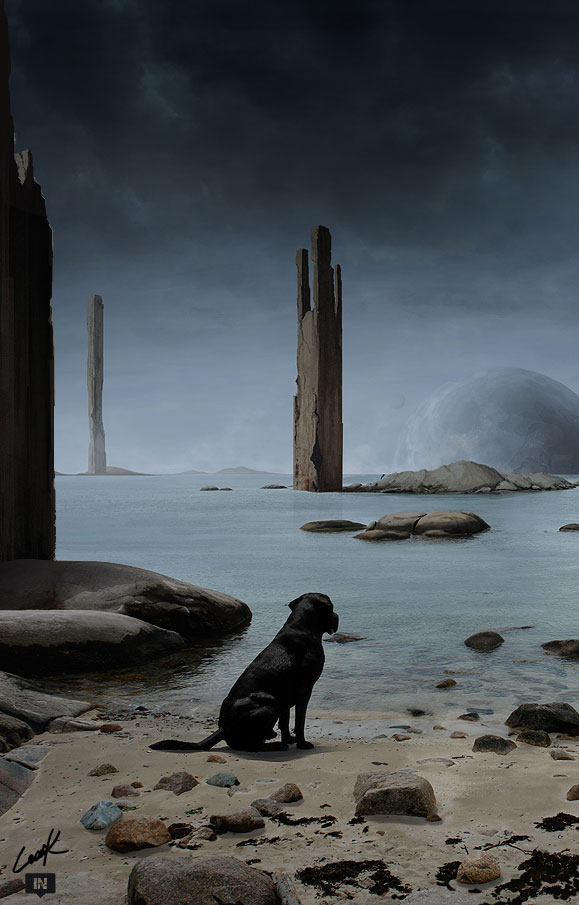
IN10 marks the tenth full experiment released by the crew in the past three years. It’s significant because after quite a long time between experiments, IN came back strong lead by some great new artists. Many of these artists improved a lot in the months they joined the group, and also breathed some new life into the latest exhibition. It’s always a mixed bag of which artists are going to be able to submit to each experiment. We hope to keep older artists active while helping new ones develop and succeed. Intrinsic Nature is already 10 experiments deep, but we feel it’s only just begun.
All The Riches By MACABRE
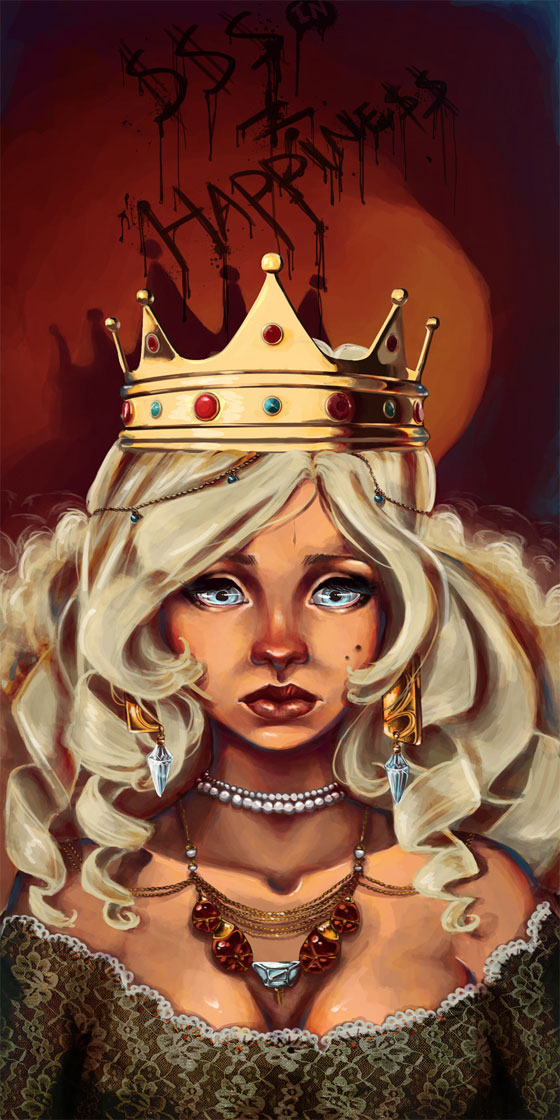
La Valse Des Monstres By Ramon de Andrade
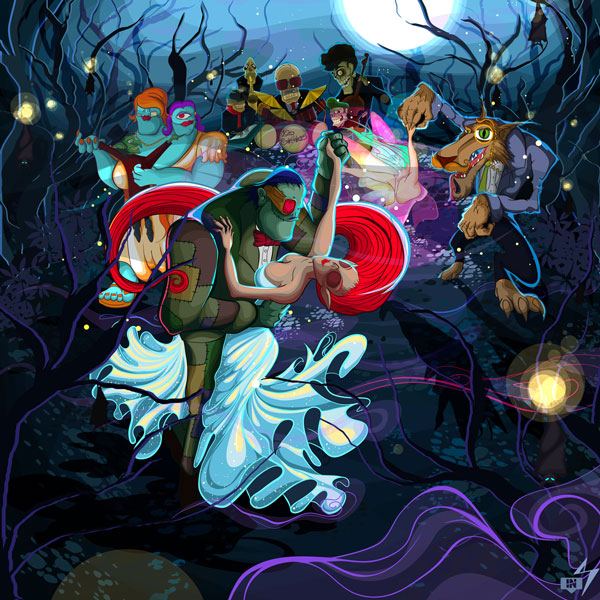
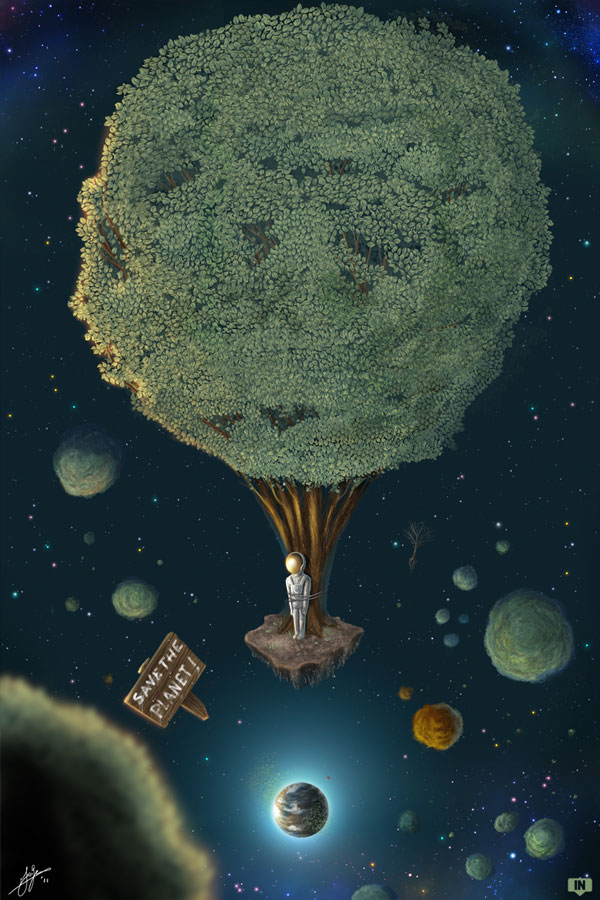
Trees Are Leaving By Shapesfactory
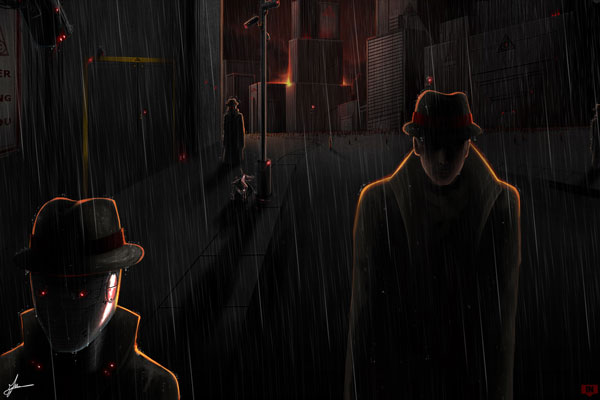
Nineteen Eighty-Four By Shapesfactory
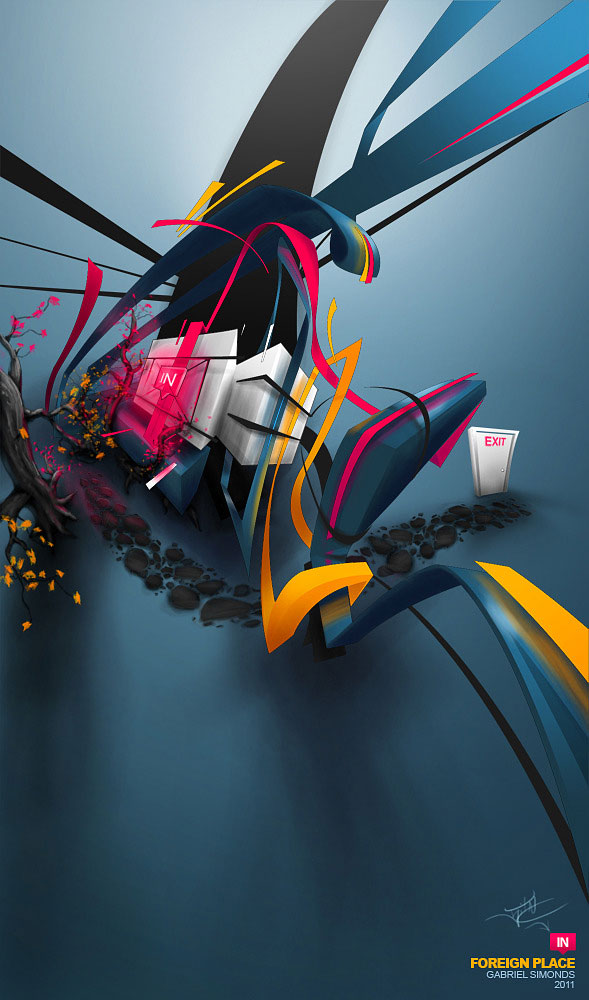
Forgein Place By Silnc
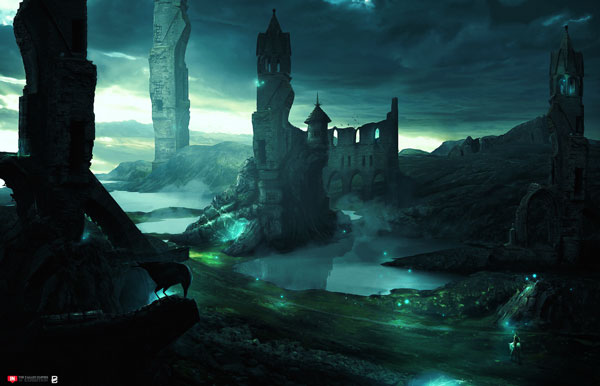
The Fallen Empire By Skema
Civilization By Syst-eeem
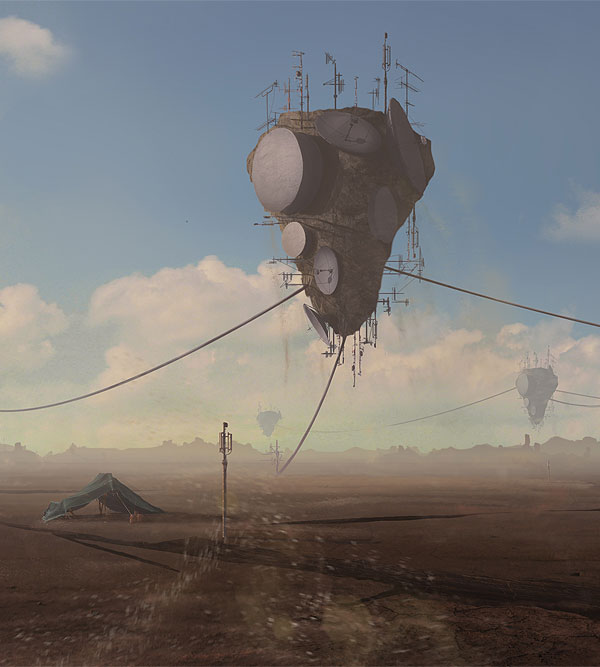
Freaks And Geeks By Tropfich

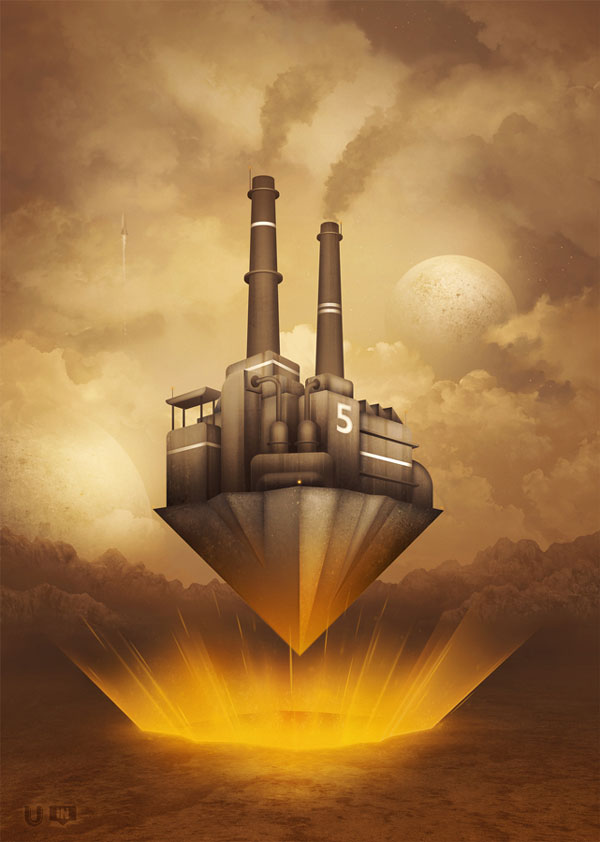
Quarry By Uneventual
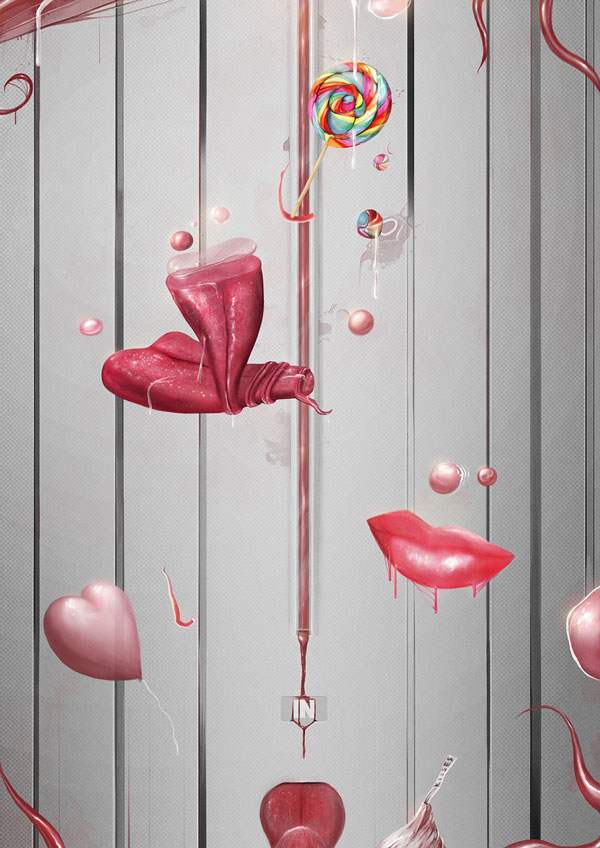
Lets Exhange Some Body Heat and What Not By Yago
Special Thanks
I’d like to give a special thanks once again to Anthony for helping me put together this look at Intrinsic Nature’s 10th Experiment. Make sure to stay up to date with IN by checking their website for constant site updates.
Win a Free Copy of Filter Forge (x3)
2011-08-29 19:00:18 (читать в оригинале)Let’s be honest, most of Photoshop’s default filters and effects can be a bit cheesy. We recently introduced you to Filter Forge, a third-party plugin for Photoshop that allows you to do some pretty amazing things with filters, and even create your own. We also gave away several copies of Filter Forge Basic Edition to several lucky Psdtuts readers. Today, we have decided to do it again by giving away another 3 copies. To enter, all you have to do is submit your entry using the form below.
Filter Forge is a versatile Photoshop plugin which allows both novice and expert users create a wide variety of realistic and abstract textures and effects. Users can take instant advantage of over 8100 free community-created filters in the online filter library, or create their own filters in the visual filter editor by assembling them from components such as blurs, gradients, color adjustments, noises, distortions, or blends – without writing a single line of code.
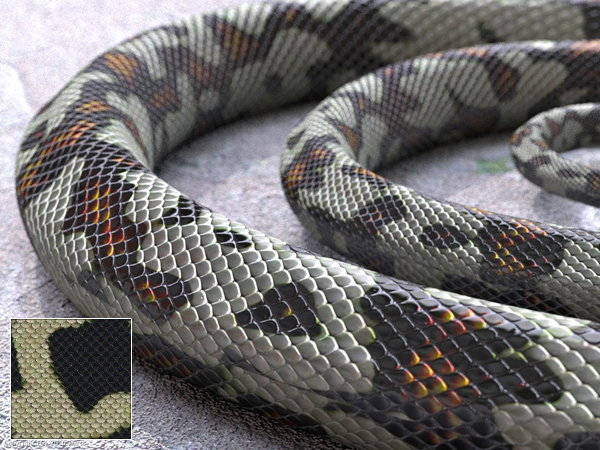
In this image Filter Forge was used to create the snakeskin: Pattern maps, bumpmaps, and normal maps. The 3D model was made in Microstation V8i, rendered with Luxology Render. No post work.
See More Examples
On the surface, Filter Forge is just a Photoshop plugin, a pack of filters that generate textures, create visual effects, enhance photos, and process images. However, there are some things that make Filter Forge unique:
- You can create your own filters. Filter Forge comes with a visual node-based editor allowing you to create your own filters – textures, effects, distortions, backgrounds, frames, you name it. All filters automatically support 16- and 32-bit modes in Photoshop, real-world HDRI lighting, bump and normal maps, huge resolutions, and most filters can be seamlessly tiled.
- You get free access to over 8100 user-created filters. Afnyone can contribute their textures and effects to the online filter collection so it grows with every submitted filter. This means the more people use Filter Forge, the better it gets.
To win a free copy of Filter Forge, all you need to do is enter using the form below.
Submit Your Entry
Up For Grabs
- 1 copy of Filter Forge Basic to 3 readers
Rules
- To enter, submit your entry using this form.
- You may only enter once.
- Make sure to enter a valid email address so that we can contact you.
- Entries will be accepted until Friday, September 2, 2011 at 11:59 PM, EST.
To learn more about Filter Forge, visit their website, download the demo version of the software, and check out their gallery.
Download Demo
Editor’s note: This post was sponsored by Filter Forge.
Create a Floating Over-Grown “Tree House” in Photoshop
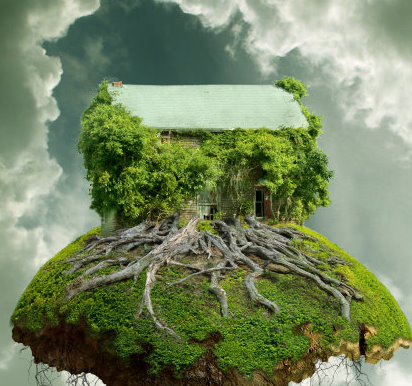
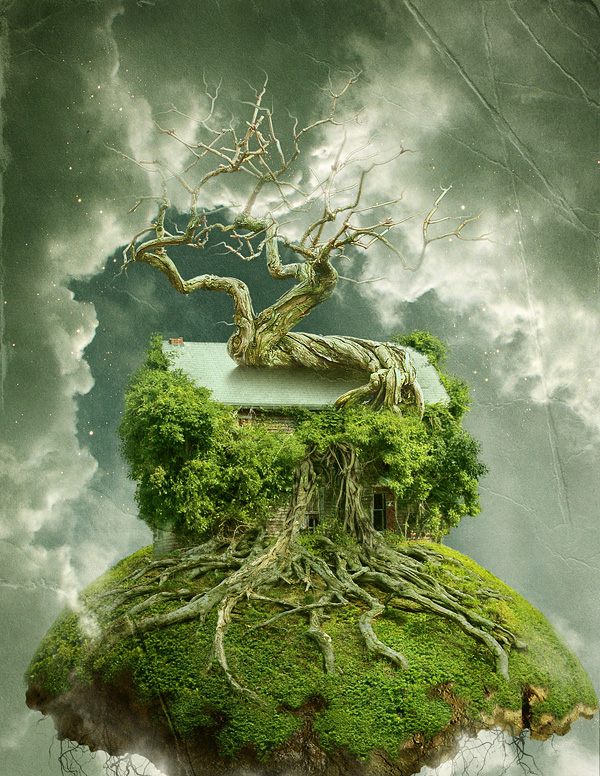
2011-08-29 17:00:34 (читать в оригинале)Photoshop is great because it allows us to create scenes that wouldn’t otherwise be possible in real life. In this tutorial we will combine several stock images to create a floating over-grown tree house in Photoshop.
Tutorial Assets
The following assets were used during the production of this tutorial.
- Roots
- Roots2
- Tree
- Old Barn
- Clouds
- Green texture
- Stars
- Old Paper
- Soil
- Branches
Step 1
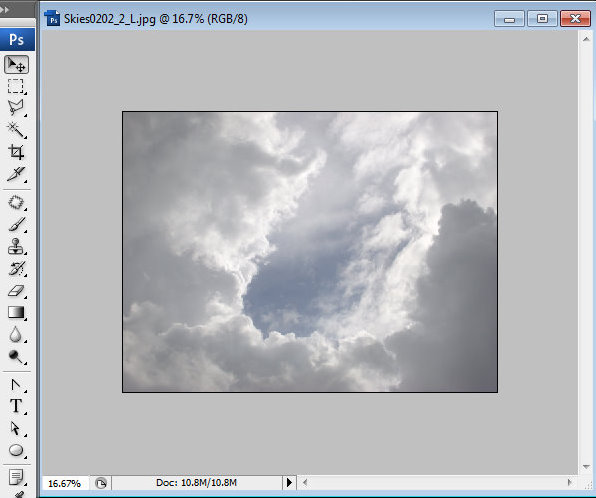
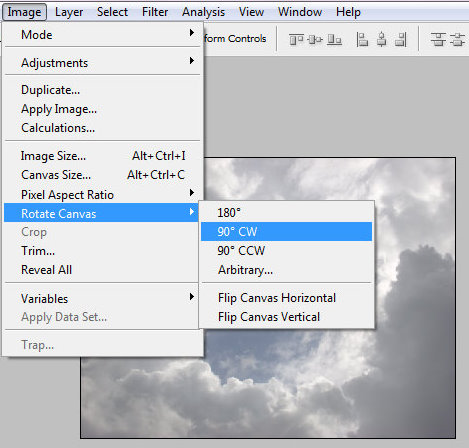
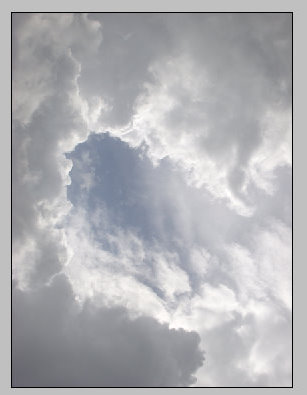
Download and open in Photoshop the large sky photo – 2240px * 1680px. Rotate the Canvas, choose Image > Rotate Canvas > 90° CW.
Step 2
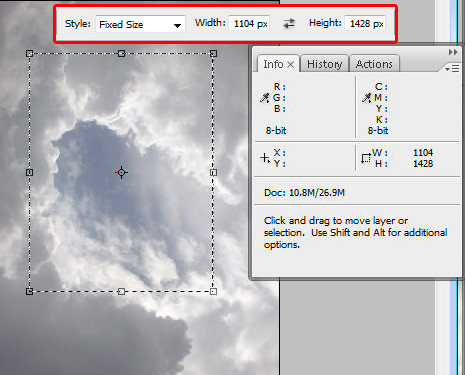
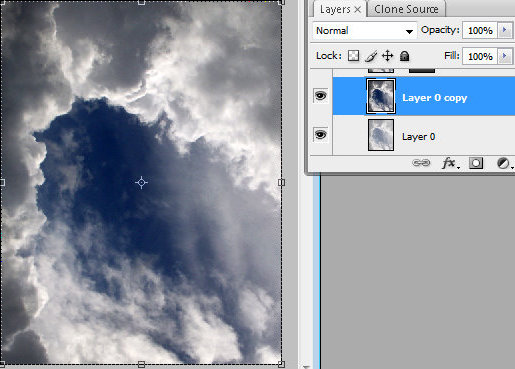
Then choose Rectangular Marquee Tool ![]() , choose Fixed Size with Width = 1104px and Height = 1428px and create selection of the area like on the screen shot. Go to Image > Crop.
, choose Fixed Size with Width = 1104px and Height = 1428px and create selection of the area like on the screen shot. Go to Image > Crop.
Step 3
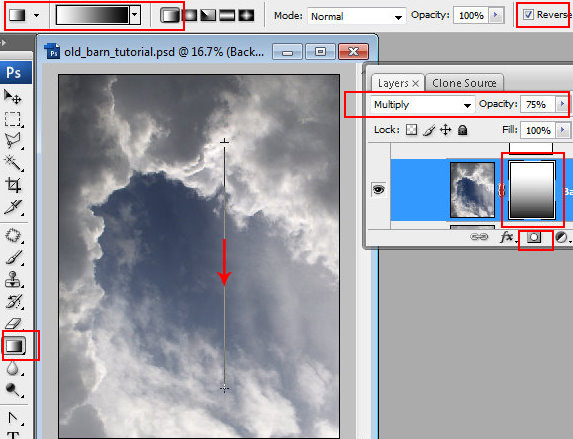
Duplicate sky background layer and apply Auto Contrast adjustment to it, Image > Adjustments > Auto Contrast. Apply Multiply Blending Mode to this layer and Opacity 75%. Add Layer Mask to the duplicated layer – click small icon![]() in the bottom of layers palette. Make mask active and fill it with the linear Black and White gradient.
in the bottom of layers palette. Make mask active and fill it with the linear Black and White gradient.
Step 4
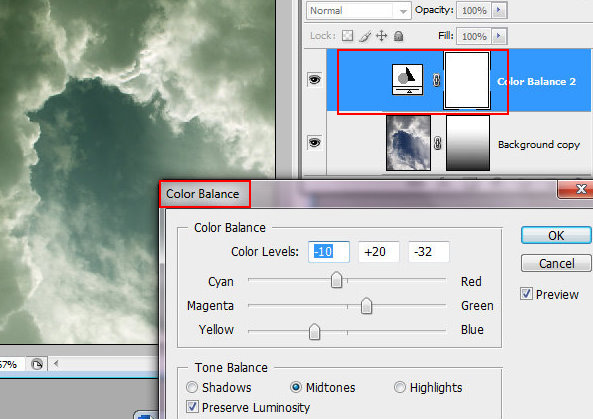
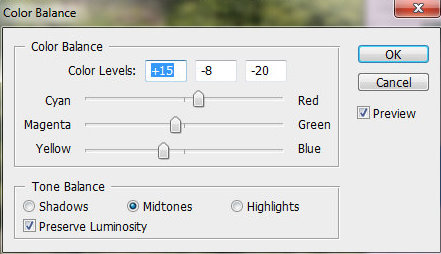
Create a new adjustment layer, click small icon![]() in the bottom of layers palette, choose Color Balance from the drop down menu. Apply following settings.
in the bottom of layers palette, choose Color Balance from the drop down menu. Apply following settings.
Step 5
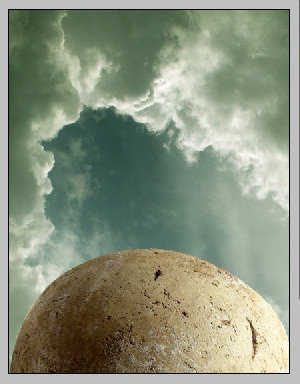
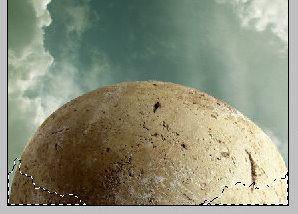
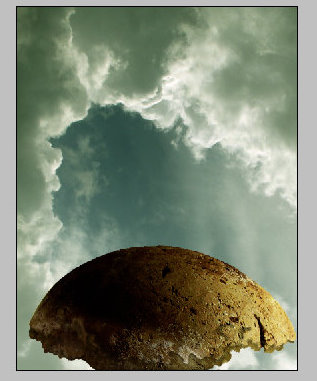
Insert soil sphere, select outside area and remove it. In order to load selection of white background, you may use Magic Wand Tool. Rotate this shape to move dark part of the sphere on the left side, Edit > Transform > Rotate.
Step 6
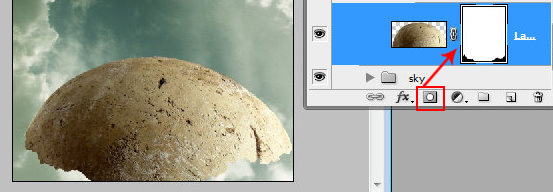
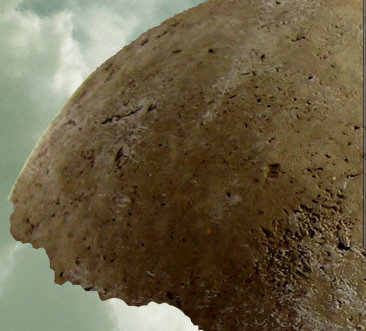
Add Layer Mask ![]() to the soil layer and erase selected area with small round black brush. You may correct erased contour by using white brush.
to the soil layer and erase selected area with small round black brush. You may correct erased contour by using white brush.
Step 7
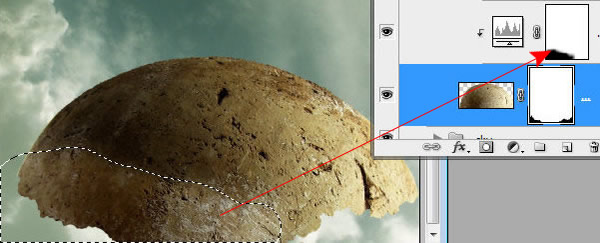
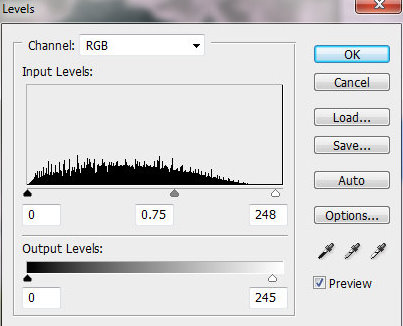
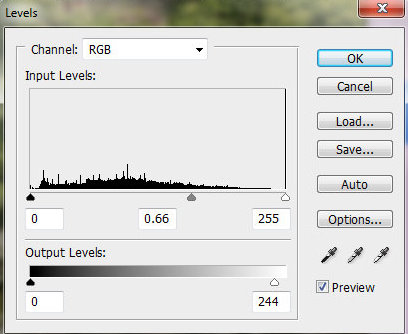
Create a new adjustment layer, click small icon ![]() in the bottom part of layers palette, choose Levels. In order to apply levels changes just for the soil shape, right click to adjustments layer and find "Create Clipping Mask". Set levels adjustments and erase left part of adjustment layer with large soft brush.
in the bottom part of layers palette, choose Levels. In order to apply levels changes just for the soil shape, right click to adjustments layer and find "Create Clipping Mask". Set levels adjustments and erase left part of adjustment layer with large soft brush.
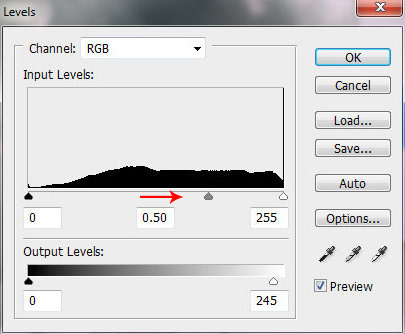
Step 8
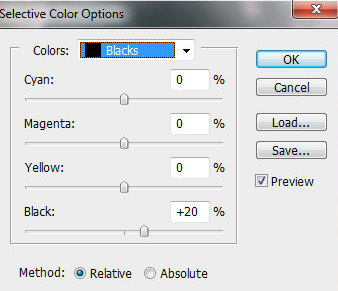
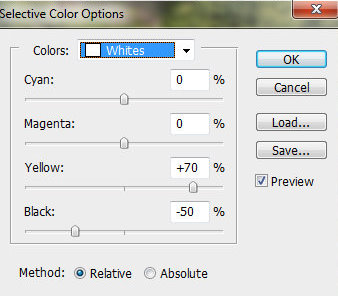
Then create one more adjustment layer clipping mask – "Selective Color" in this time. Apply setting like on the screen shot. Process layer mask with soft brush to create crumbly, spotty texture.
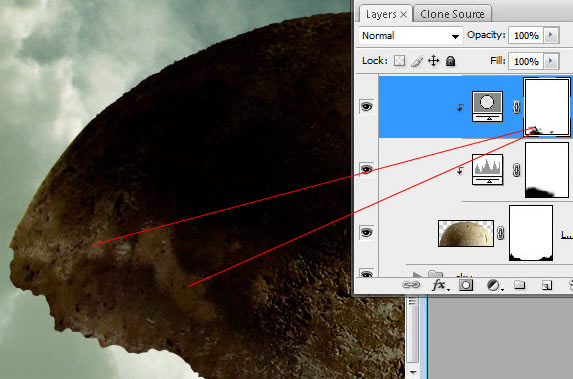
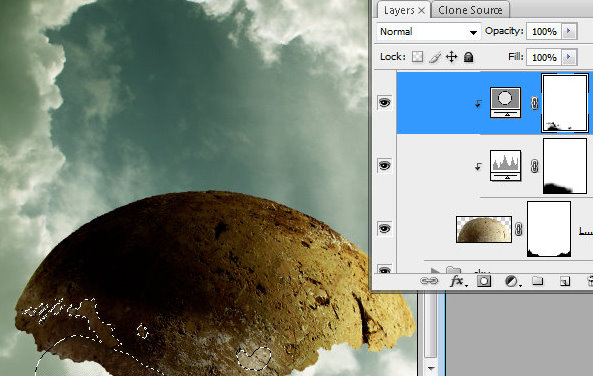
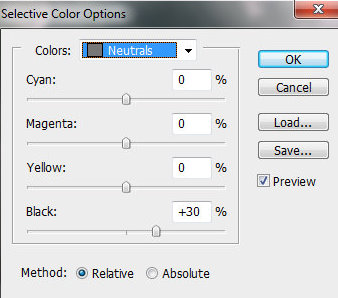
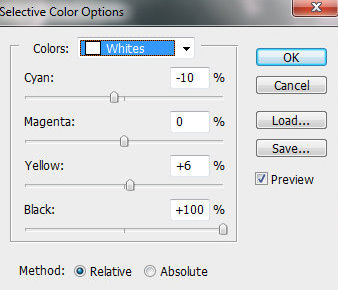
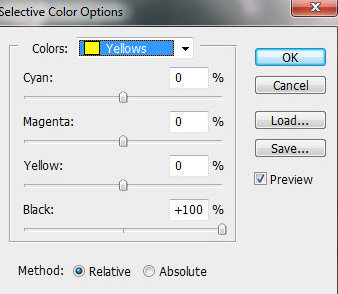
Step 9
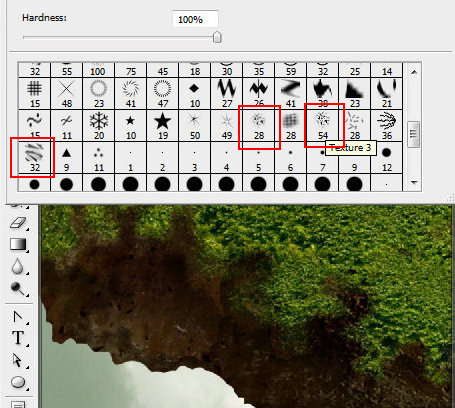
Create a new empty layer, make Clipping Mask from it like with the previous adjustments layers. Draw a ragged contour for the bottom part of the shape. Use regular round brush and "Texture 3" brush from assorted brushes set.
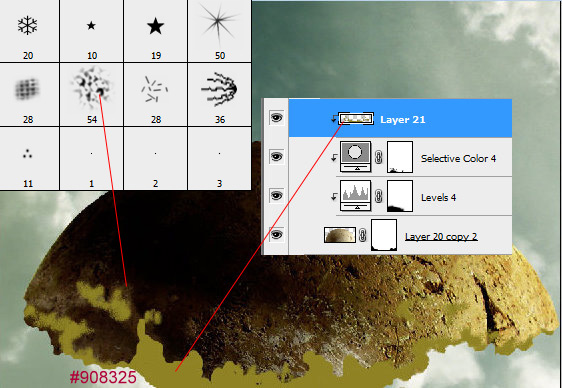
Step 10
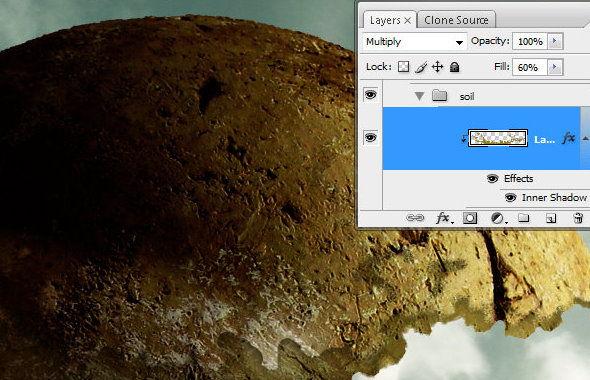
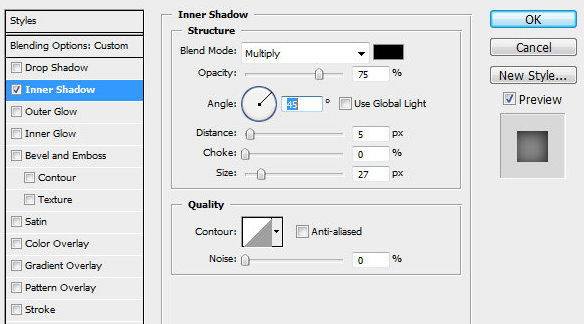
Apply Multiply Blending mode to the created clipping mask layer, set Fill = 60, apply Inner Shadow layer style effect.
Step 11
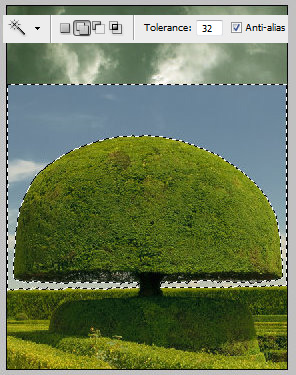
Insert green tree image, select blue sky and white clouds around the tree by using Magic Wand Tool ![]() with setting like on the screen shot. click with Wand Tool several times to caver all sky and white clouds. Clear selected sky area and erase bottom part of the image with Eraser Tool.
with setting like on the screen shot. click with Wand Tool several times to caver all sky and white clouds. Clear selected sky area and erase bottom part of the image with Eraser Tool.
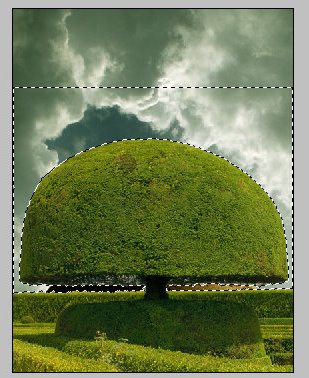
Step 12
Correct the green shape with Warp transformation to make it more spherical. Edit > Transform > Warp.
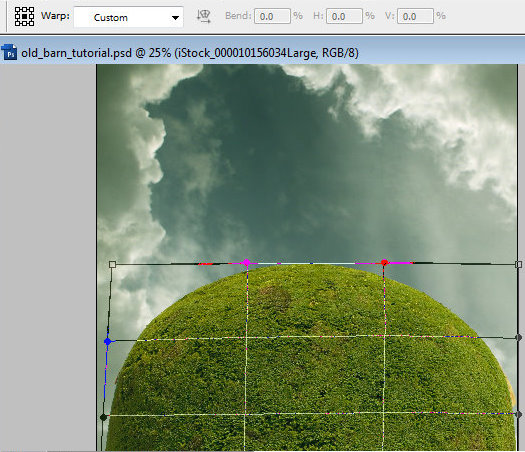
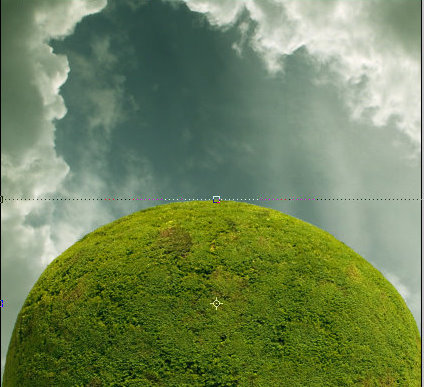
Step 13
Add Layer Mask to the green sphere and erase bottom part. Try to create ragged and snaky contour. You may use textured brushes from the Photoshop preset assorted brushes set.
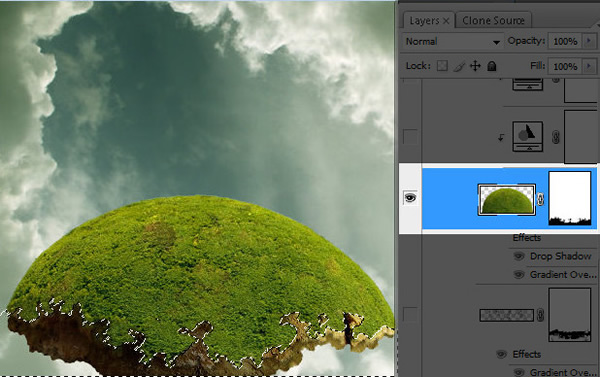
Step 14
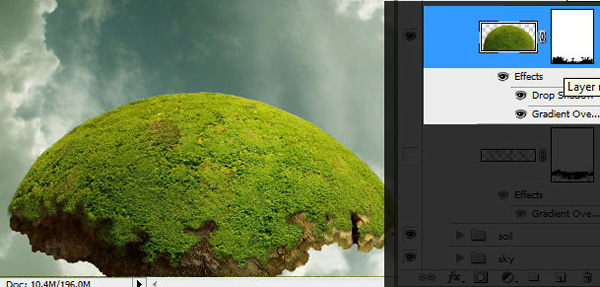
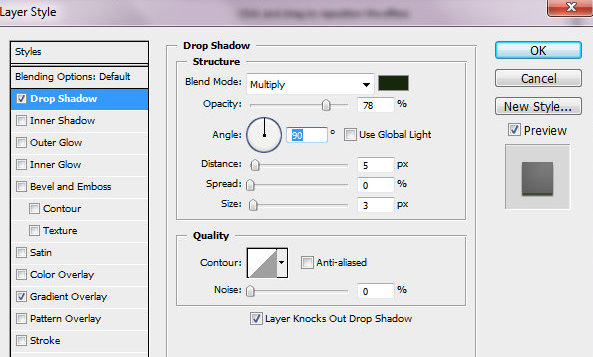
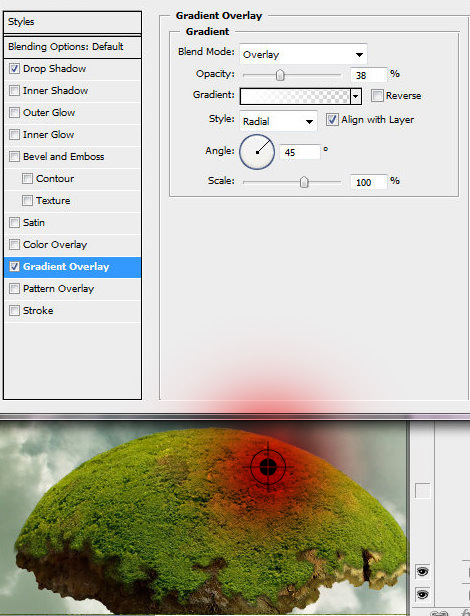
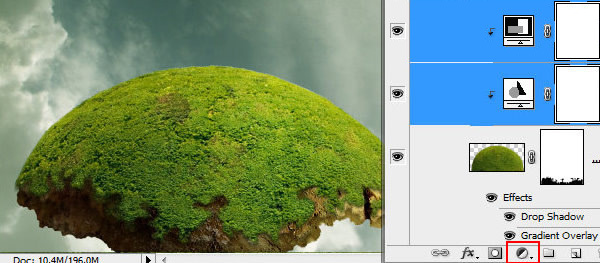
Add Drop Shadow and Gradient Overlay layer style effects to this layer. The center of gradient area is marked with red color on the second screen shot.
Step 15
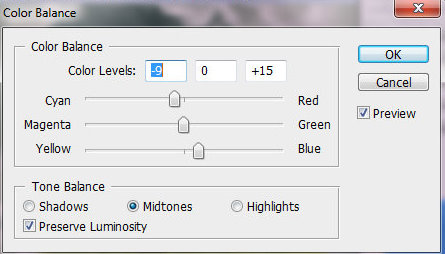
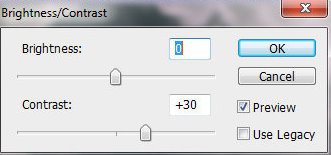
Create new adjustments layers for the green shape – "Color Balance" and "Brightness and Contrast", make clipping masks from them.
Step 16
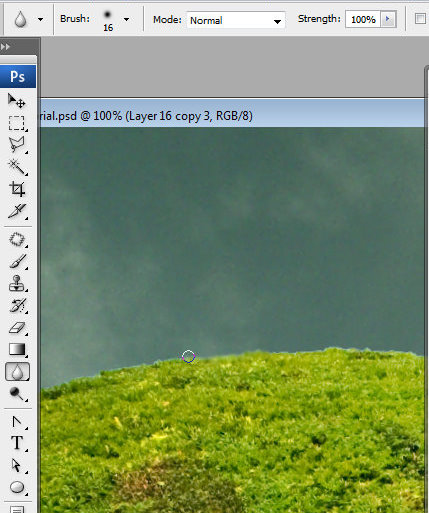
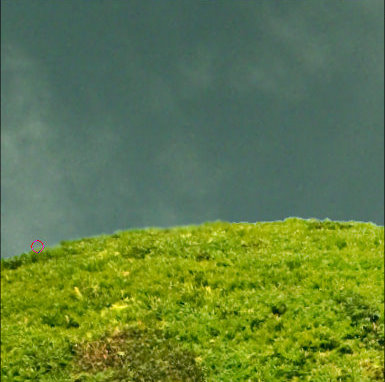
Process green shape top contour with Blur Tool, choose small soft brush for it and strength – 100%.
Step 17
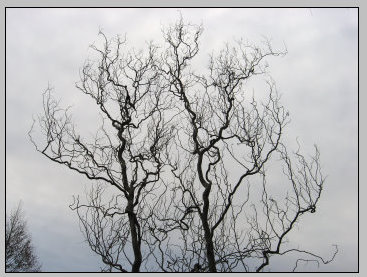
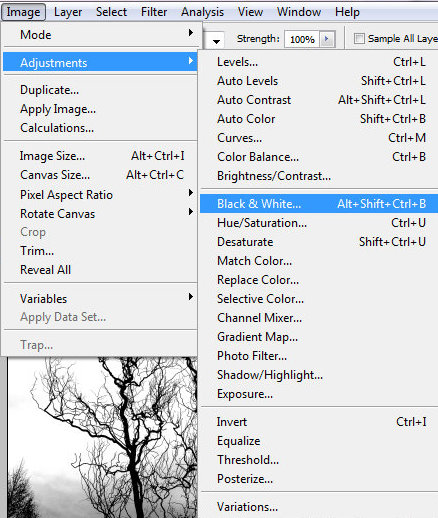
Open branches photo. Make this image black and white. Image > Adjustments > Black & White (none preset).
Step 18
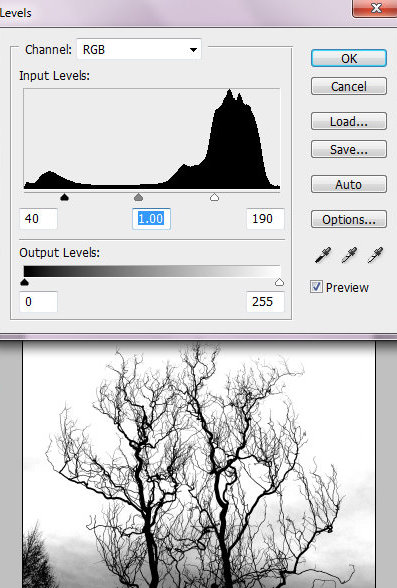
Correct levels settings for this photo, make it more contrast, play with black and white markers to make very dark branches and white background. Don’t pay attention to bottom part of the image. We will use only top branches.
Step 19
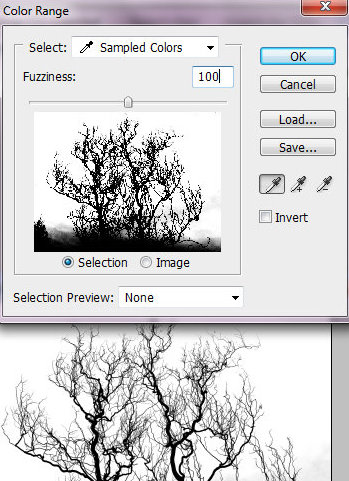
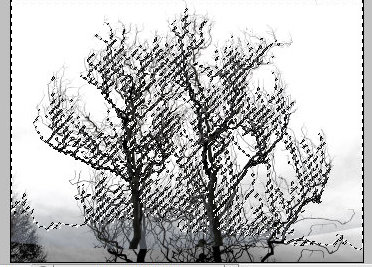
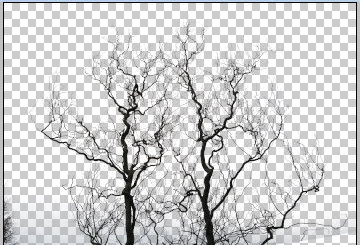
Then load selection for the white background. Go to Select > Color Range. Set Fuzziness around 100% and click with Eyedropper Tool in the white background area, say Ok. Clear selected area. You should have dark branches on the transparent background.
Step 20
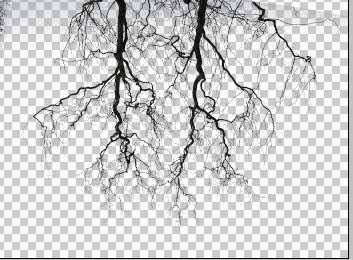
Apply Flip Vertical transformation to the layer with branches. Edit > Transform > Flip Vertical. Select bottom part of branches and copy selected area.
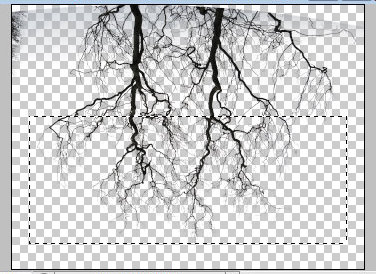
Step 21
Paste copied part of branches above brown soil layers and below green sphere. Erase outside branches
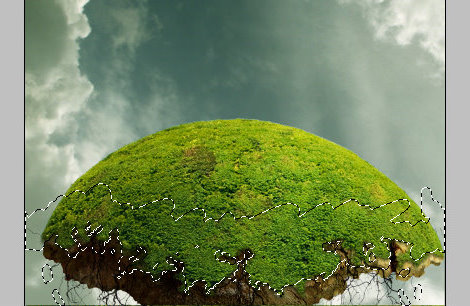
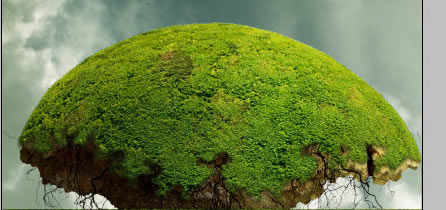
Step 22
Apply Multiply Blending Mode to branches and Opacity 65%. Add Gradient Overlay layer style effect.
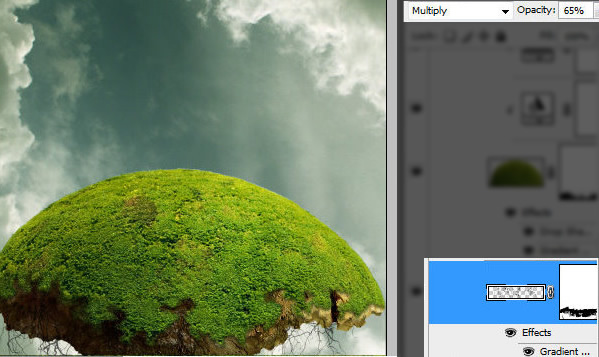

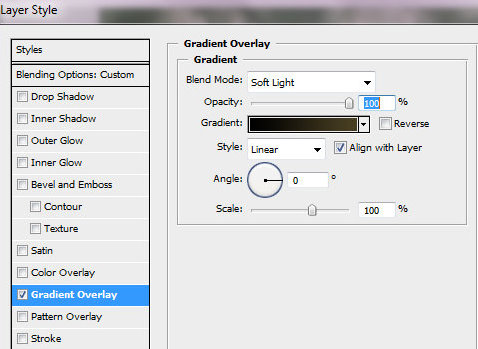
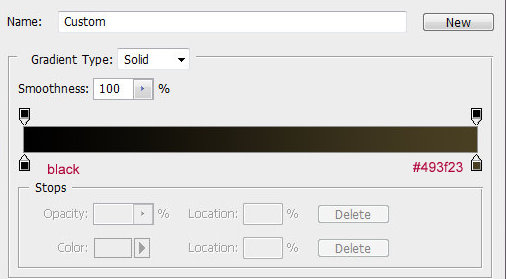
Step 23
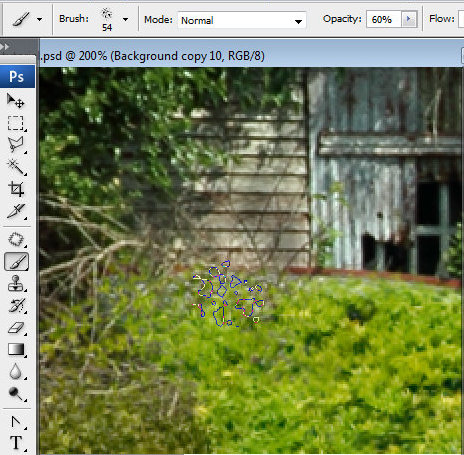
Insert Old Barn image. Erase bottom selected area, use Layer Mask as in the previous steps, it helps to correct erased area many times. Use black brush for erasing and white for restoring. In order to make contour smooth process bottom barn contour with translucent textured Brush.
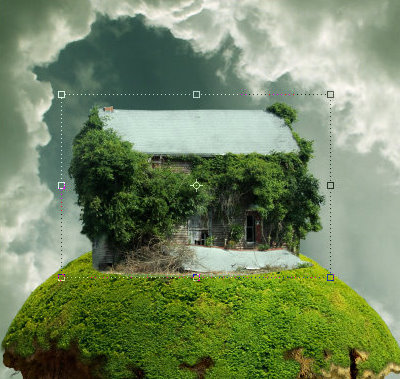
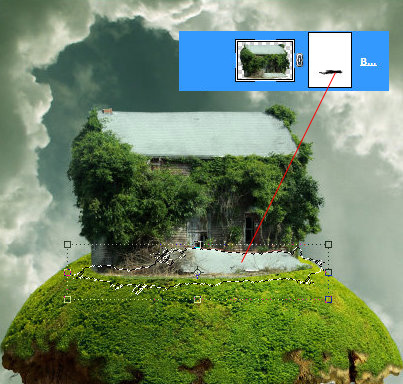
Step 24
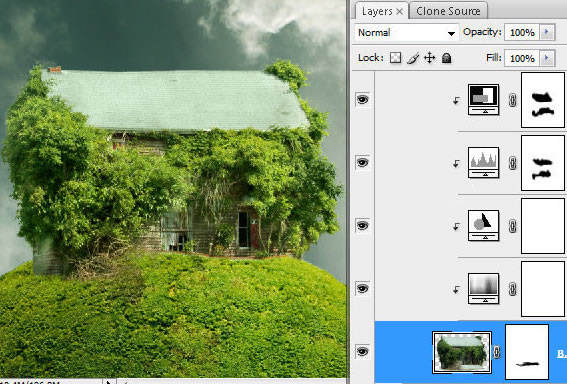
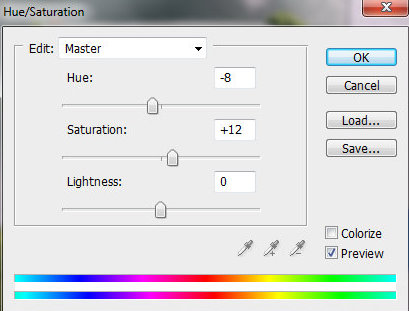
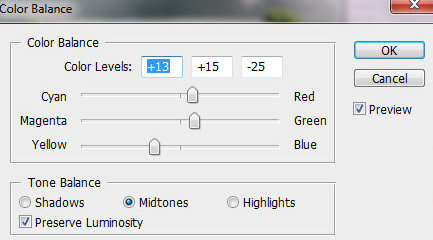
Create several adjustment layers – "Hue/Saturation", "Color Balance", Levels, "Brightness&Contrast". Apply settings like on the screen shot, play with them may be you will fin better combination.
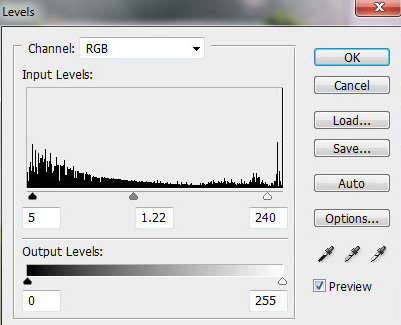
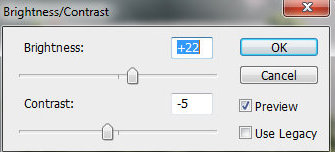
Step 25
Erase selected areas in the "Levels" and "Brightness & Contrast" adjustments layers masks with using large soft brush.
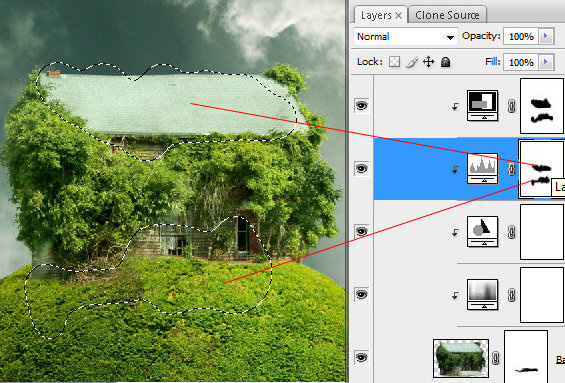
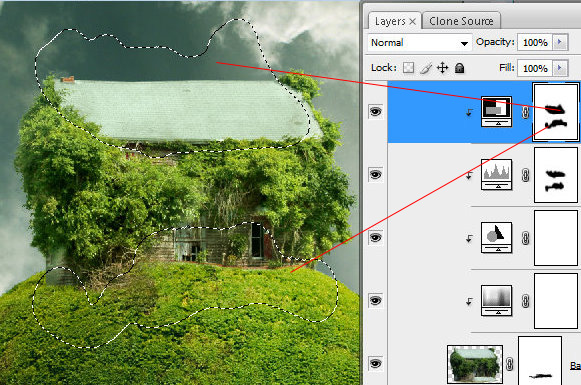
Step 26
You should have something like this:
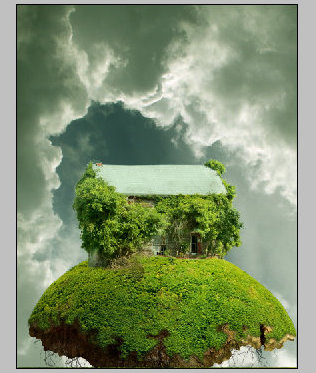
Step 27
Insert roots image, erase background area with round Eraser Tool. Transform roots image to fit it into Green Sphere shape, Edit > Transform > Free Transformation.
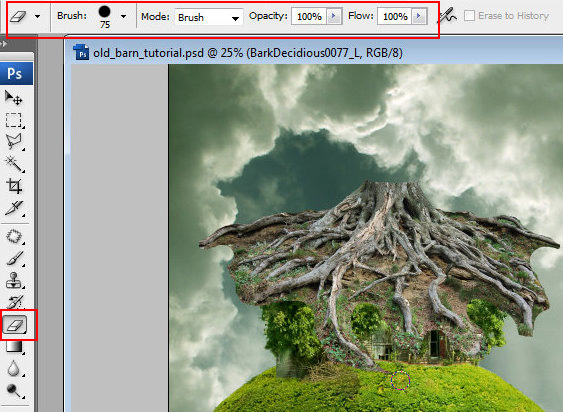
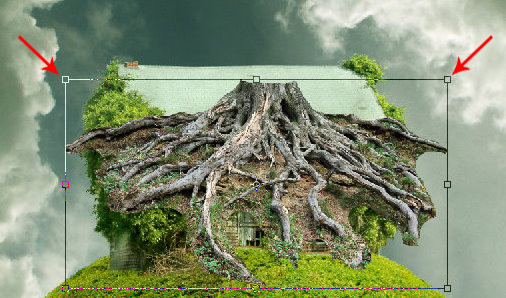
Step 28
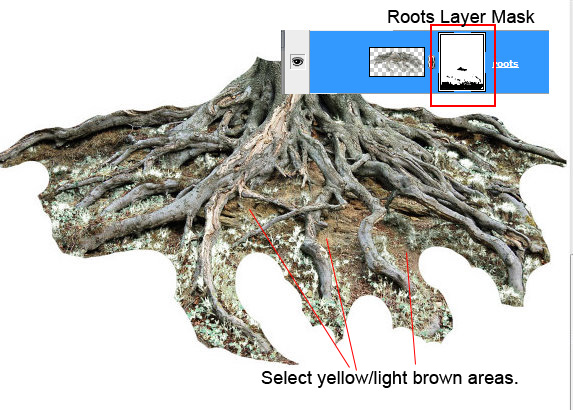
Add Layer Mask to the roots layer, then make active main roots layer thumbnail, go to Select > Color Range click with eyedropper tool to the green spot, say "Ok". You will have very similar selection like on the screen shot.
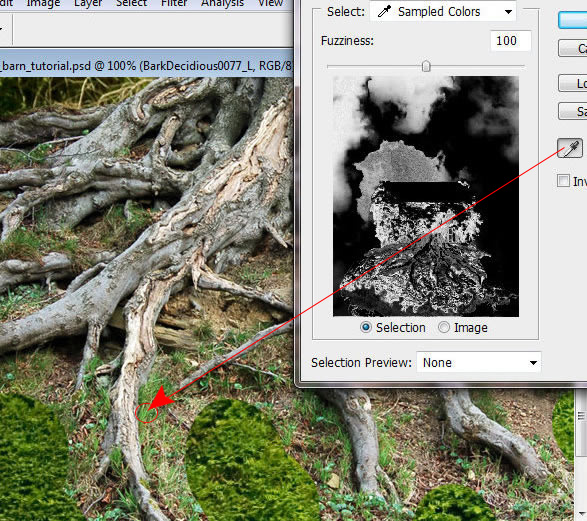
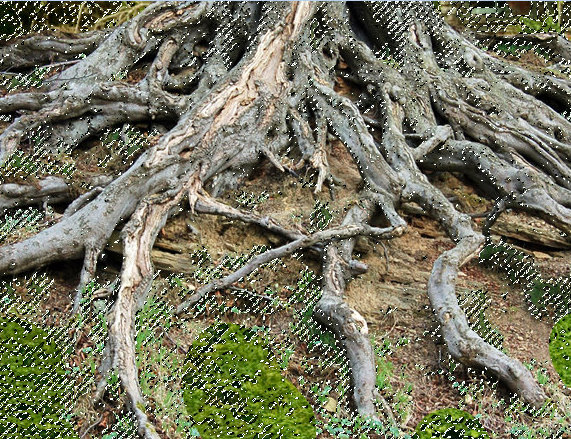
Step 29
Keep selection, make active roots Layer Mask and erase selected green spots, avoid roots. Then go to Color Range again and click with Eyedropper Tool in the other color spot of roots background (yellow, light brown colors), load selection. Erase selected background spots again, avoid roots. Create temporary white layer below roots layer to see result of your actions.
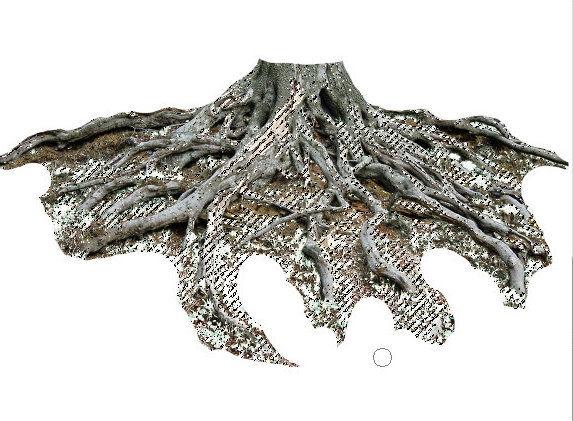
Step 30
Repeat previous actions several times. In final, you may erase and correct roots contour without Color Range selection, just using textured brush. Background shouldn’t be absolutely clear. Correct roots shape with Warp transformation to make it more spherical.
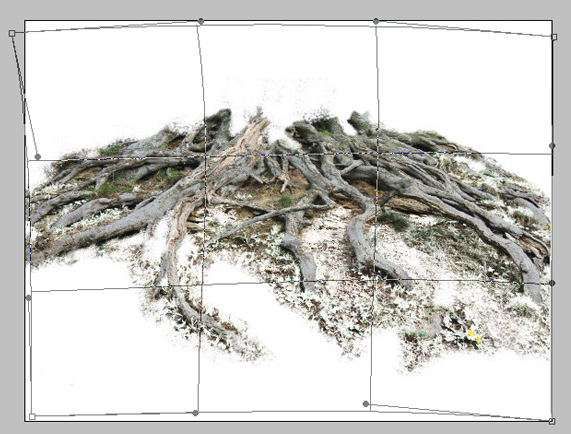
Step 31
Remove white layer.
Step 32
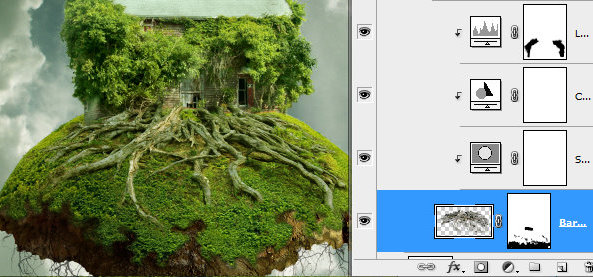
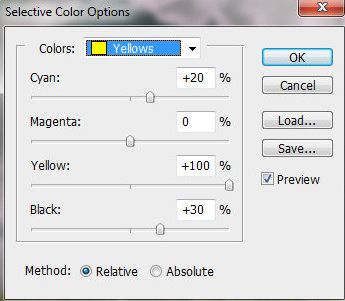
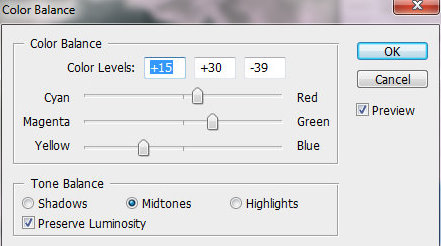
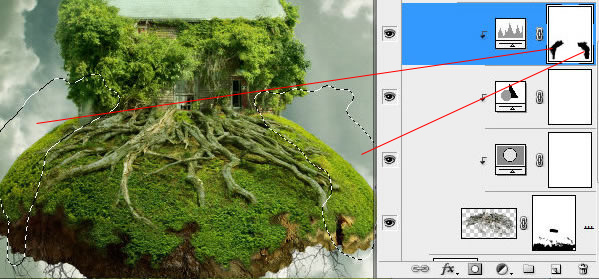
In order to correct brightness and color shade, create new adjustment layers – "Selective Color", "Color Balance", "Levels". Erase left and right side of the "Levels" mask with large soft brush.
Step 33
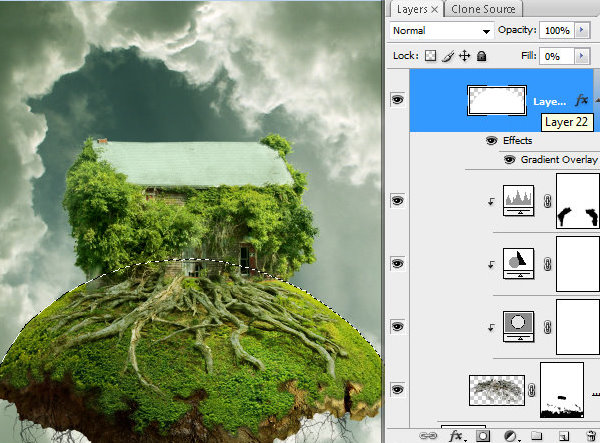
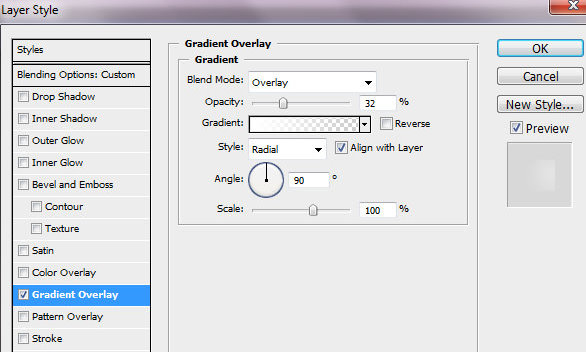
Create a new empty layer above roots layers, load selection for green shape and fill selected area in a new layer with any color, adjust Fill = 0%. Apply Gradient Overlay effect, the same as for Green Sphere early.
Step 34
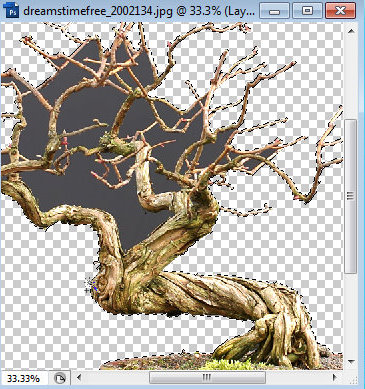
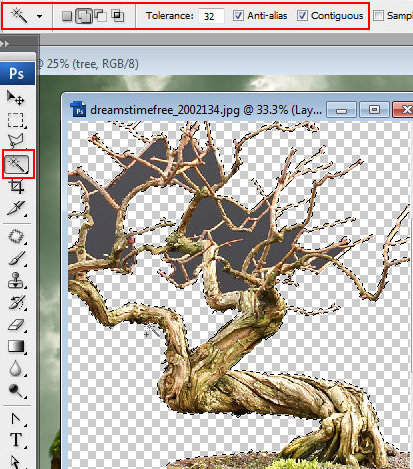
Open tree image, unlock background layer, load selection for background color with Magic Wand Tool ![]() and clear selected areas. Erase bottom part with Eraser Tool.
and clear selected areas. Erase bottom part with Eraser Tool.
Step 35
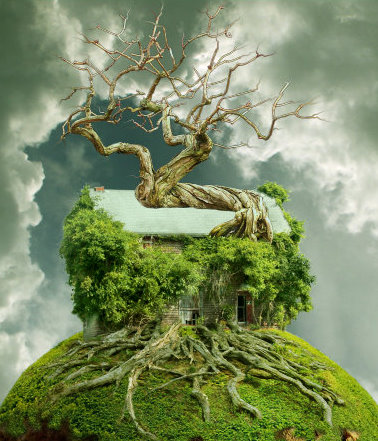
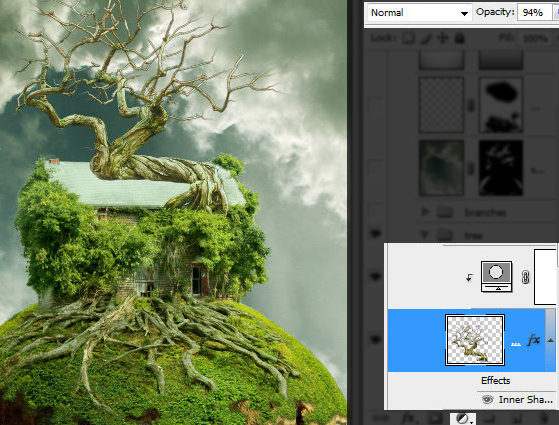
Place tree layer with transparent background to the top of all crated layers. Set Opacity 94%, add adjustment "Selective color" layer and Inner Shadow effect.
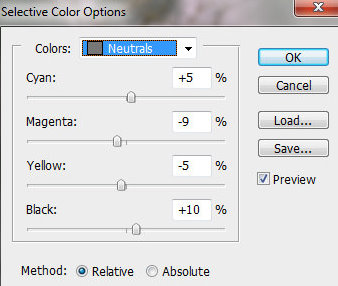
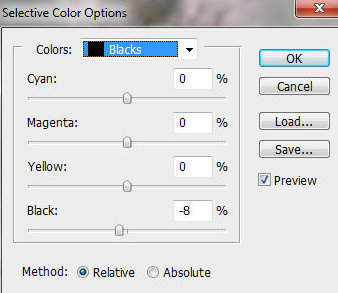
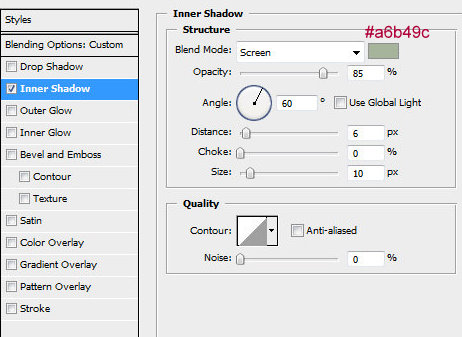
Step 36
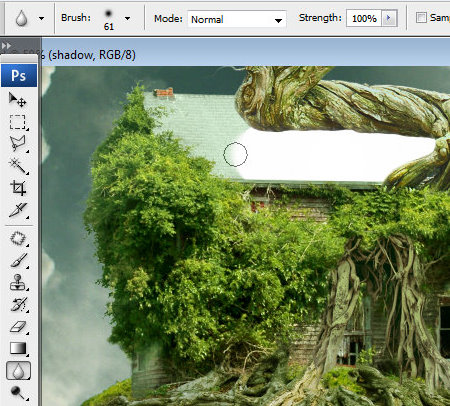
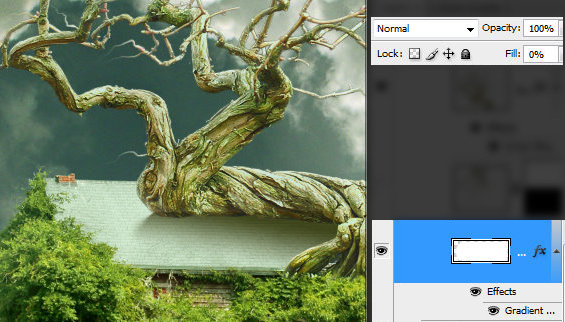
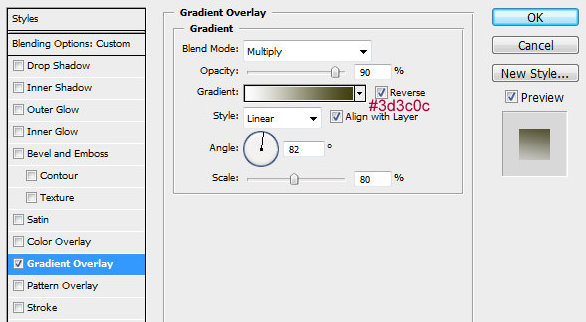
In order to make shadow effect on the roof, create a new layer below tree layer and draw a simple shape like on the screen shot, process left edge with Blur Tool. Set Fill = 0%. Apply Gradient Overlay effect to this layer.
Step 37
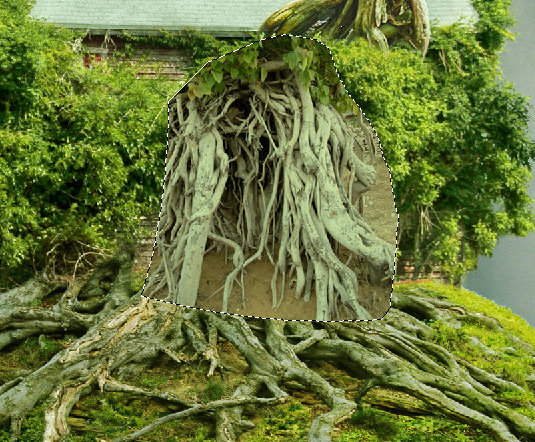
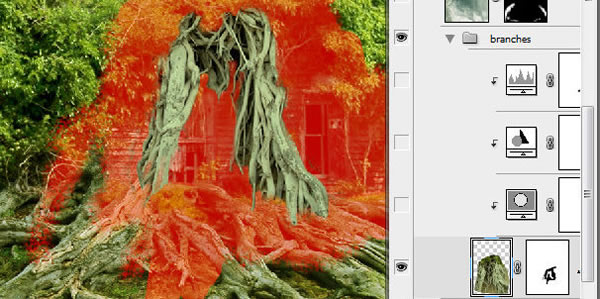
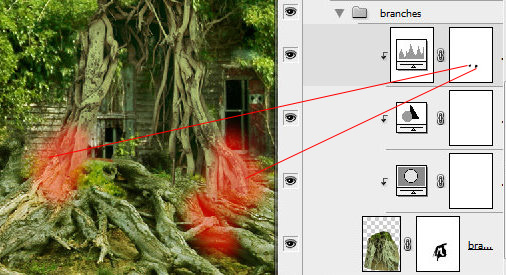
Insert another roots picture, erase red marked space.
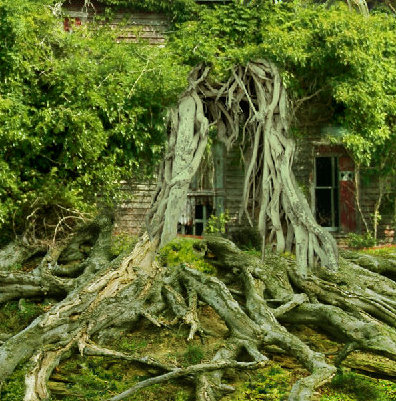
Step 38
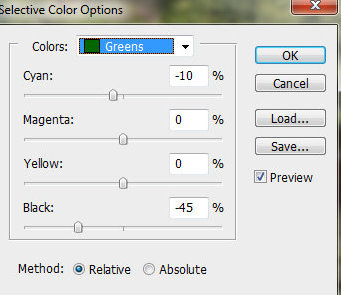
Create adjustments Clipping Masks – "Selective Color", "Color Balance", "Levels". Correct "Levels" Layer Mask with round soft brush.
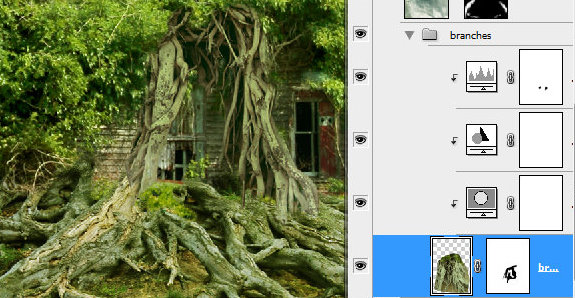
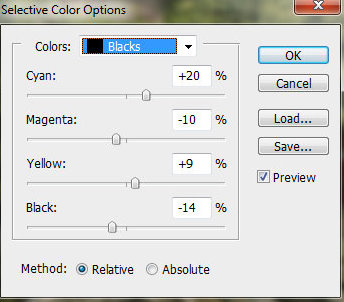
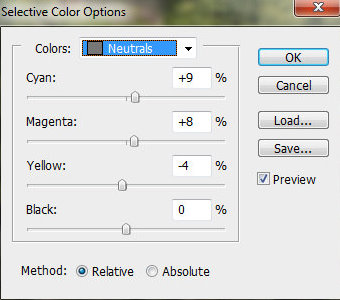
Step 39
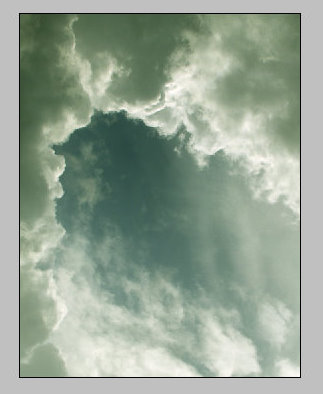
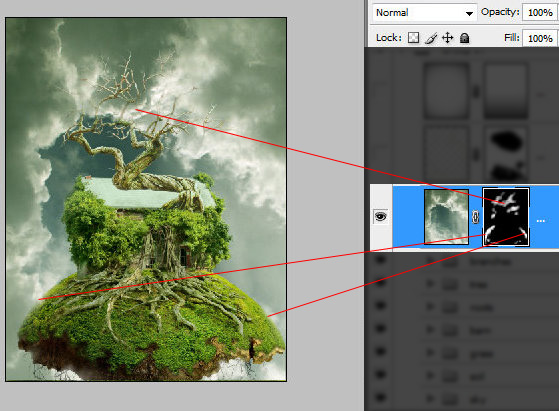
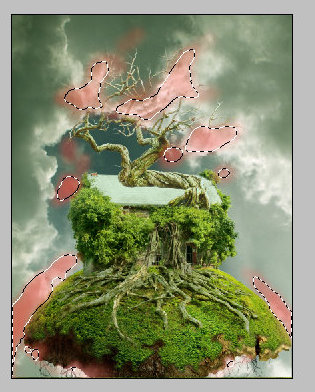
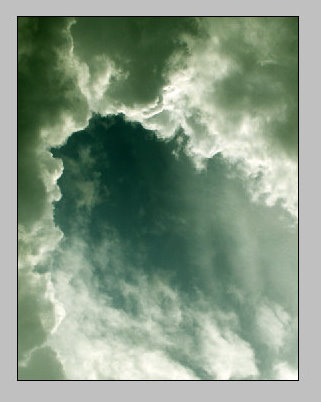
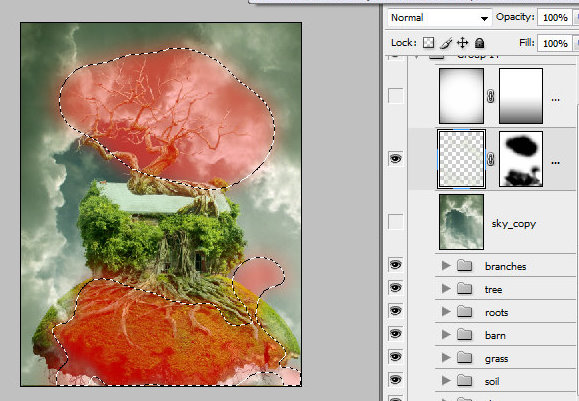
Return to the bottom sky levels. Group sky and sky adjustments layers. Duplicate the group and merge it. Place merged sky layer above all created layers. Add layer mask to this layer and fill it with black color. Then chose translucent soft and round white color Brush Tool (Opacity ~ 16-20%). And restore some areas next to the top branches of the tree and green sphere contour – see red marked spots. Restored areas should be translucent.
Step 40
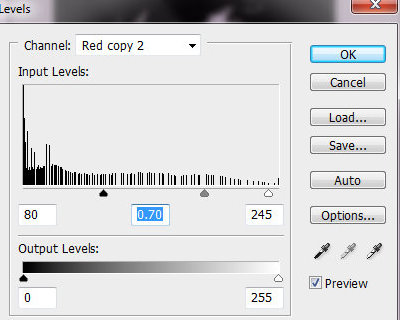
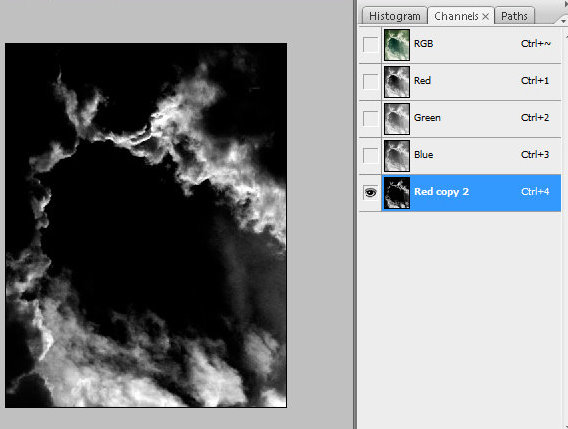
Duplicate merged sky group once again, place it above just created layer from the previous step. Find Channels palette and duplicate red channel. Make duplicated channel very contrast by using levels settings. Command/Ctrl + click red channel thumbnail to load selection for the white area or click small icon ![]() in the bottom part of channels palette.
in the bottom part of channels palette.
Step 41
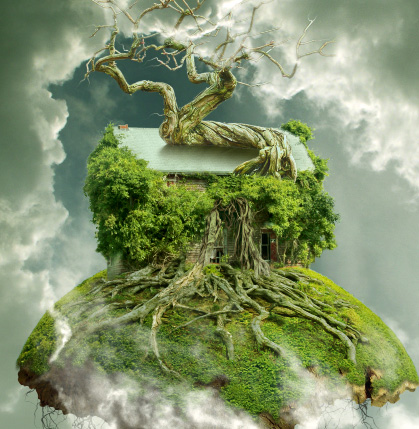
Keep selection, make visible RGB channel and return to layers palette, go to Select > Inverse. Then clear inverted selection area. You should have something similar:
Step 42
Add layer mask to the white clouds layer and erase most part of it (red marked zone). Just leave some white clouds in the bottom left and right parts of photo manipulation.
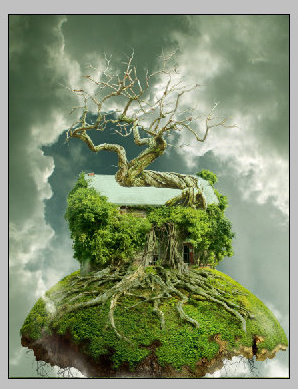
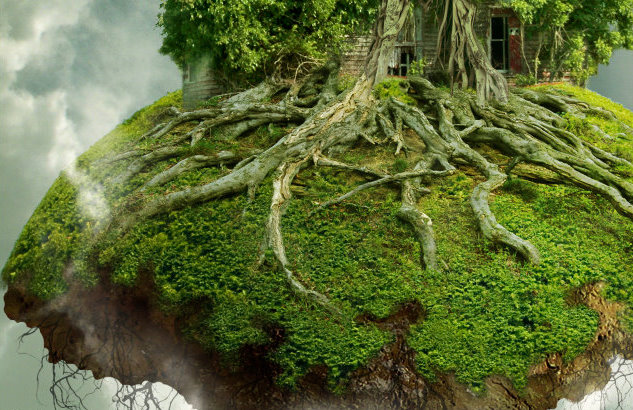
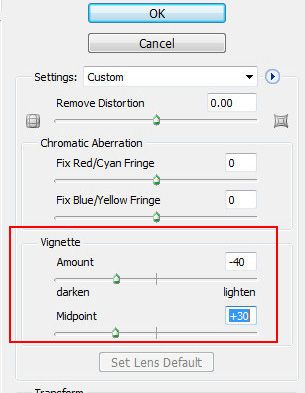
Step 43
Create a new white layer. Go to Filter > Distort > Lens Correction. Apply Vignette effect.

Step 44
Apply Multiply Blending Mode to created layer, Opacity 70%, add layer Mask and fill it with linear black and white gradient.
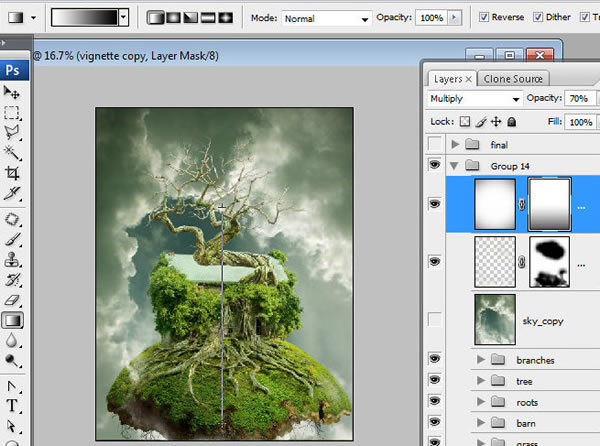
Step 45
Merge all created layers.
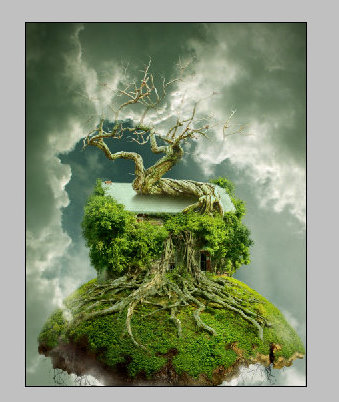
Step 46
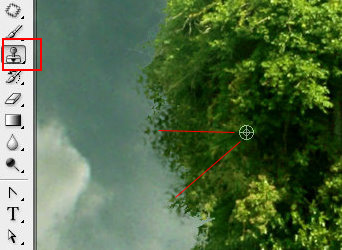
Retouch merged layer. Hide scratchy areas and edges between different details of composition by using Stamp Tool. In order to make edges between tree branched and green leaves smoother choose textured brush for the stamp, set the sampling point by positioning the pointer in green leaves area and Alt-clicking (Windows) or Option-clicking (Mac OS). Then add some green spots from cloned source above branches. Repeat this action several times to hide all rough spots. You may use this instrument to correct and smooth foliage area between sky and barn wall.
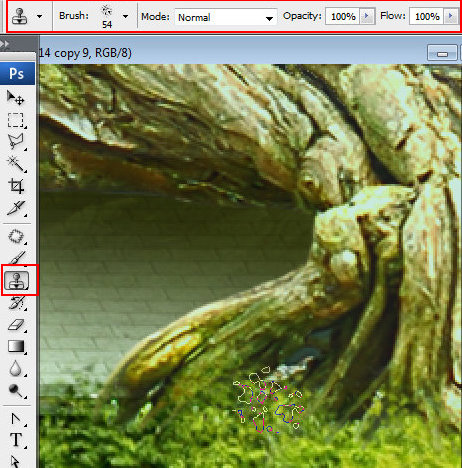
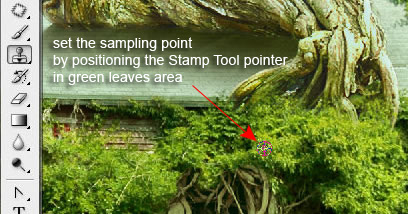
Step 47
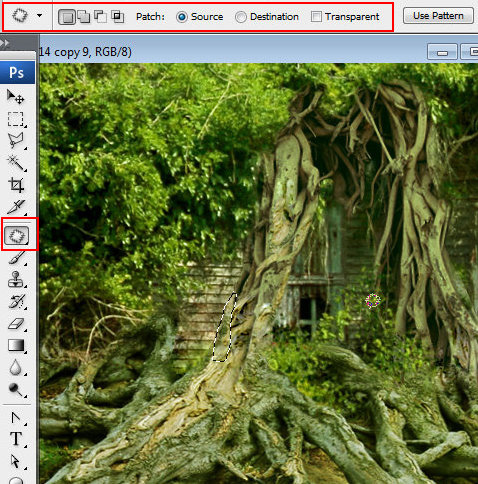
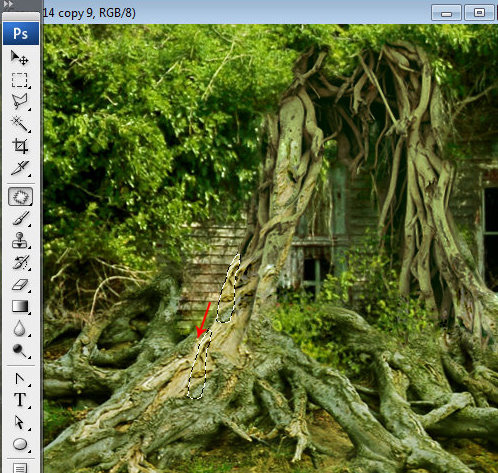
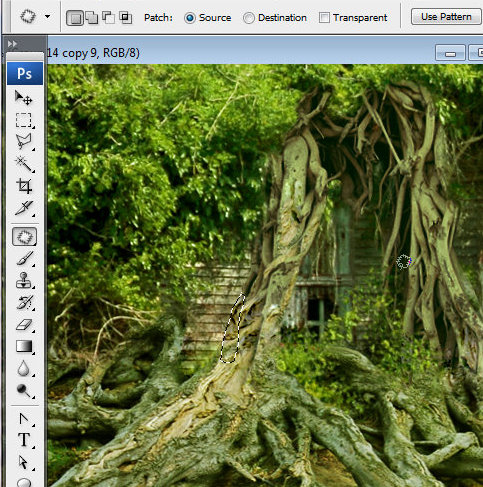
You may also use Patch Tool to correct some bugs. Drag the selection border to mask edges between different stock images. When you release the mouse button, the trace of the selected area is patched with the sampled pixels.
Step 48
Correct branches tips with Smudge Tool.
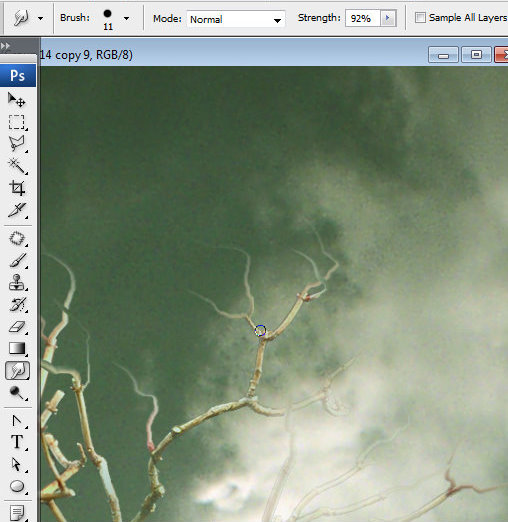
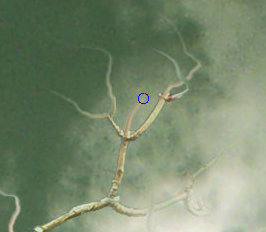
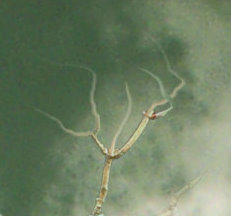
Step 49
Duplicate retouched layer, apply Gradient Map to it. Image > Adjustment > Gradient map.
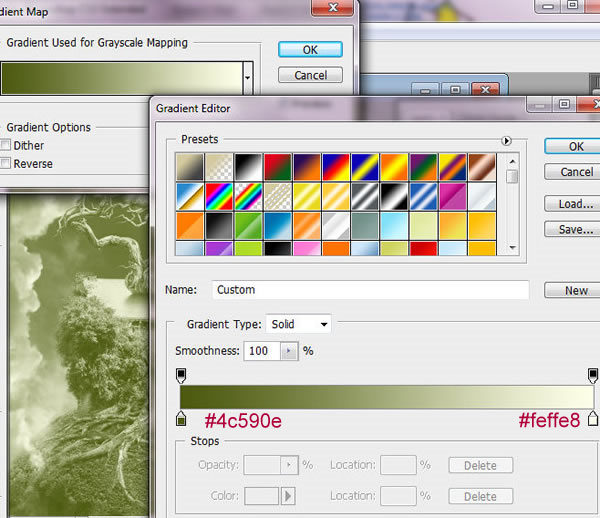
Step 50
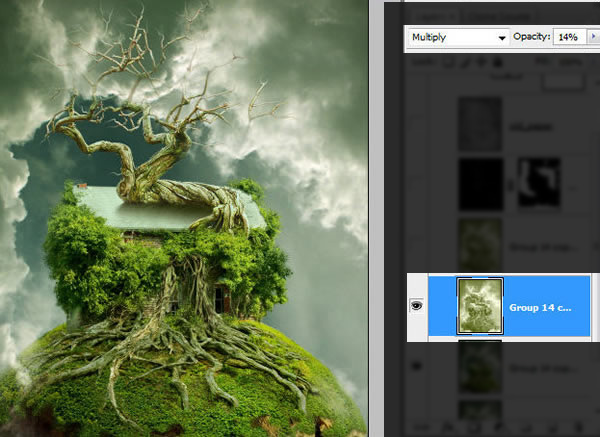
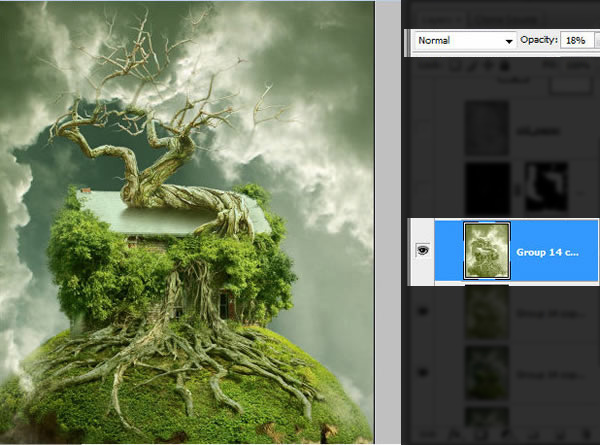
Duplicate layer with Gradient Map effect two times. Apply Multiply Blending Mode and Opacity 14% for the bottom one and Normal Blending Mode and Opacity 18% for the top gradient layer.
Step 51
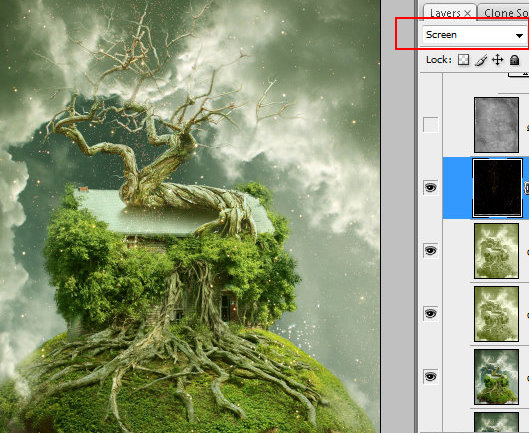
Insert stars image, apply Auto Contrast and Auto Levels to it, choose Screen Blending mode. Also open Levels setting and move black marker little bit right, until the star background becomes absolutely transparent. Erase some stars.
Step 52
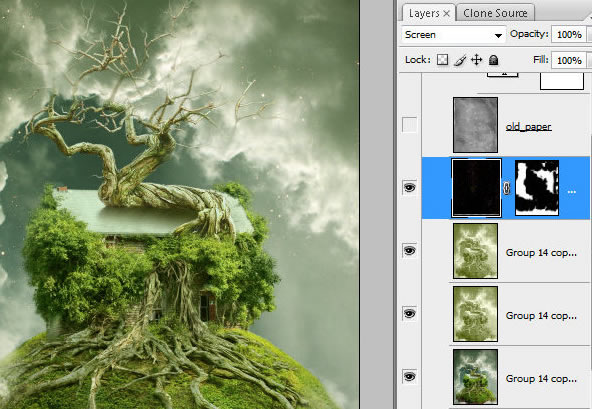
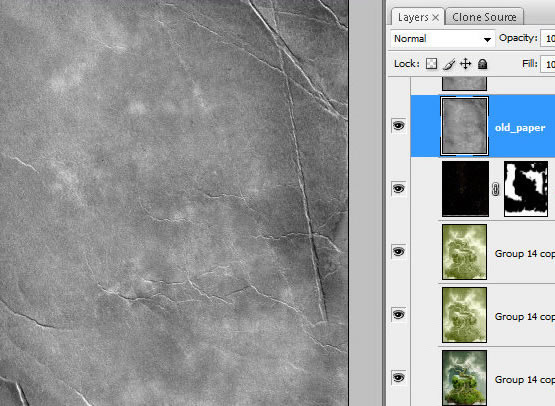
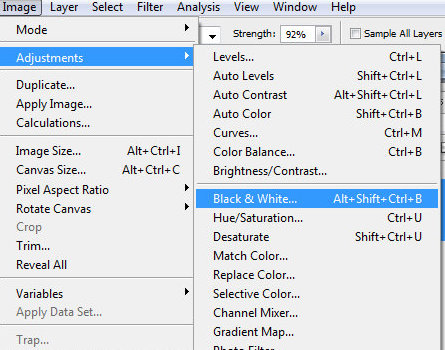
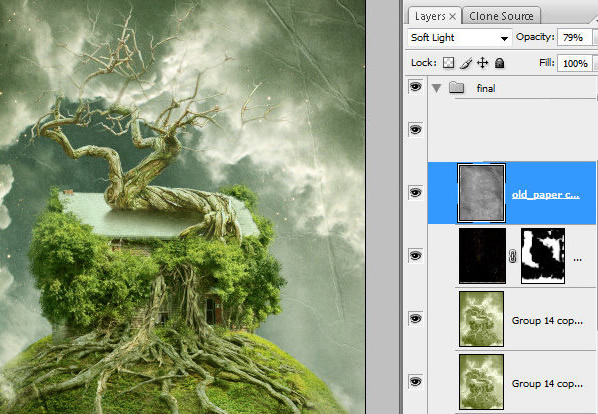
Insert old paper image, make it black and white. Image > Adjustments > Black and White (preset none). Apply Soft Light Blending Mode to this layer and Opacity 79%.
Final Image
|
| ||
|
+493 |
506 |
В интересном положении |
|
+450 |
511 |
Документальное кино |
|
+439 |
471 |
ГОРОСКОП |
|
+406 |
514 |
Документальные фильмы |
|
+377 |
445 |
Темы_дня |
|
| ||
|
-1 |
13 |
Волонтеры. Красный крест |
|
-1 |
30 |
Skytao |
|
-3 |
8 |
Улицы Праги |
|
-7 |
5 |
Планирование проекта |
|
-8 |
6 |
Адреналин продаж |
Загрузка...
взяты из открытых общедоступных источников и являются собственностью их авторов.
